UK Add-ons
Manual for version 3.6
Release notes (new for this version in bold) :
- Ingenico/Worldpay EFT Integration (No longer for sale) - Section 16
- Import Tool (from older models) - Section 17
- Extra set up steps for ERA 2.x added - Section 4 and Section 5
- Tickertape Alert Bar Service added - Section 14
- Support for V-R200 added - minor references throughout document
- Changes to support DTEX version 2.0.7
CASIO Electronics Co., Ltd. makes no representations or warranties with respect to the contents or use of this manual and specifically disclaims any express or implied warranties of merchantability or fitness for any particular purpose. Casio will accept no responsibility for loss of data or financial loss. All trademarks acknowledged.
Install and Setup guide
1 - Download and Install ‘UK Add-ons’
2 - Register the till on the Casio Cloud
3 - Install latest OS for the V-R100/V-R200/V-R7000 using ‘UK Add-ons’
4 - Install the Cash Register application using ‘UK Add-ons’
4.1 Add ‘Add-ons Settings’ icon to ‘System’ tab in the Cash Register application
5 - Install the DTEX (Data Exchange) using ‘UK Add-ons’
5.1 Run a script to link the DTEX to the Cash Register application
6 - Install ‘TeamViewer’ using ‘UK Add-ons’
7 - Install ‘LogMeIn Rescue’ using ‘UK Add-ons’
8 - Sales Recovery for Cloud
9 - Time and Attendance
9.1 Installing and Configuring the ‘Time and Attendance’ panel
10 - Configuring the ‘Utility Panel’ on the till
11 - Configuring the ‘Utility Panel’ on the Cloud
12 - Email Settings
13 - Message Alerts Sender
14 - Tickertape Alert Bar Service
14.1 When are Alerts generated?
14.2 Configuring Alerts in ‘Add-ons Settings’
14.3 Configuring Alerts in the Cloud
14.4 How Alerts work in operation on the till
15 - Stocktaker PLU Report
15.1 Add a shortcut icon for ‘PLUs REPORT’
16 - Casio/Ingenico EFT Integration
16.1 Configuring the Raspberry Pi
16.2 Setting up the Hardware
16.3 Setting up the Software
16.4 Configure a key to be the ‘CREDIT’ key
16.4.1 Configuring the ‘CREDIT’ key from the Cloud
16.4.2 Configuring the ‘CREDIT’ key on the Cash Register (No Cloud)
16.5 Using the EFT payment option on the Cash Register
16.6 Reprinting the last credit card receipt
16.7 Enabling ‘CASH BACK’ (and a consideration when using Contactless payment)
16.8. ‘Operator mistake’ on the till when you tap the ‘CREDIT’ key (Cloud users)
16.9. ‘ERROR (-1)’ is displayed when you tap ‘Save’ after setting up a ‘CREDIT’ key (non-Cloud users)
16.10. Precautions when using Dallas Keys (iButton)
16.11. ‘Paper out’ errors if a ‘Swipe and Sign’ transaction is in progress
16.12. Further Reading and Troubleshooting
17 - Import from older models (Import Tool)
17.1. Backing up the older Casio till
17.1.1 QT-6600/QT6100/QT6000
17.1.2 QT-2100/TE8000/TE8500
17.1.3 TE4500/TE4000
17.2 Format of CSV files
17.3 Creating Casio.txt files
17.4 Supported media
17.5 Running the tool in ‘UK Add-ons’
17.6 The import process
17.7 Allocating unassigned PLUs to Departments
17.8 Colorizing Departments
17.9 Importing CSV files
17.9.1 Errors in the PLU CSV file
17.10 Final setup tasks
1 - Download and Install ‘UK Add-ons’
The latest release version of ‘UkAddons.apk’ can always be found at http://addons.casiocs.co.uk
This makes it easy to find and install the latest version of the utility directly from a browser on the till itself. You will also be able to access the latest version of this documentation from the same page. Before installing the tool, go to ‘Settings-Security’ and check the ‘Unknown sources’ option.
- Tap on ‘UkAddons.apk’ to initiate the download. Please note that there are separate versions for ERA and the old (4.x) cash register application. If you are using ERA, be sure to download the correct version. The file will take a few seconds to download.
- Swipe down the download icon in the Task Bar at the top left. You should see the downloaded file.
- Tap ‘UkAddons.apk’, tap ‘Next’ and then tap ‘Install’.
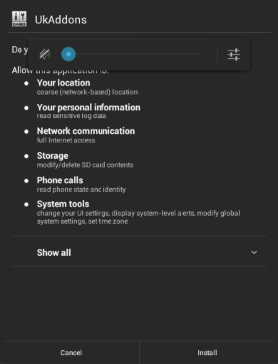
- When prompted, tap ‘Open’.
2 - Register the till on the Casio Cloud
You need to register the till (V-R100,V-R7000) using the correct ‘Organisation’, ‘Branch’ and ‘Till’ number. This information is used to identify the till when communicating with the Casio Cloud via DTEX (see later).
This step is essential in order to correctly set up the till on the Casio Cloud or to use the ‘Time and Attendance’ module, ‘Utility Panel’ features or other online services that may be released by Casio UK as part of ‘UK Add-ons’.
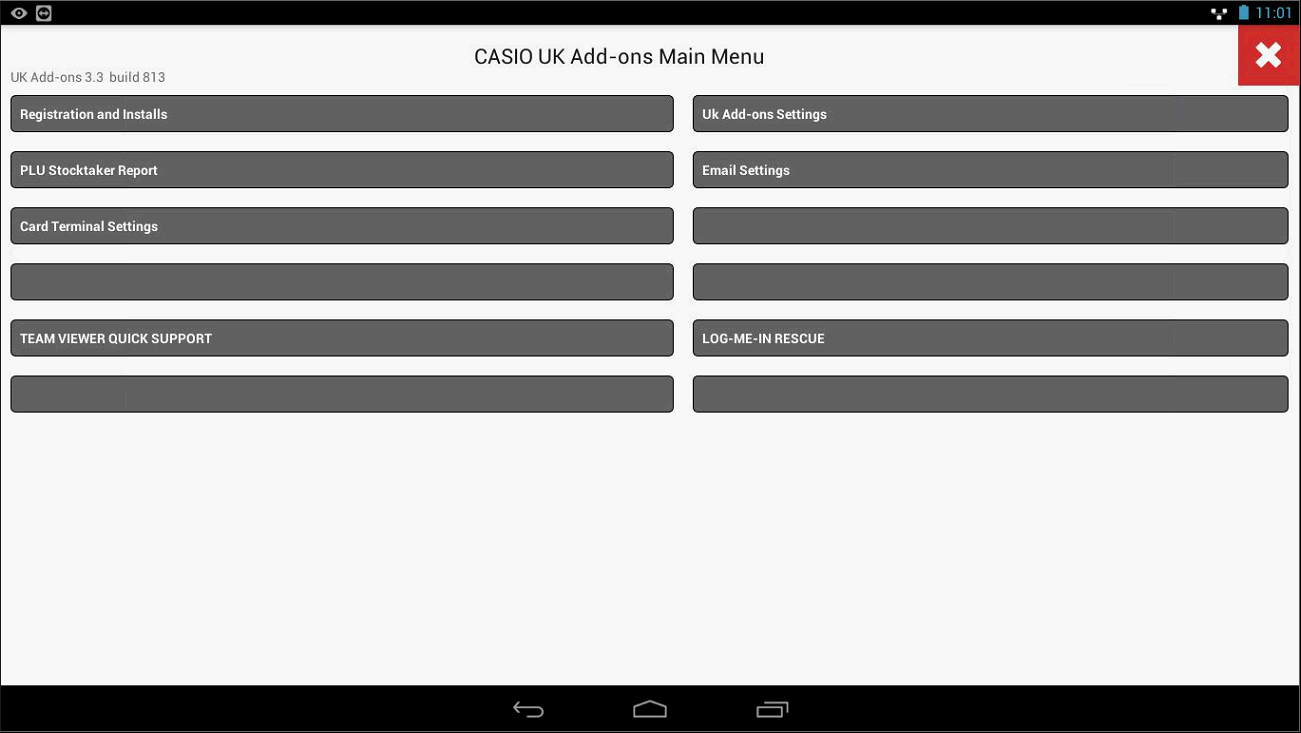
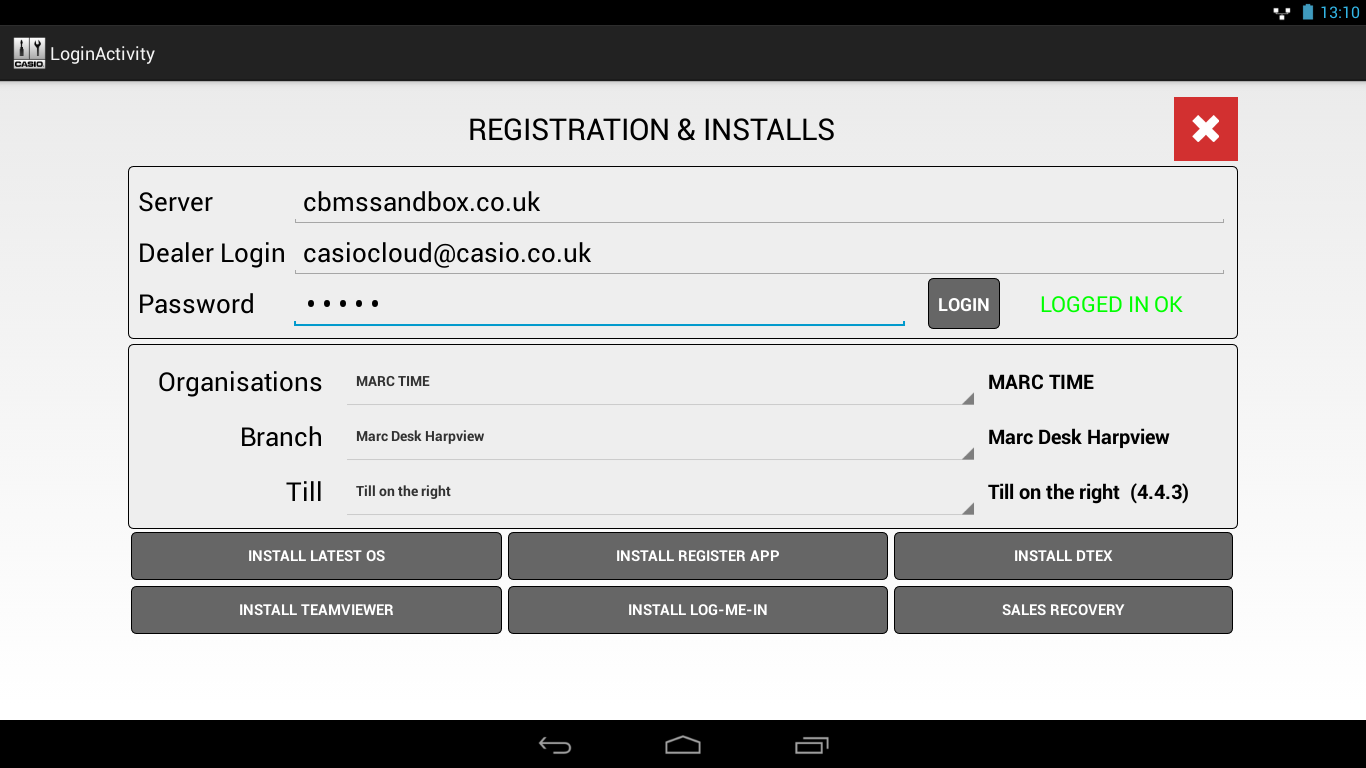
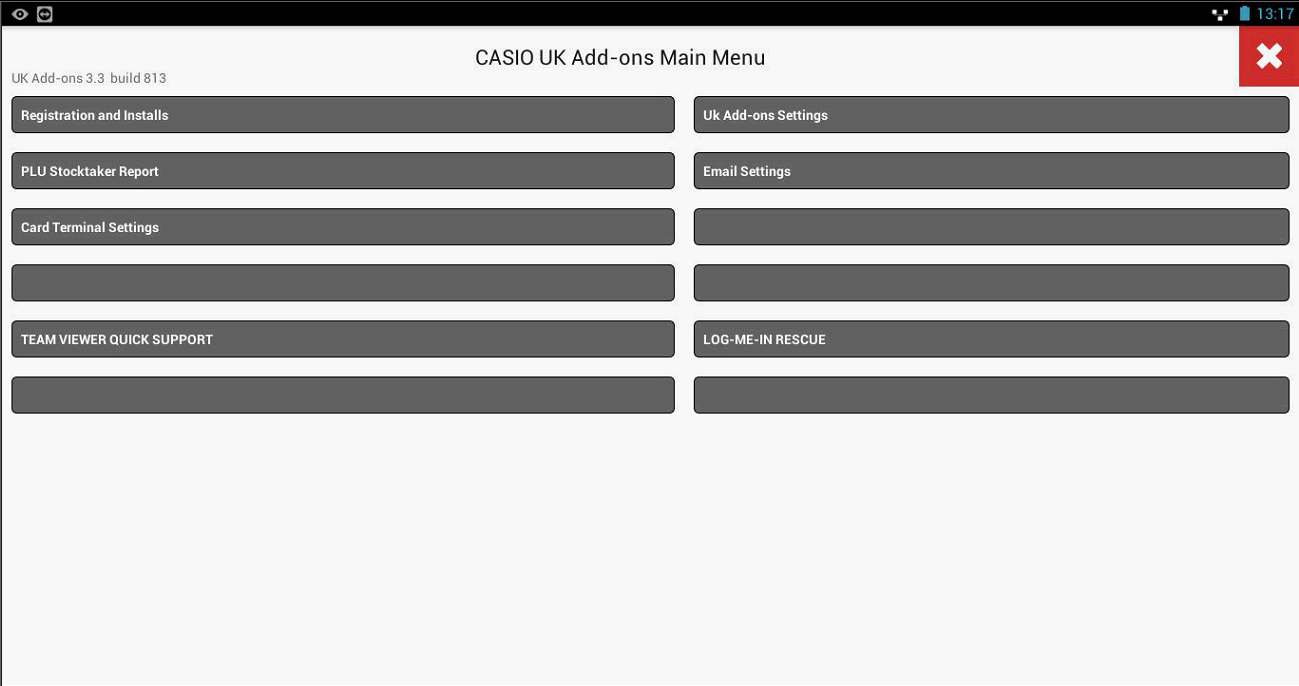
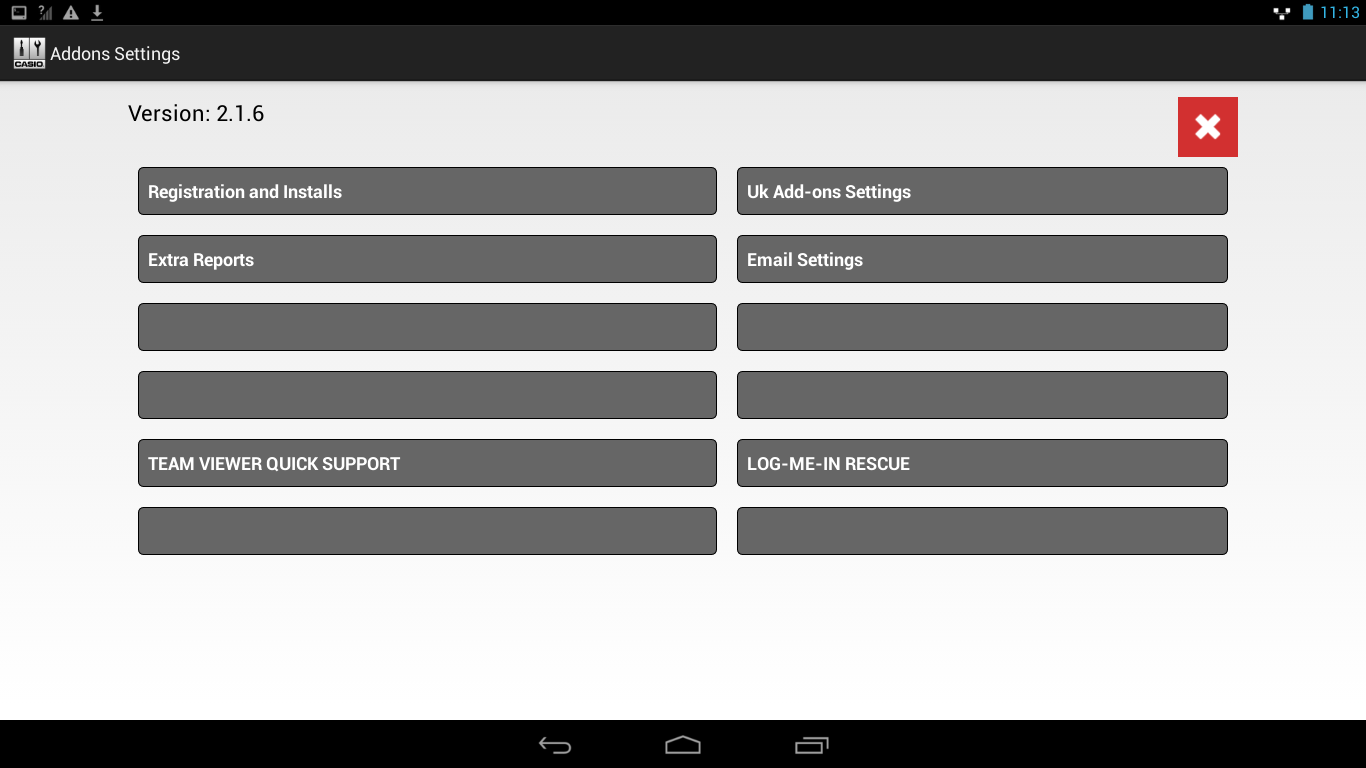
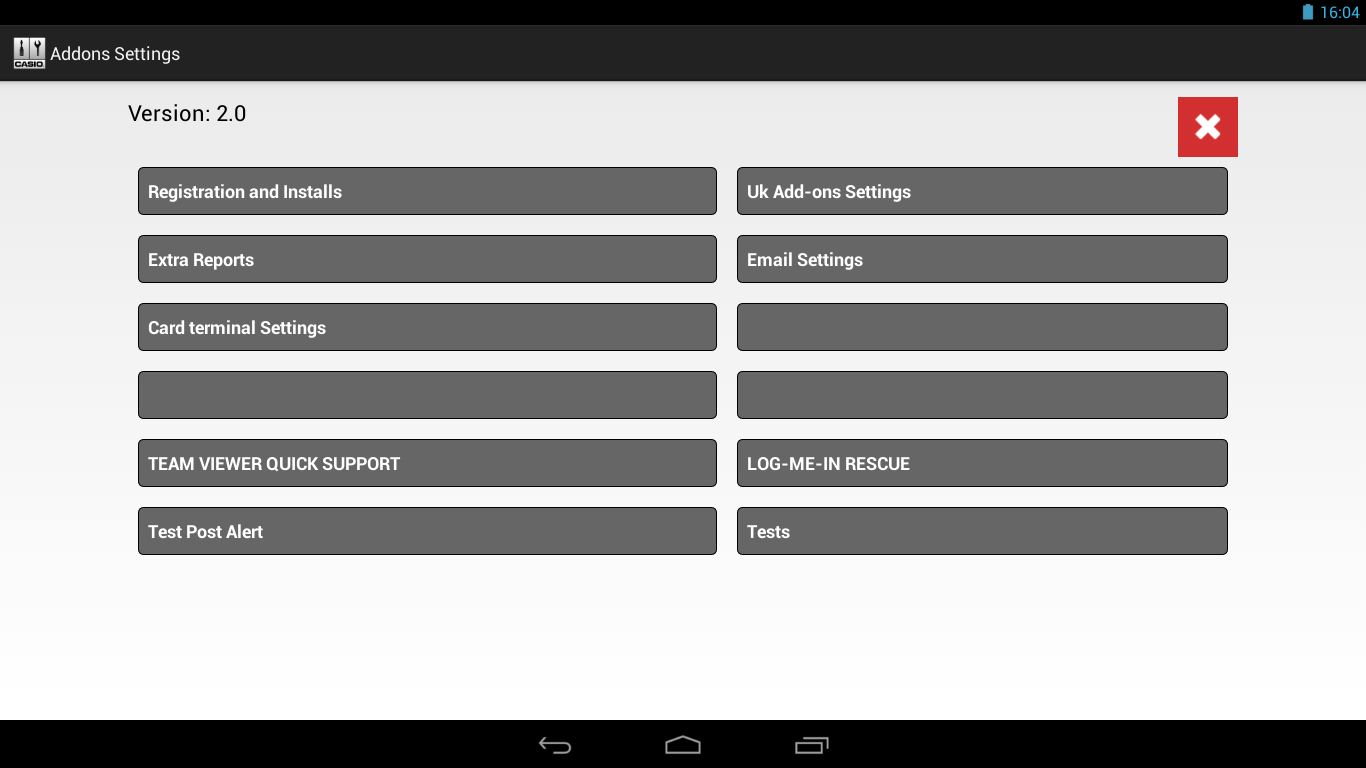
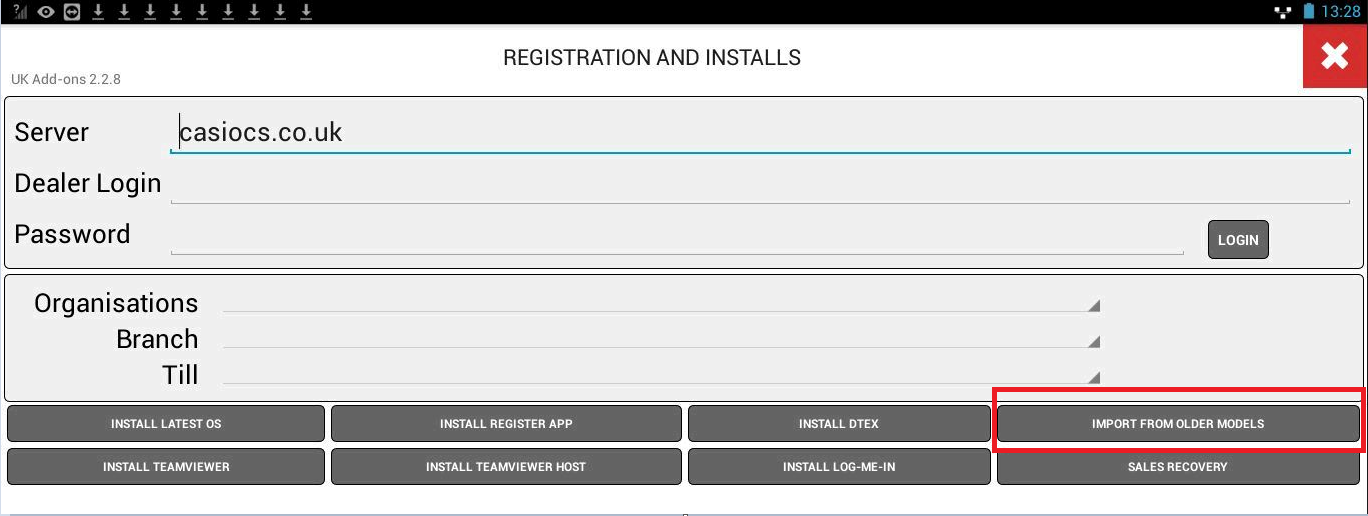
- Launch ‘UK Add-ons’ (the actual icon is called ‘Addons Settings’) and tap ‘Registration and Installs’.
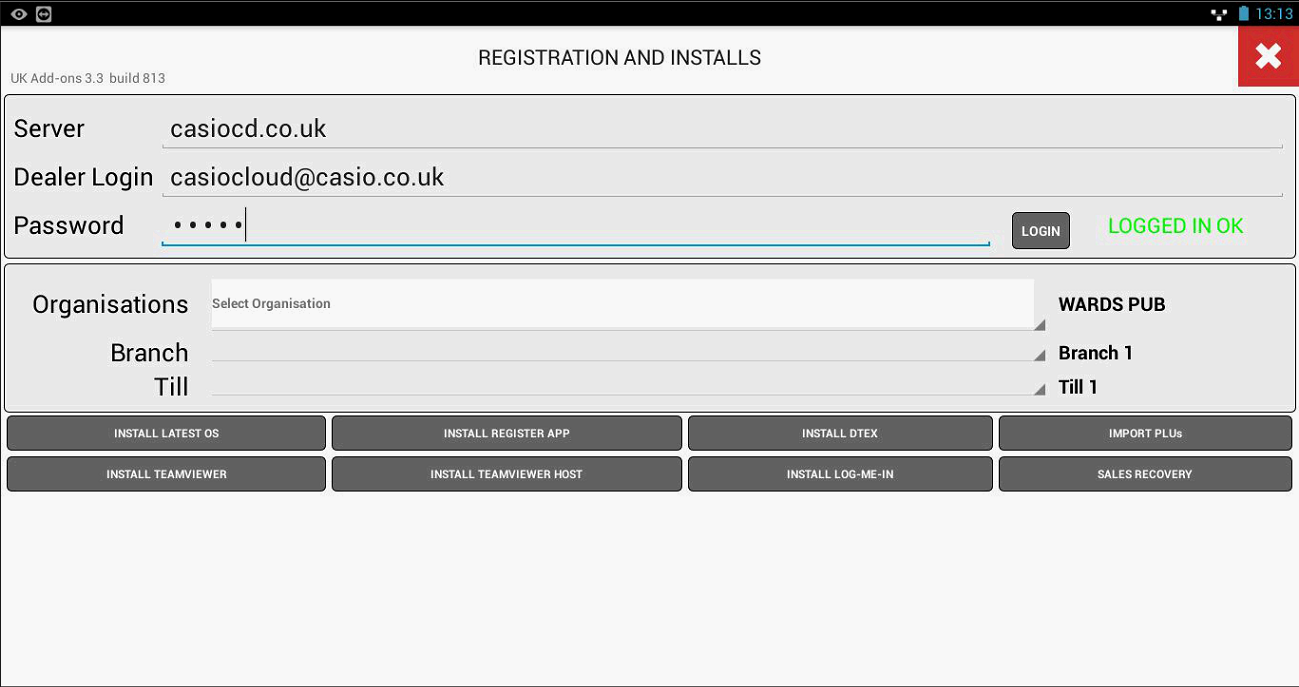
- On the ‘REGISTRATION & INSTALLS’ screen, enter the server on which the till/branch is hosted (usually ‘casiocs.co.uk’ but it may be one of the demo or trial servers) , your dealer login for the Cloud (this will be an email address) and your dealer password.
- Tap ‘LOGIN’. You should see the message ‘LOGGED IN OK’.
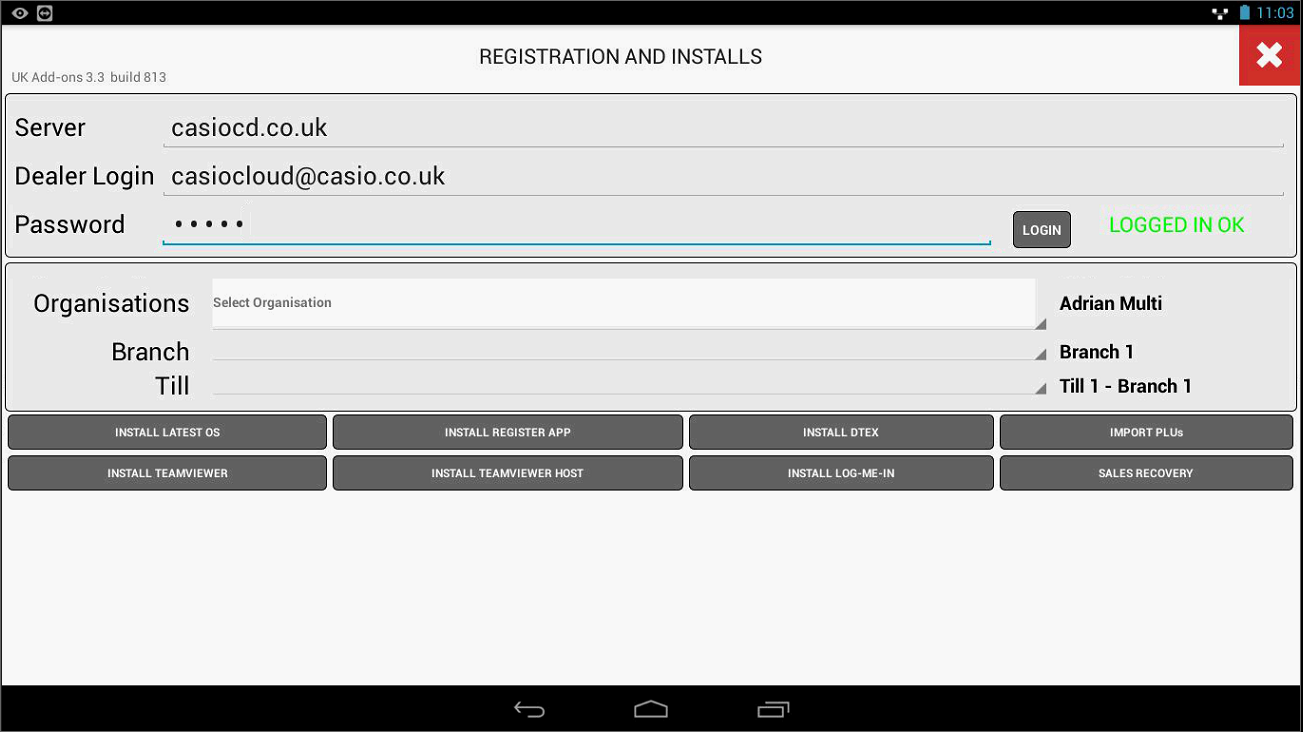
- The ‘Organisations’, ‘Branch’ and ‘Till’ fields will now be drop down lists from which you can choose the details for this particular till (You have to select the ‘Organisations’ field first). The drop down lists will be populated based on the credentials you used to log in during the step above. If the details you are looking for do not appear in the lists, double check that you have logged in to the correct server. ‘Branch’ and ‘Till’ details need to be set up on the Cloud so be sure to complete the settings there first or they will not be available to you in the list.
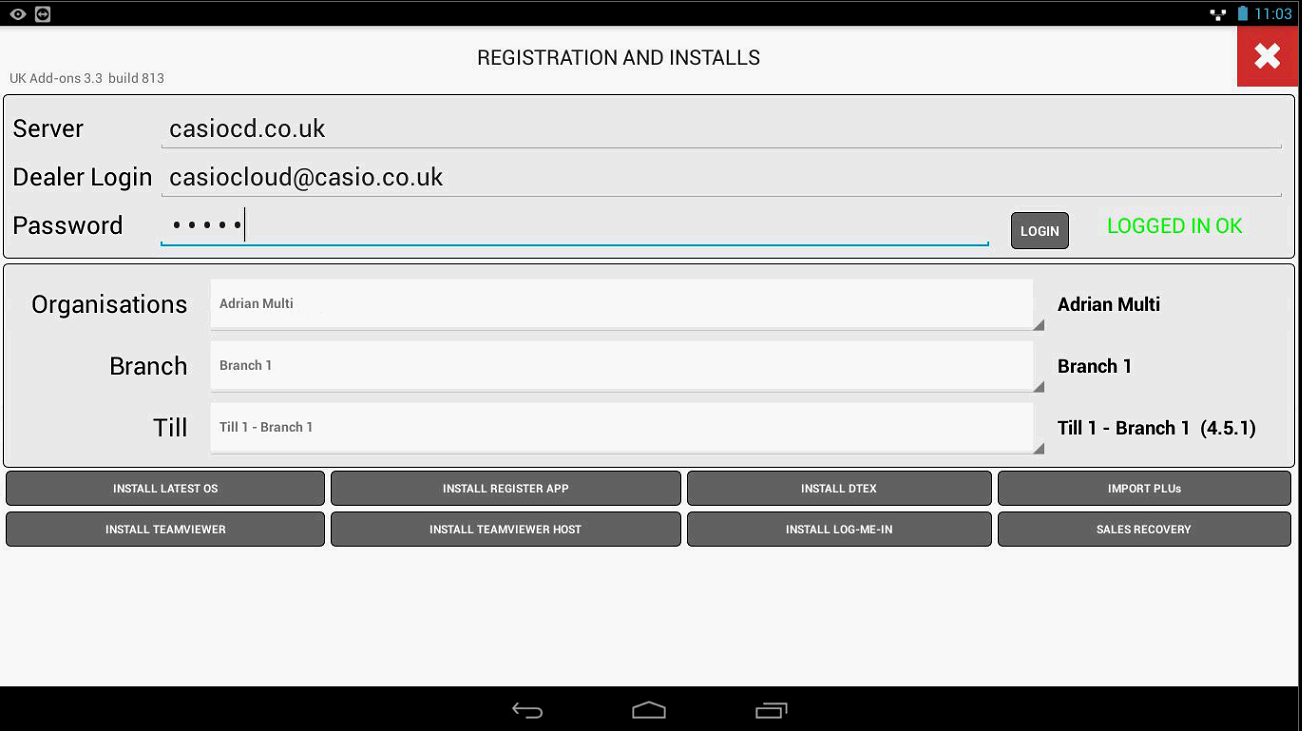
Note that the version of the Cash Register application that you have configured on the Cloud for this till will appear shortly after you select the till from the list (on the right hand side; in the example above, it is 4.5.1).
The till has now stored the information about its Organisation, Branch, and Till number. If you exit the ‘REGISTRATION & INSTALLS’ screen and then return to it, this information will have been remembered. If you want to change the details for this till, for example to change it for testing purposes or during troubleshooting, you can do so by choosing different details from the drop down list and then performing an ‘OPEN’ on the till to download a new CRX.
3 - Install latest OS for the V-R100/V-R200/V-R7000 using ‘UK Add-ons’
The latest versions of the OS for the V-R100, V-R200 and V-R7000 are kept updated on the Add-ons server.
- Tap ‘Registrations and Installs’ and log in as a dealer. You do NOT need to select the ‘Organisations’, ‘Branch’ or ‘Till’ in order to update the OS.
- Tap ‘INSTALL LATEST OS’.
- The utility will check to see if a later version of the OS is available and, if there is, it will download it and extract it to the appropriate folder.
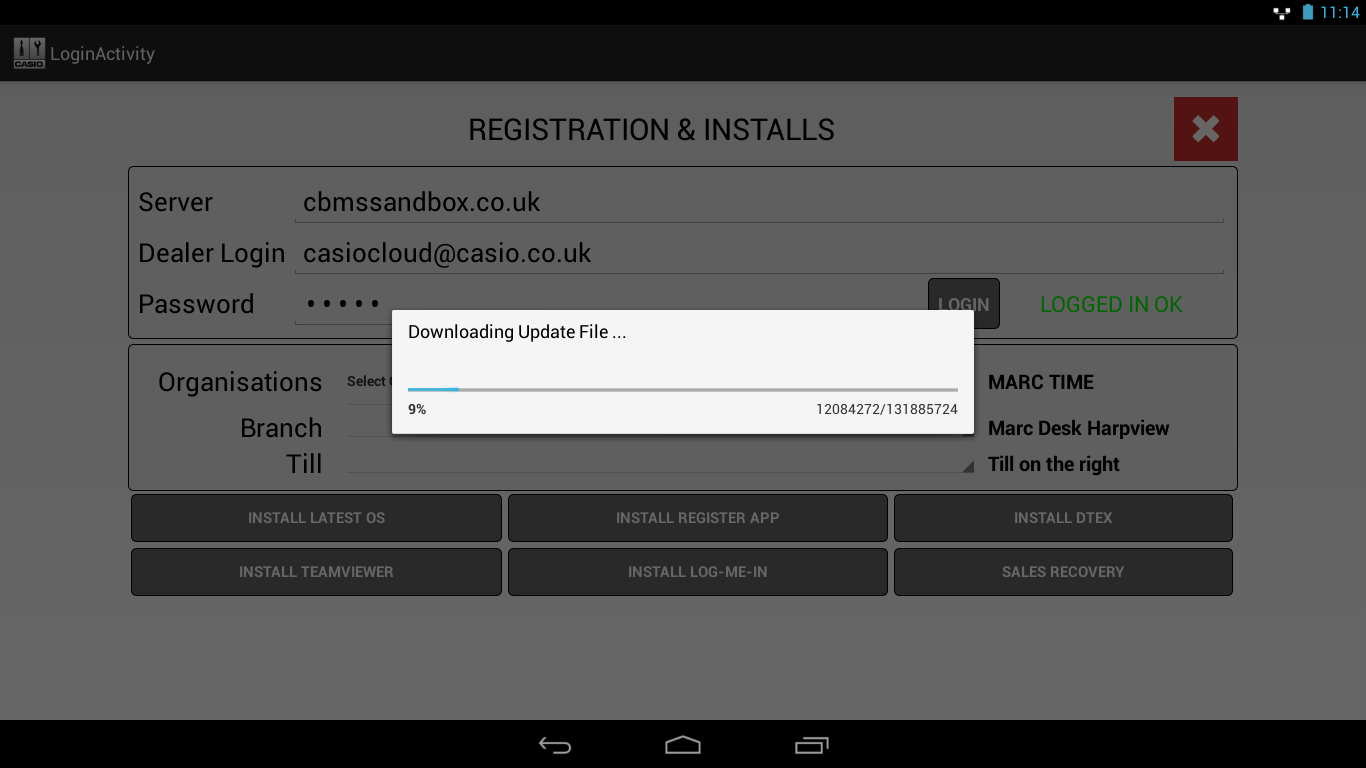
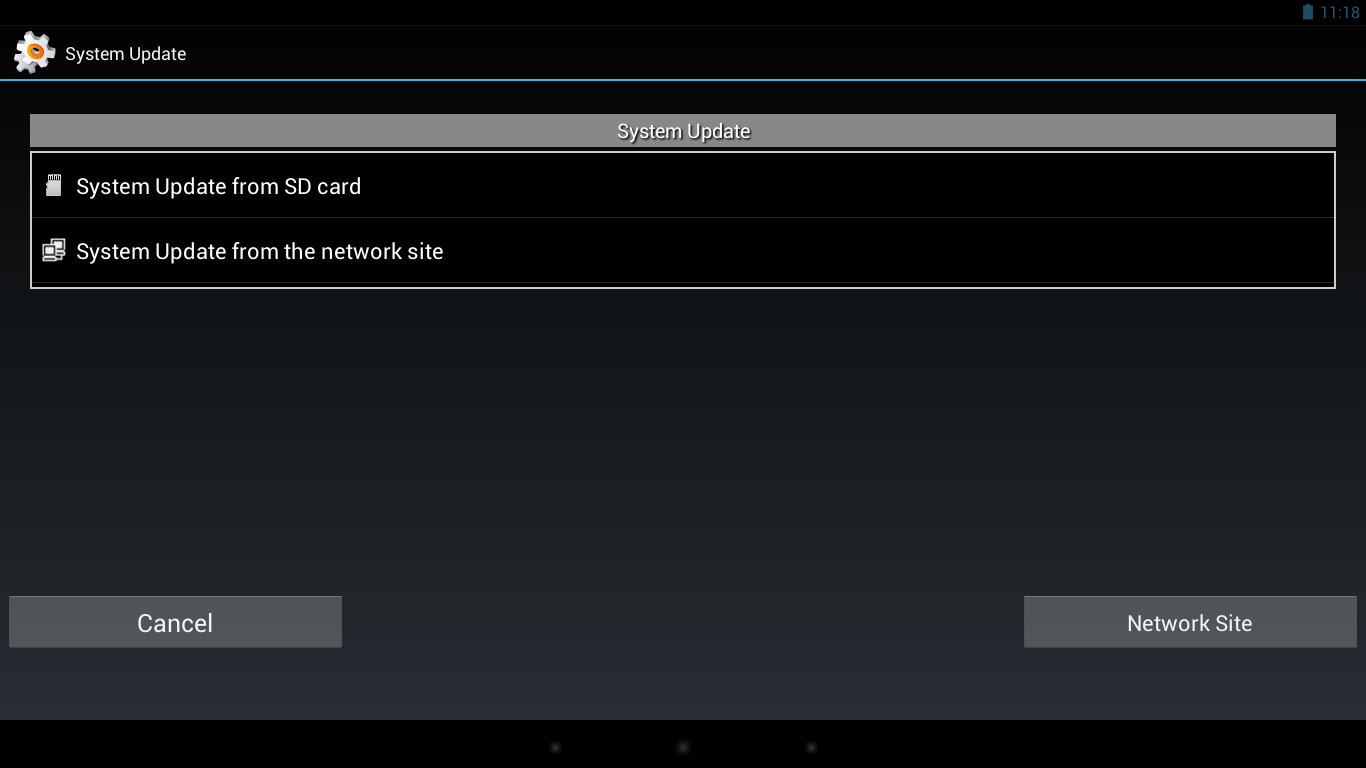
- Once the download is complete, you will see a confirmation screen. Tap ‘OK’ and the ‘System Update’ application will start.
- Select ‘System Update from SD card’.
- On V-R7000 or V-R200 (but not V-R100), at the top right of the screen, tap the ‘Menu’ icon (the 3 vertical dots) and select ‘Storage’.
- A dialog will be displayed. Tap ‘/storage/sdcard0’ then tap ‘Execute’.
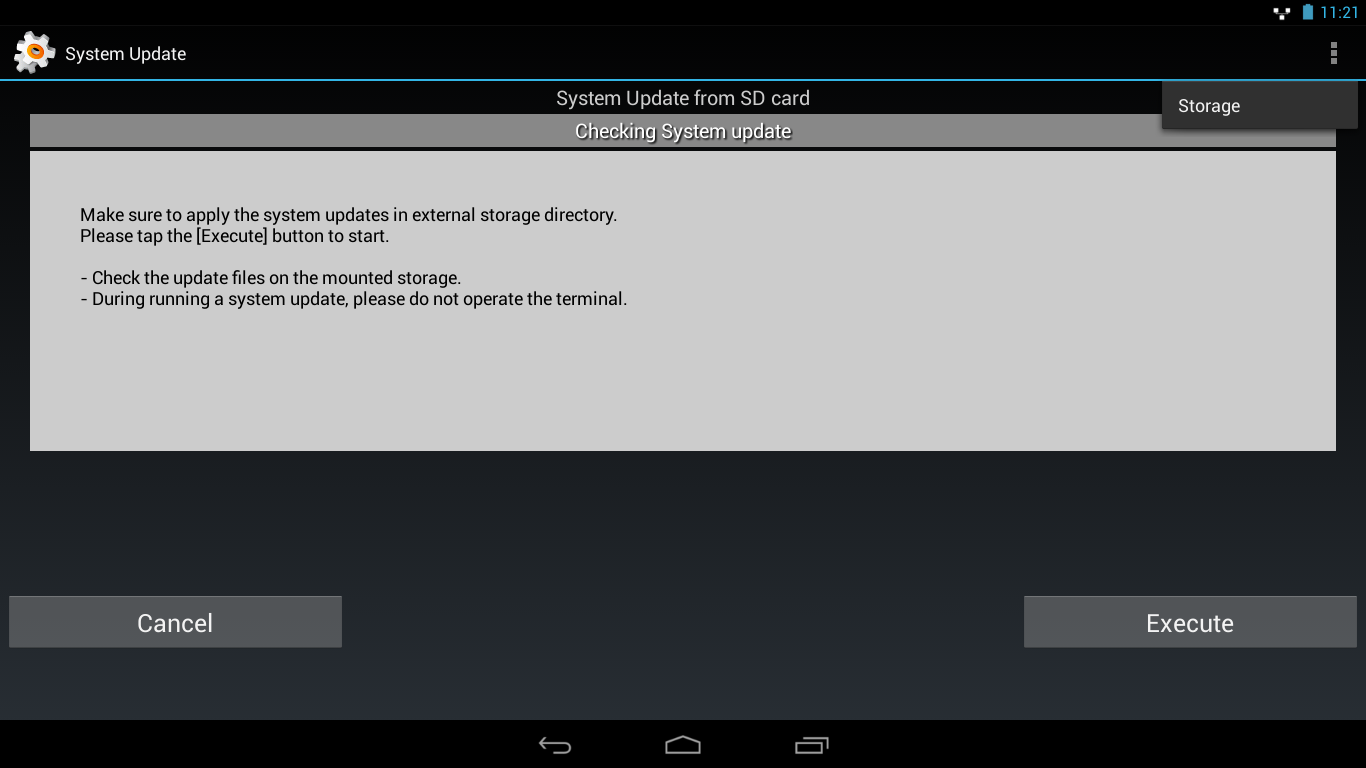
- A dialog will be displayed asking you to confirm the start of the upgrade. Tap ‘OK’. The till will reboot and begin the OS update process. This will take several minutes to complete.
- A message will appear confirming the successful update. Tap ‘OK’.
4 - Install the Cash Register application using ‘UK Add-ons’
It is highly recommended that you install the Casio Cash Register application from ‘UK Add-ons’ as it makes the entire process much easier.
- Tap ‘Registration and Installs’ and log in with your dealer credentials taking care to get the ‘Branch’ and ‘Till’ correct.
- Tap ‘INSTALL REGISTER APP’.
- A list of the available versions will be displayed. We strongly recommend that you install the latest version but you must make sure that the version you install matches the CRX you have imported for this till on the Cloud. In the example below, the CRX for this till on the Cloud has been generated for application version 2.0.2 (i.e. the ERA application). Therefore, in this case we would choose version 2.0.2 from the list as this matches the CRX in the Cloud. Tap the version you wish to install.
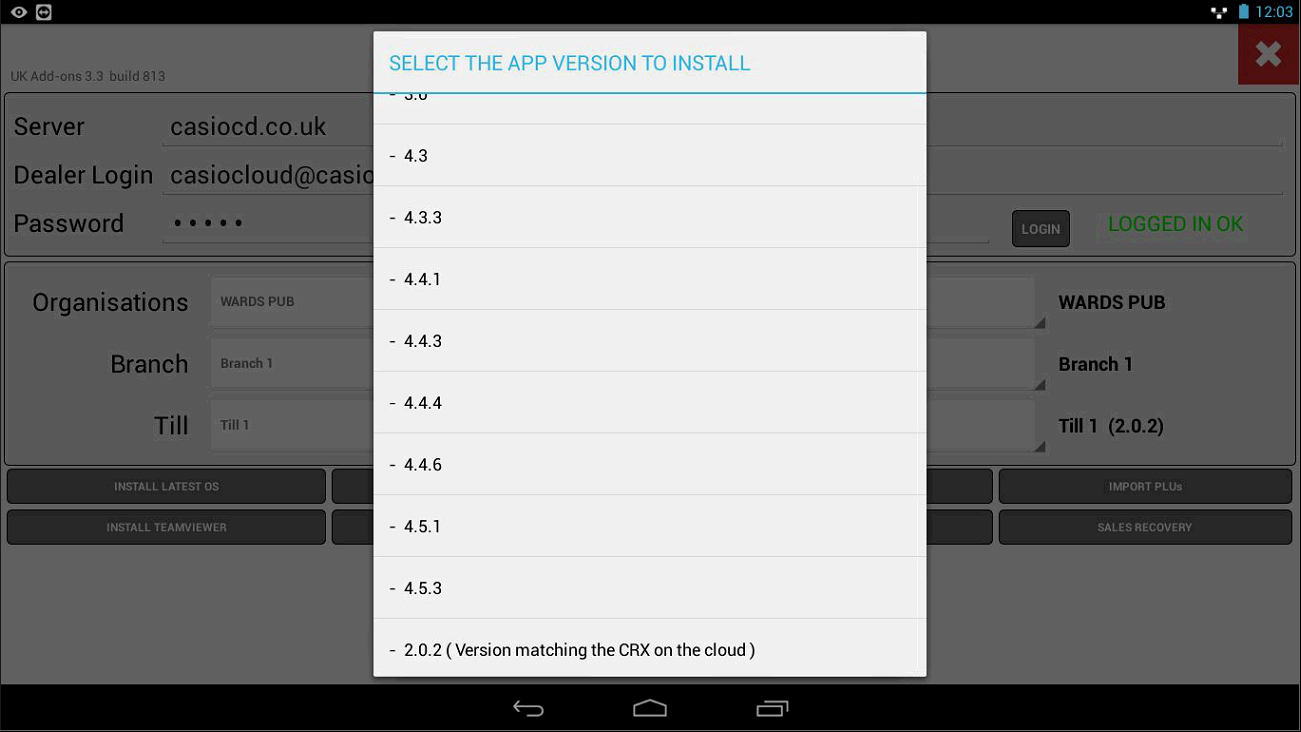
- The application version you have selected will be downloaded.
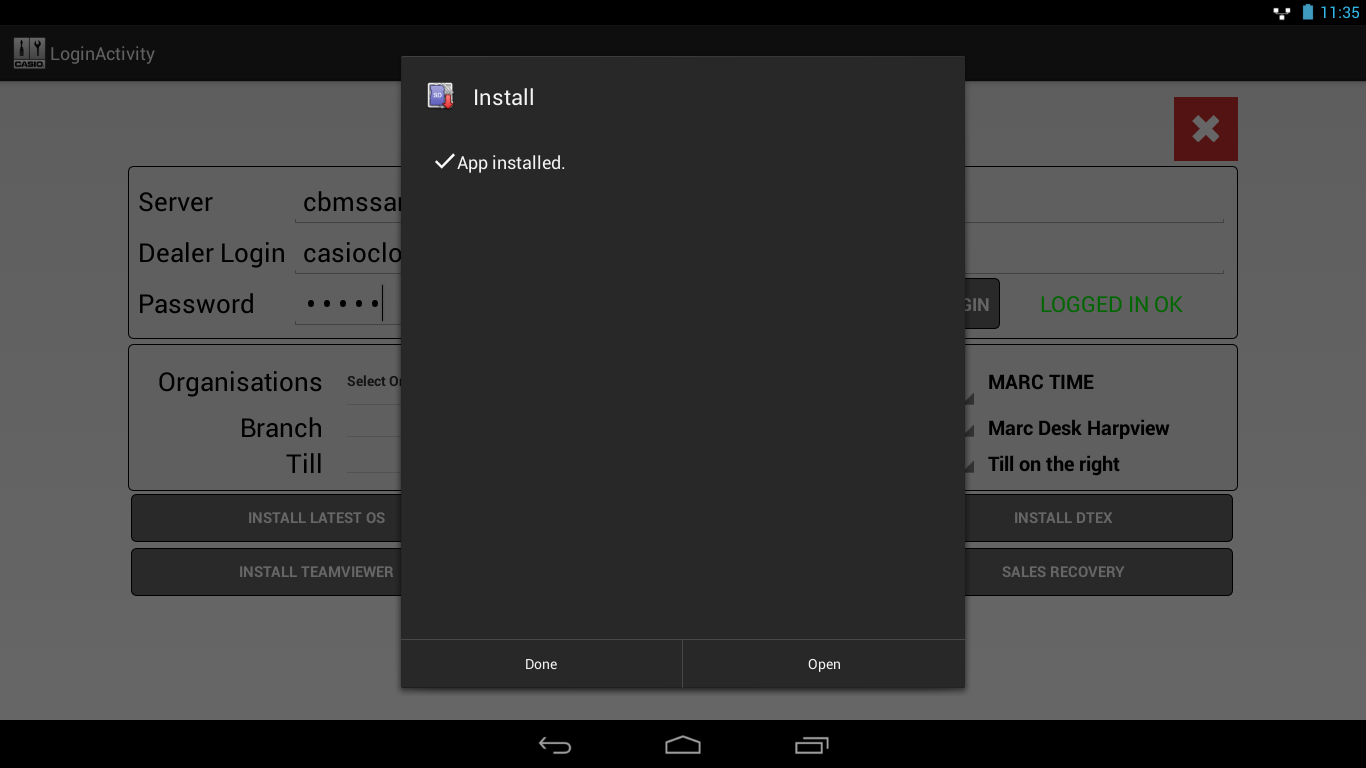
- When the download has completed, the ‘Install’ screen will be displayed. Tap ‘Install’.
- When this process has finished, tap ‘Open’.
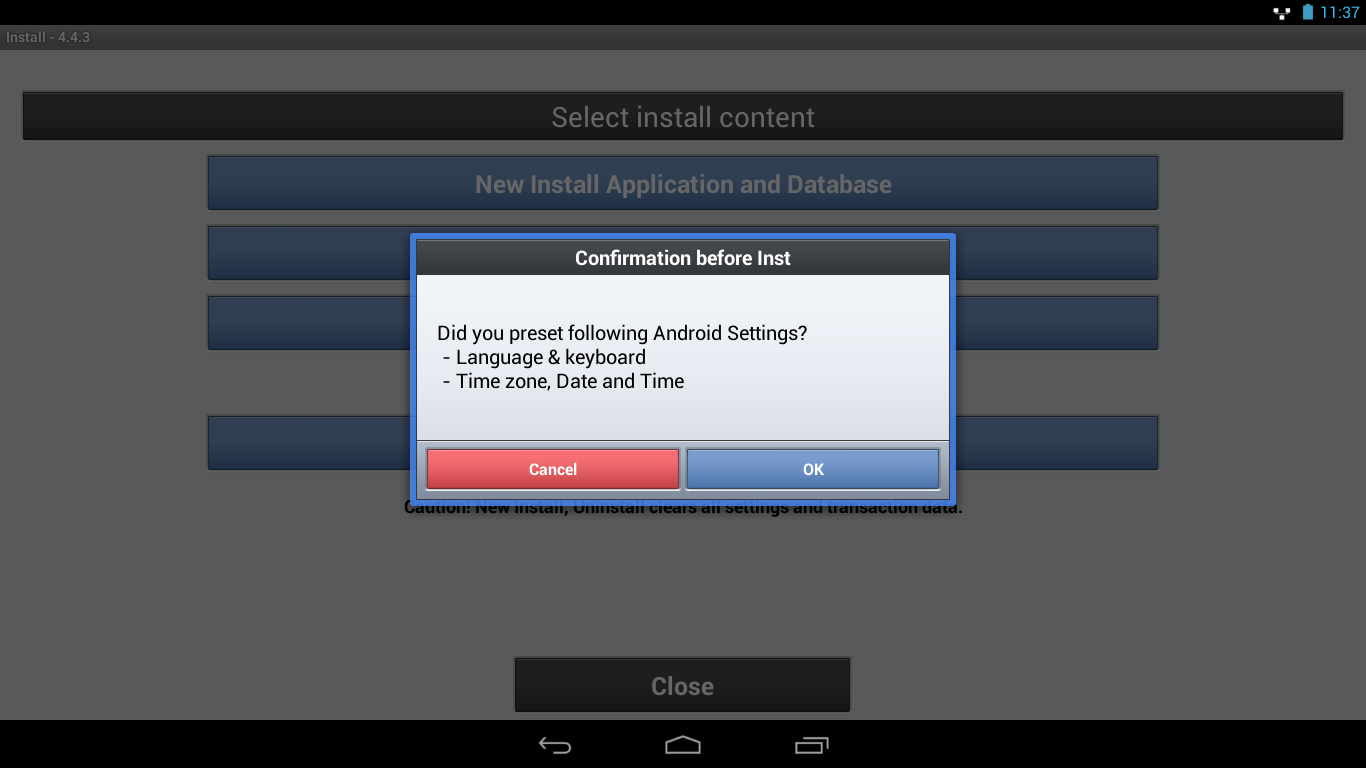
- A confirmation dialog will be displayed asking you to confirm ‘Language & keyboard’, ‘Time zone’ , ‘Date and Time’. Tap ‘OK’ at this point as this can be configured afterwards. Do NOT tap ‘Cancel’.
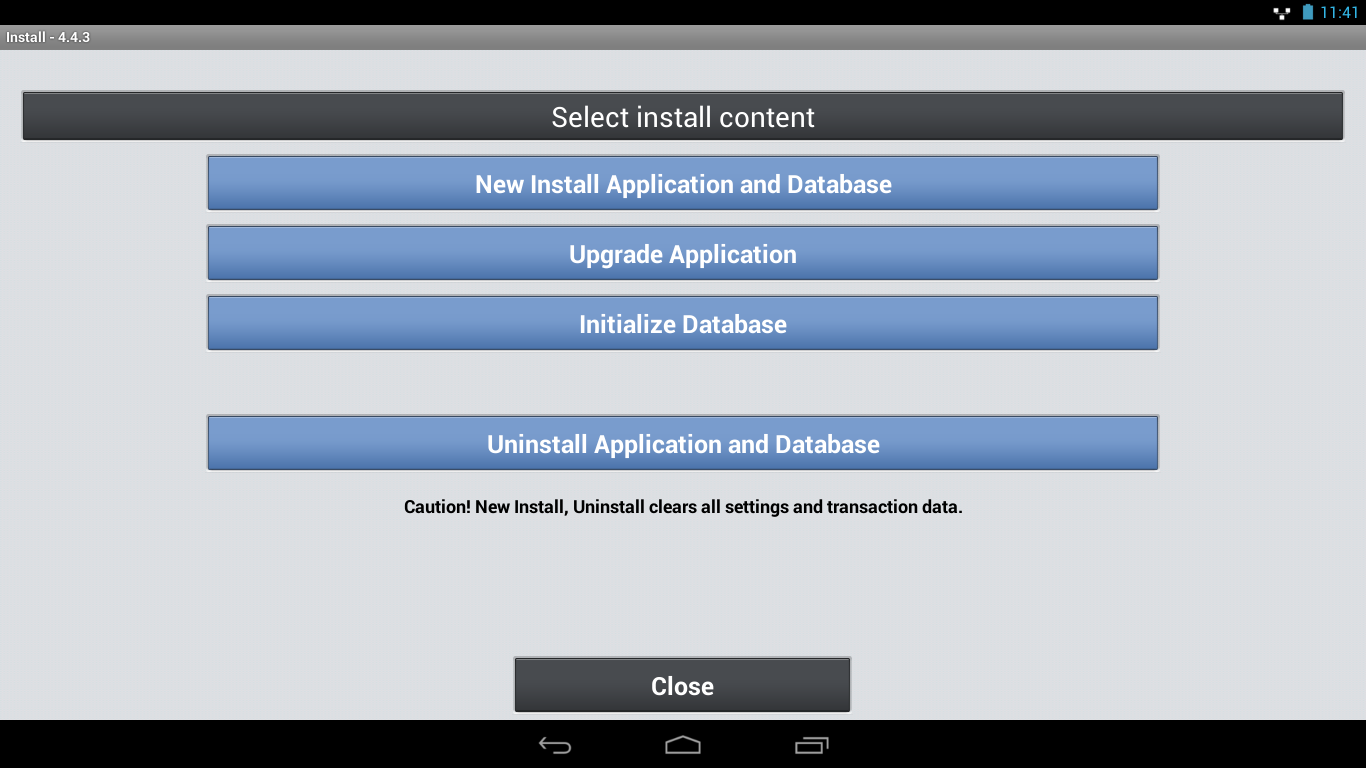
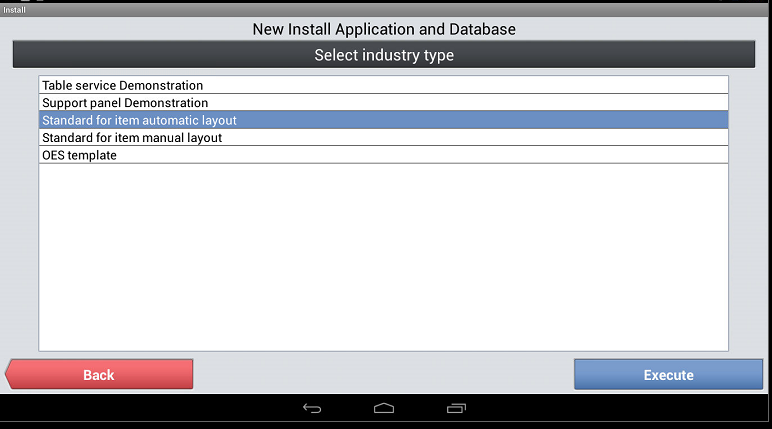
- You will see the ‘Select install content’ screen. Select ‘New Install Application and Database’.
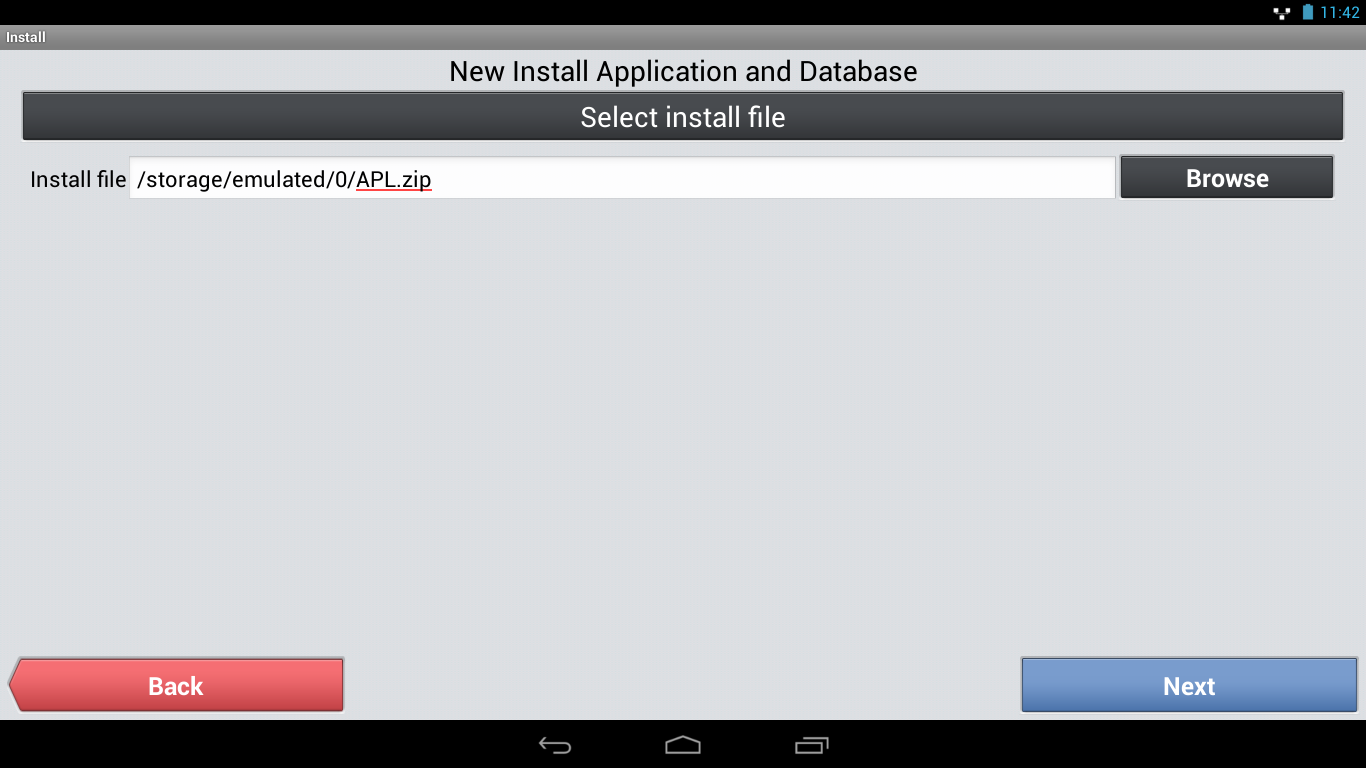
- You will see the ‘Select install file’’ screen. Tap ‘Next’.
- For version 4.x. You will see the ‘Select industry type’ screen. Select your required option from the list and tap ‘Execute’. Usually, this will be ‘Standard for item automatic layout’.
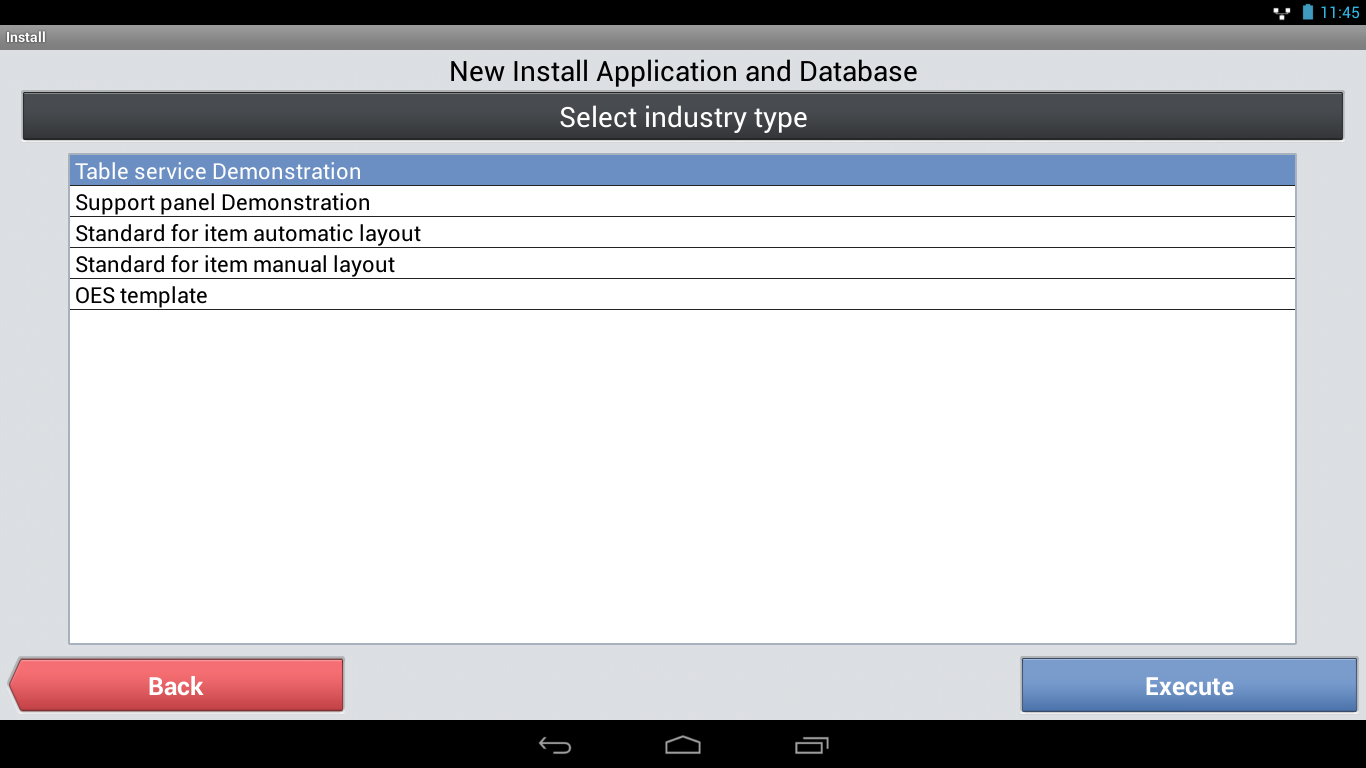
For version ERA 2.x and higher, you will not be prompted to choose an industry type yet.
- You will see a confirmation dialog warning you that you will be initialising the database and application. Note that if you already had an installation of the Cash Register application on the till, it will be wiped by this process along with the associated databases. Tap ‘OK’.
Note: If you have installed ERA 2.x or higher on the till, you will not be able to install version 4.x without first factory resetting the till. The same applies to installing ERA 2.x - you must factory reset the till before installing ERA 2.x. There is no upgrade process from 4.x to ERA 2.x or higher in this tool - you must upgrade the customer via the Cloud ‘Upgrade’ feature or use the separate Upgrade tool (release date: Sept 2017). - When the installation has completed, a dialog will be displayed to confirm success. Tap ‘Close’.
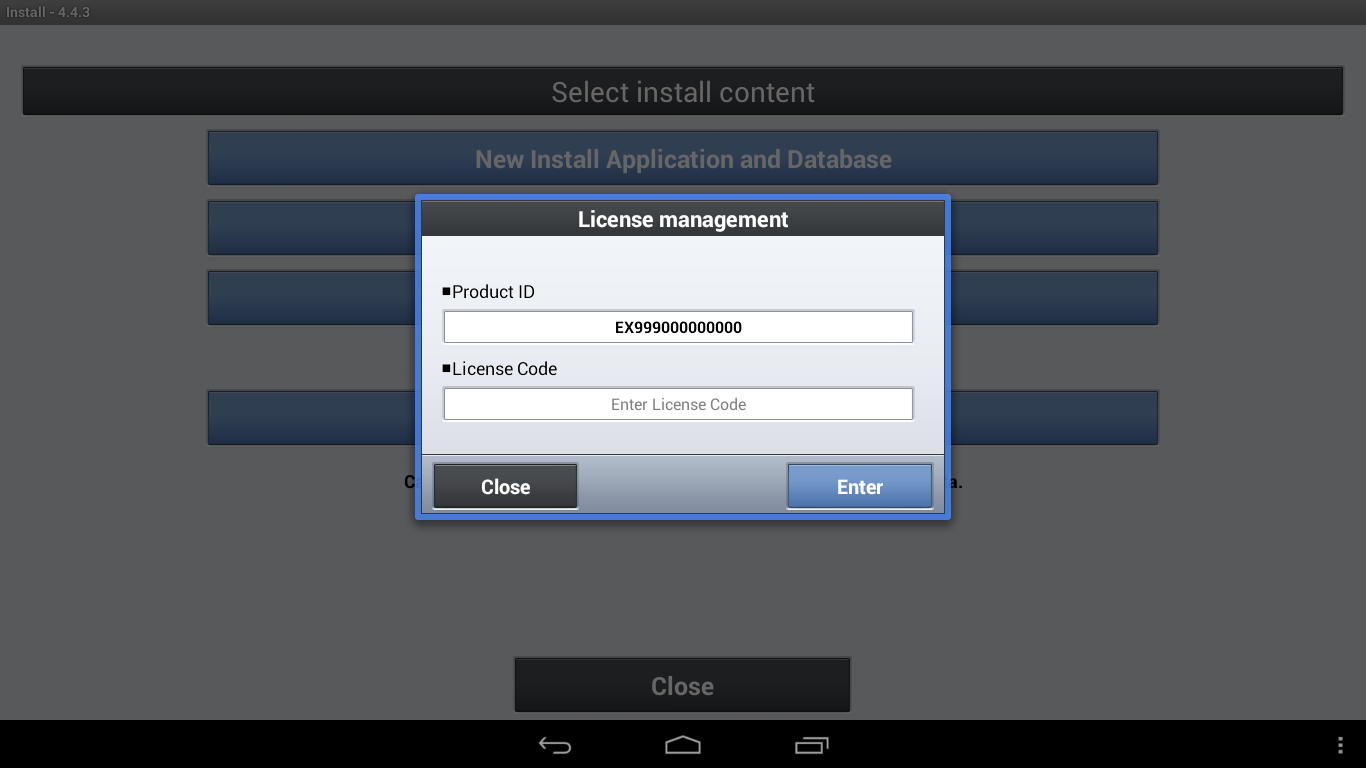
- You will be prompted for license information.
For version 4.x, you will need a ‘Product ID’ and a ‘License Code’. You should find these in the box with the cash register. Enter the codes and tap ‘Enter’. Tap ‘Close’, then ‘OK’.
This completes the setup process for version 4.x. The till will reboot to finish the installation.The rest of the steps in this section refer to only ERA 2.x and higher.
For version ERA 2.x or higher, you will need to use the new licensing system to obtain an ‘Installation Key’ to be entered along with the ‘Product ID’ and ‘License Code’. Refer to the separate document, ‘ERA (Premium) Licensing Process.pdf’ which is available for download on the dealer website. It is necessary to obtain a specific installation key for each till. Enter the codes for this till and tap ‘Enter’.

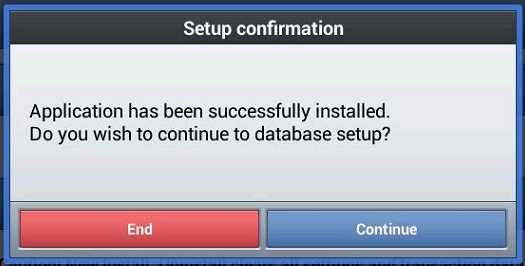
- For version ERA 2.x or higher, you will be prompted to continue to ‘database setup’. Tap ‘Continue’. You must perform an ERA 2.x or higher database initialization at least once on the V-R even if you will be downloading a CRX file from the Cloud later. This step ensures that the application is fully set up correctly.
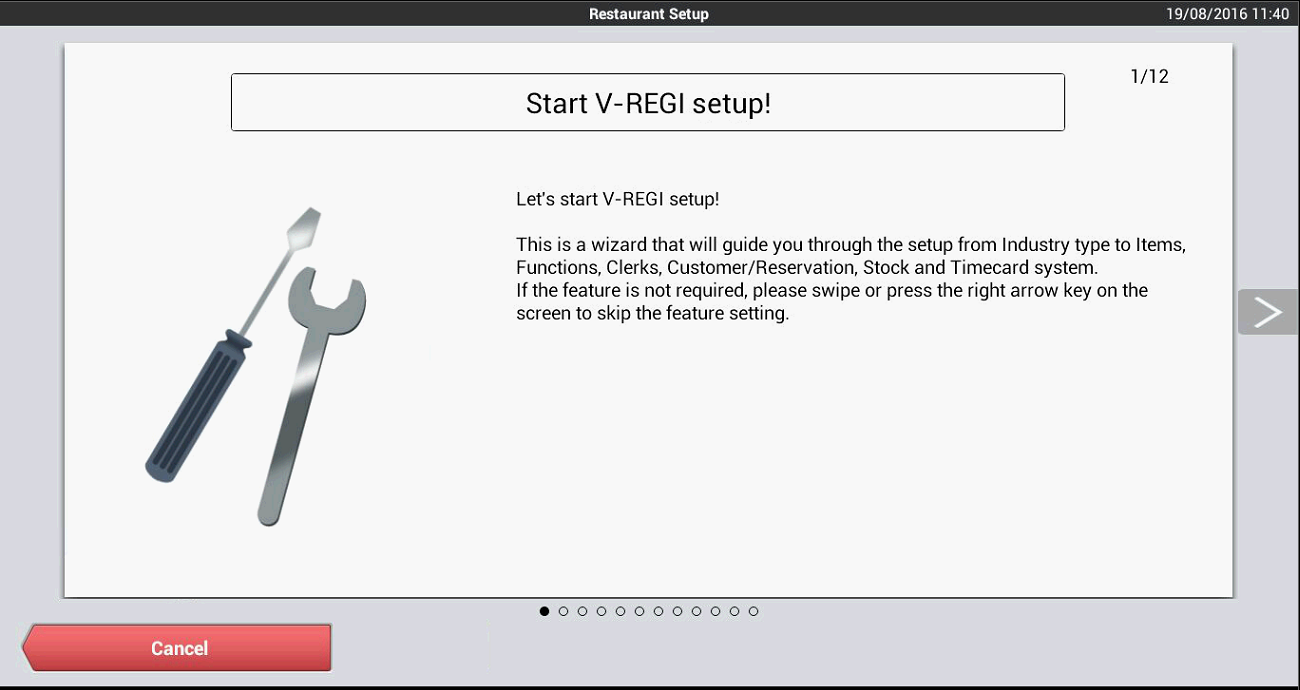
- You will see the first page of the setup ‘wizard’. Tap the arrow symbol on the right of the screen

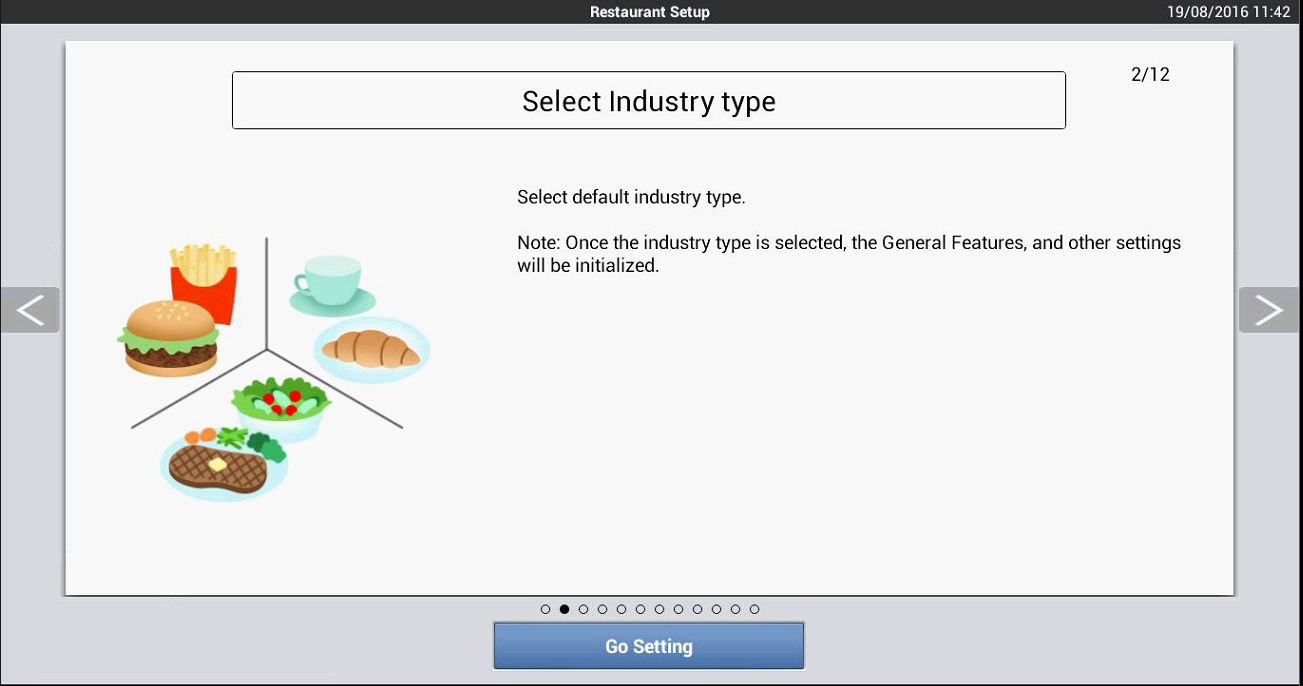
- You will see the ‘Select Industry type’ screen. Tap ‘Go Setting’.
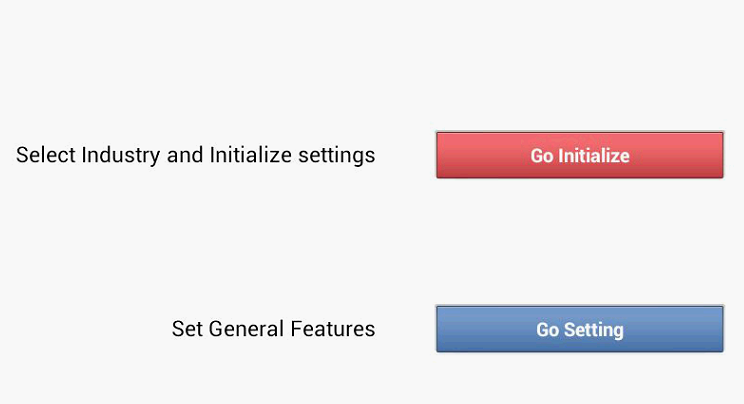
- Tap ‘Go Initialize’.
- Ensure that ‘Restaurant Demonstration’ is highlighted and tap ‘Execute’.
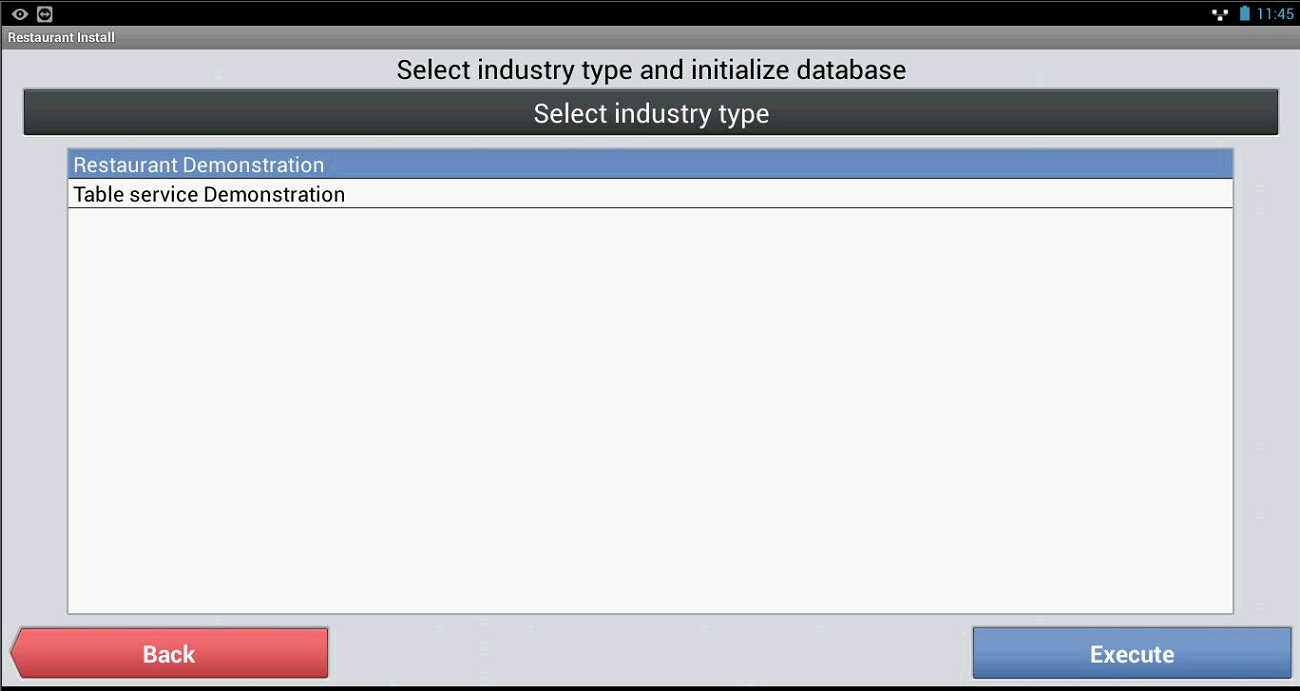
- You will be prompted to confirm (all previous data will be deleted). Tap ‘OK’. The database will be initialized. When it has finished, tap ‘Close’.
- Tap ‘Back’ and tap the right arrow icon until you reach the ‘Finish’ screen in the wizard. Tap ‘Exit’ and then tap ‘OK’ to reboot the application.
- The till will reboot to finish the installation.
Note: When you download the Casio Cash Register application a set of scripts and a CRX demo program will also be downloaded to the appropriate folders. These are used later.
4.1 Add ‘Add-ons Settings’ icon to ‘System’ tab in the Cash Register application
It is recommended that you run the ‘PutUkAddonsSettingsButtonOnSystemTab.sql’ script on the till. This adds a button for accessing the ‘Add-ons Settings’ on the ‘System’ tab of the Cash Register application. You MUST do this if you are planning to use the ‘Utility Panel’.
Note: Version 3.4 Build 856 and higher supports V-R200, but do not put the ‘Add-ons Settings’’ icon on the ‘System’ tab as described below. This causes a user interface issue which will be fixed in due course. Users should exit from the cash register application and use ‘Add-ons Settings’ from there.
To run the script follow these steps in the Cash Register application:
- Go to the ‘System’ tab.
- Tap ‘DB MANAGEMENT’.
- Tap ‘Script Execution’.
- Tap ‘Browse’.
- Tap ‘PutUkAddonsSettingsButtonOnSystemTab.sql’.
- Tap ‘Decision’.
- Tap ‘Execute’.
- You will be asked to confirm. Tap ‘OK’.
- Tap ‘Close’ then ‘Back’.
- Tap ‘Close’.
- You will be asked to confirm a reboot. Tap ‘OK’.
‘Add-ons Settings’ will now appear as an icon in the ‘System’ tab in the Cash Register application and you should use that to make any changes to the behaviour of any of the Add-ons programs. Note: You will not have the script file if you did not use ‘UK Add-ons’ to install the Cash Register application. You are strongly recommended to use ‘UK Add-ons’ to install the Cash Register application; however, the scripts are available to download from the ‘Utilities’ section on the dealer website should you need them (they need to be copied to the \CASIO\script\ folder in the ‘Internal Storage’ on the till).
5 - Install the DTEX (Data Exchange) using ‘UK Add-ons’
The DTEX ( Data Exchange ) is the application that handles the communication between the till and the Casio Cloud. It is responsible for sending the sales data from the till to the Cloud and also downloading programming changes you make in the Cloud so that the till is up-to-date. The ‘UK Add-ons’ utility simplifies the installation and configuration of the DTEX program considerably so you are highly recommended to use it.
- Launch ‘Addons Settings’ and tap ‘Registration and Installs’.
- Type in the correct ‘Server’ (e.g. ‘casiocs.co.uk’, ‘casiocd.co.uk’, ‘casioct.co.uk’) and enter your dealer login credentials.
- Select the establishment from the ‘Organisations’ list and then select the correct ‘Branch’ and ‘Till’. The installer will use the settings you have entered in steps 1-3 to configure the DTEX automatically so ensure that they are correct.
- Tap ‘ INSTALL DTEX’.
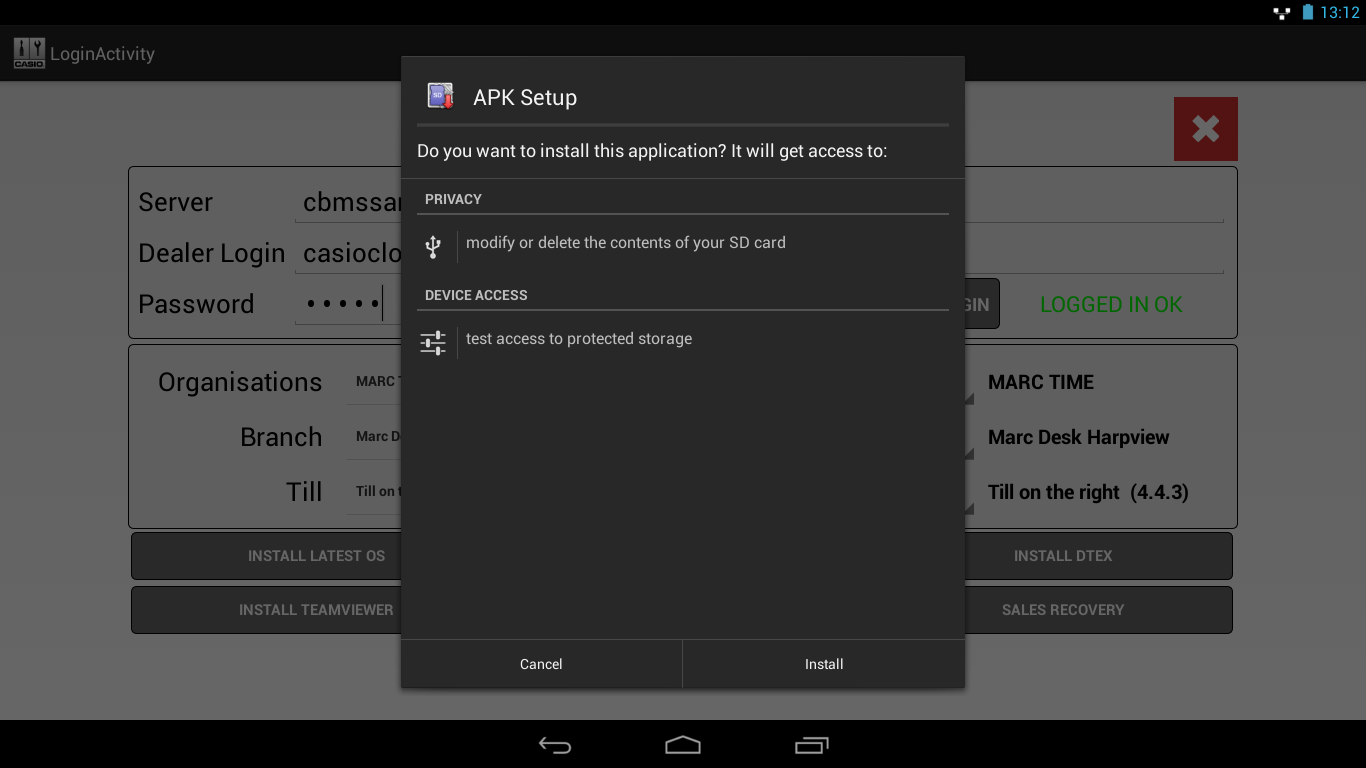
- The latest DTEX program will be downloaded and the correct settings for the organisation, branch and till. The installer will launch. Tap ’Install’ and, when the installation has finished, tap ‘Done’.
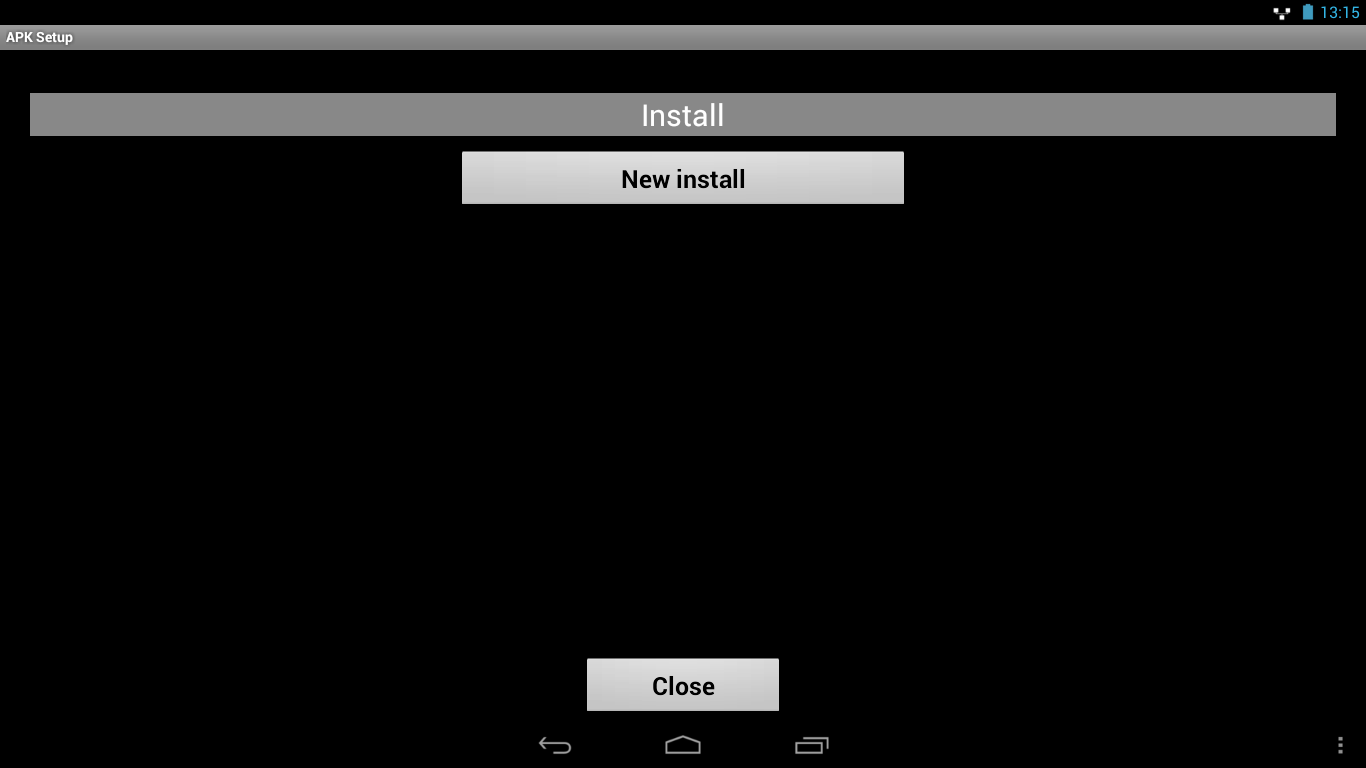
- Another setup screen will appear. Tap ‘New install’, then ‘OK’. When completed, tap ‘OK’ in the ‘Success’ dialog. Tap ‘Close’.
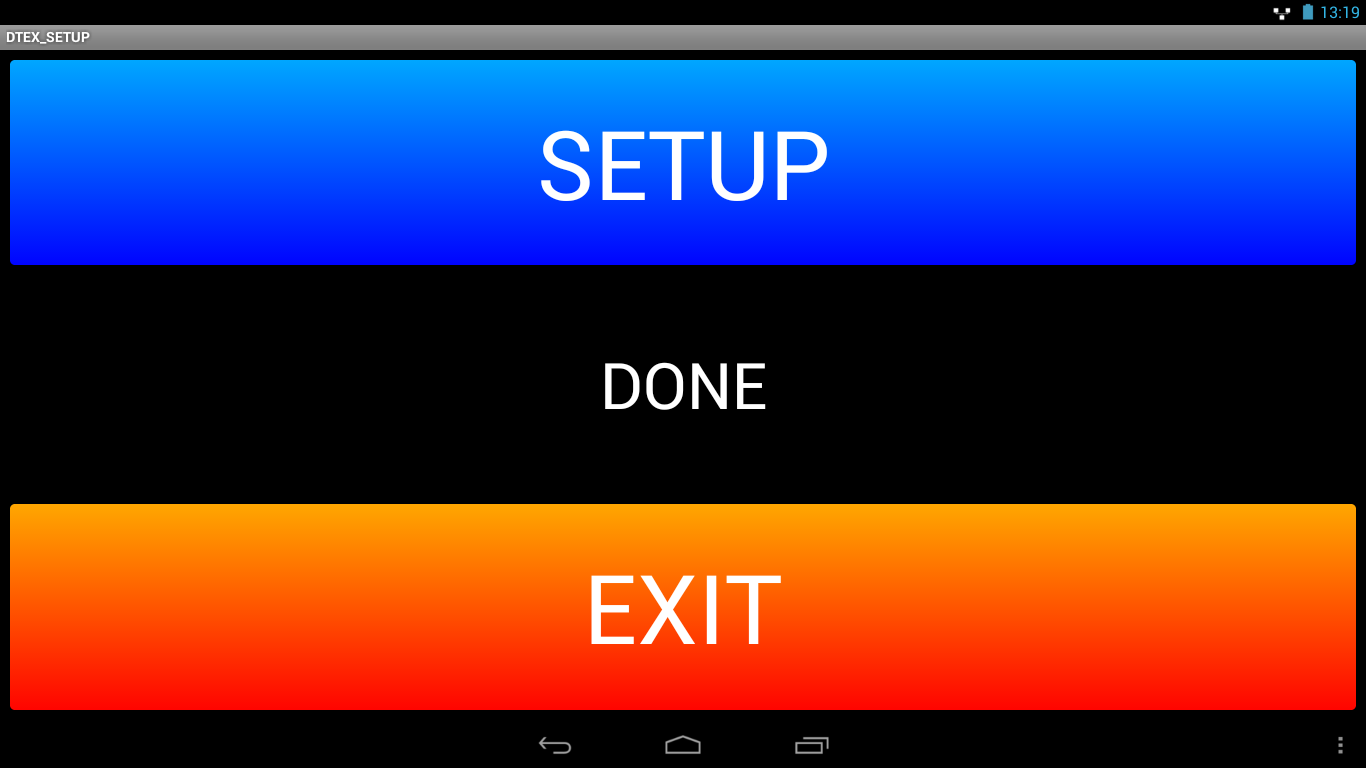
- On V-R7000 and V-R200, the ‘DTEX_SETUP’ screen will appear. On V-R100, you have to exit from UK Addons at this point and run ‘DTEX_SETUP’ manually. Tap ‘SETUP’ and wait a few seconds until the ‘DONE’ message appears. Tap ‘EXIT’.
- On V-R7000 and V-R200 only, a second install process will kick in to install the ‘Own Converter’ program. This program adjusts the way the DTEX works after some changes were made for ERA 2.x onwards. Tap ‘Next’ then ‘Install’.

- A dialog will appear informing you to install an SQL script to complete the setup. See next section for details. This prompt will not appear on V-R100 so make sure you remember to run the script.
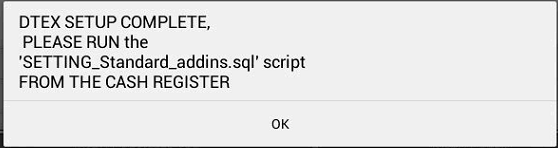
5.1 Run a script to link the DTEX to the Cash Register application
You will now need to run a script to complete the configuration of the Cash Register application and DTEX.
To run the script follow these steps in the Cash Register application:
- Go to the ‘System’ tab.
- Tap ‘DB MANAGEMENT’.
- Tap ‘Script Execution’.
- Tap ‘Browse’.
- Tap ‘SETTING_Standard_addins.sql’.
- Tap ‘Decision’.
- Tap ‘Execute’.
- You will be asked to confirm. Tap ‘OK’.
- Tap ‘Close’ then ‘Back’.
- Tap ‘Close’.
- You will be asked to confirm a reboot. Tap ‘OK’.
This completes the set up of the DTEX application and the till should now be ‘pointed’ to the correct site on the Cloud. You may now proceed to performing an ‘OPEN’ operation on the till to download the till configuration (CRX) from the Cloud. If you register a sale on the till you should also now see that in the ‘Sales Log’ on the Cloud shortly afterwards. When you perform a Z Read on the till, the data will be transmitted to the Cloud.
6 - Install ‘TeamViewer’ using ‘UK Add-ons’
TeamViewer enables you to log in to a till remotely for support purposes. The process in ‘UK Add-ons’ installs a TeamViewer client that is compatible with V-R7000 and V-R200. Use TeamViewer 12 to interact with this version.
- Launch ‘Addons Settings’ and tap ‘Registration and Installs’.
- Tap ‘INSTALL TEAMVIEWER’. You do not need to log in to install TeamViewer.
- The install files will be downloaded. The ‘QuickSupport’ install screen will appear. Tap ‘Next’ then tap ‘Install’.
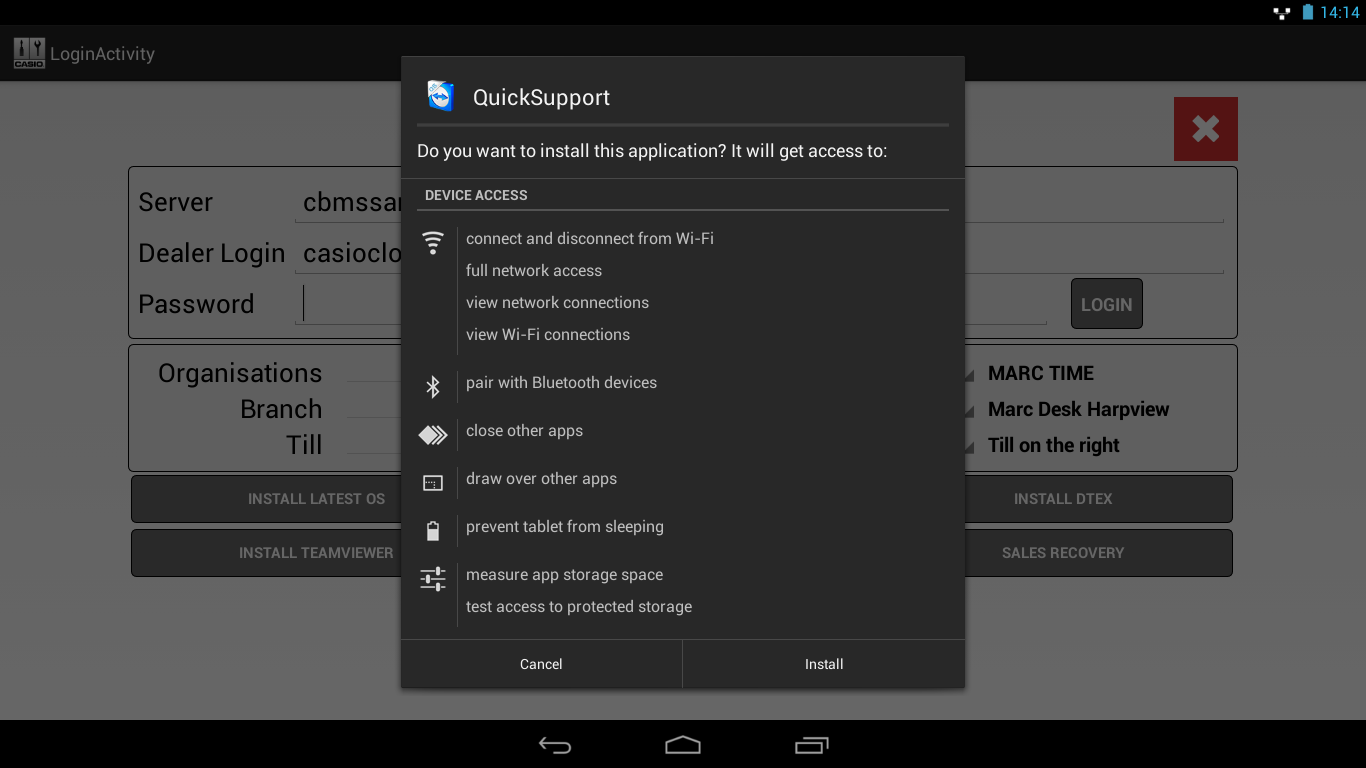
- When the installation has completed, tap ‘Open’.
- ‘Quick Support’ will launch. Swipe each information screen to the left to dismiss it and then the app will detect that fact that an ‘Add-On’ is available. Agree to install this.
- The ‘QuickSupport Add-on” installation will start. Tap ‘Install’.
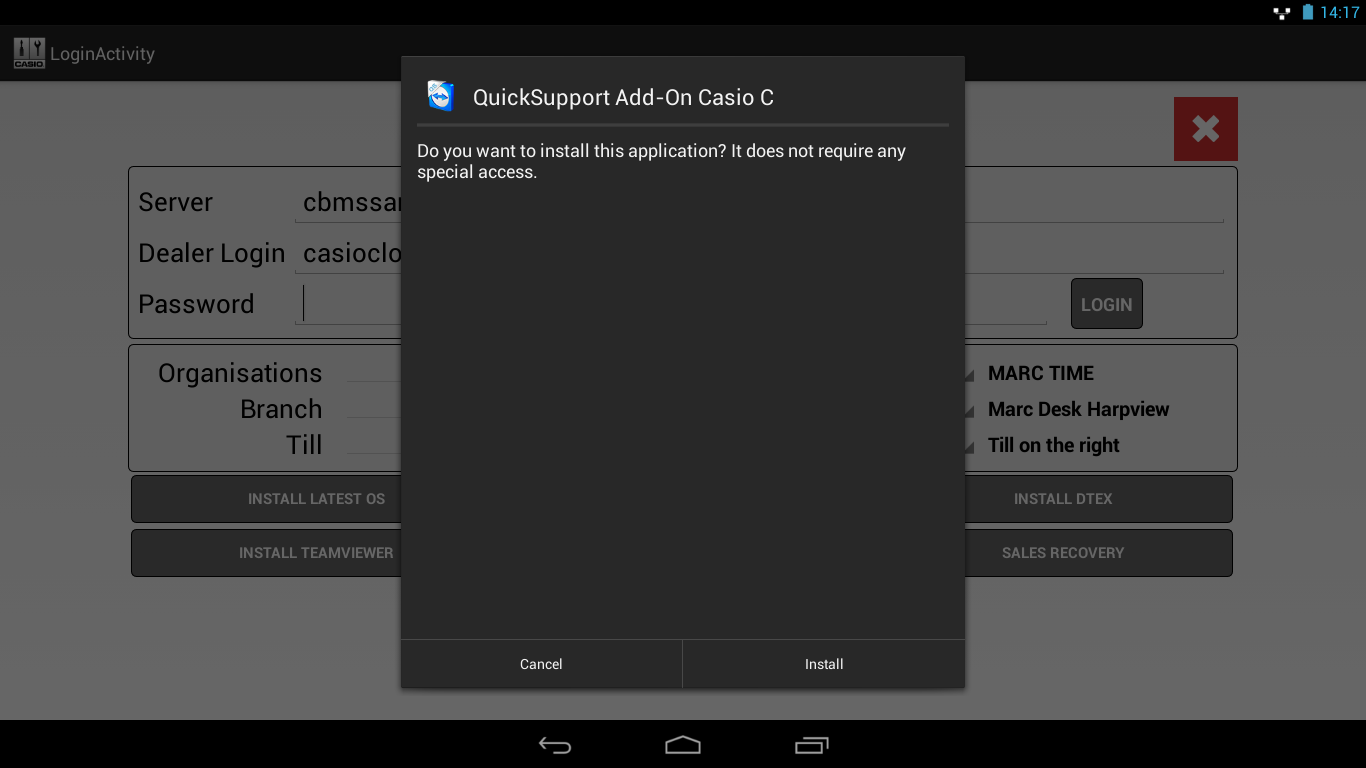
- When the installation has completed, tap ‘Done’.
Once installed TeamViewer QuickSupport can be launched from the Android desktop or from the main screen of the ‘Addons Settings’ utility. Tap ‘TEAM VIEWER QUICK SUPPORT’ to launch it.
7 - Install ‘LogMeIn Rescue’ using ‘UK Add-ons’
‘LogMeIn Rescue’ allows you to remotely log in to a till for remote support purposes. This tool is now superseded and TeamViewer QuickSupport is recommended.
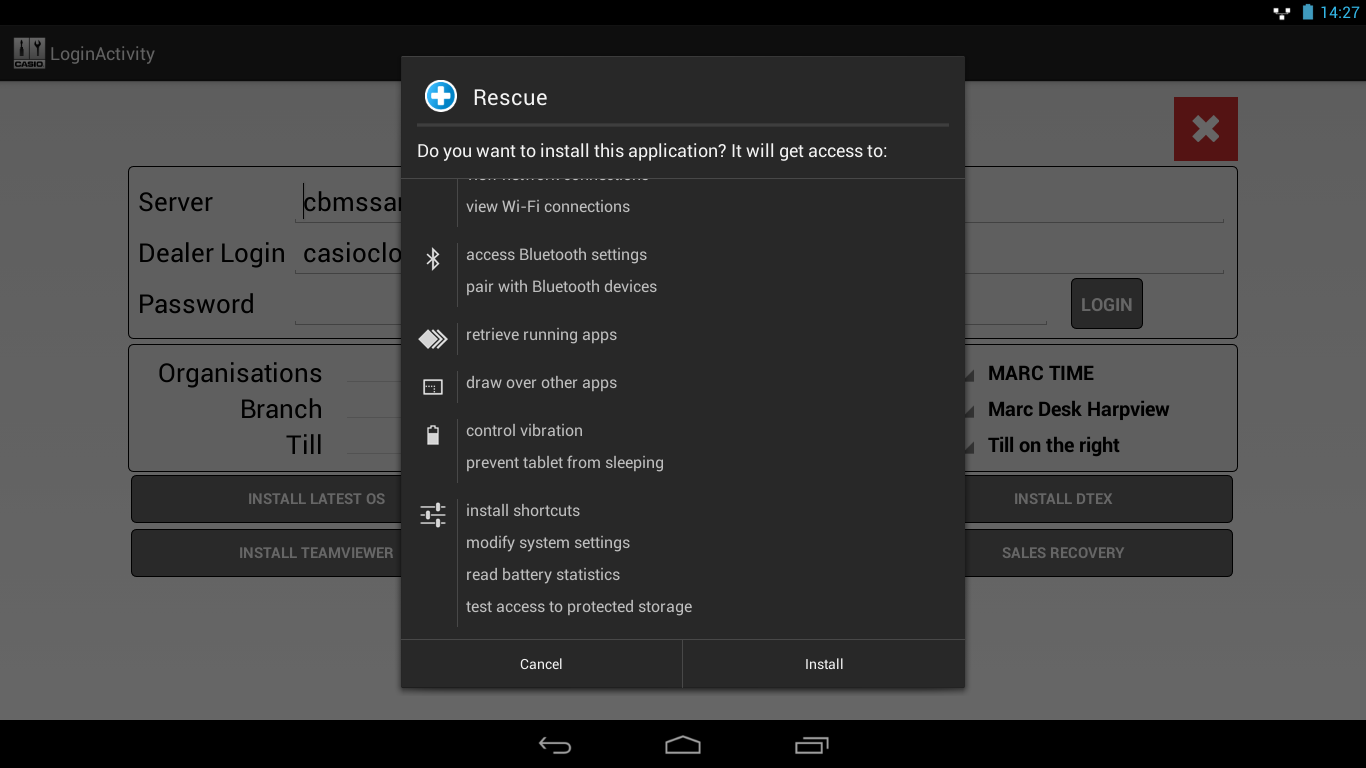
- Launch ‘Addons Settings’ and tap ‘Registrations & Installs’. You do not need to log in as a dealer to install LogMeIn Rescue.
- Tap ‘INSTALL LOG-ME-IN’. The install files will be downloaded.
- Tap ‘Next’ and then ‘Install’.
- When installation is complete, tap ‘Done’ (Do NOT tap ‘Open’).
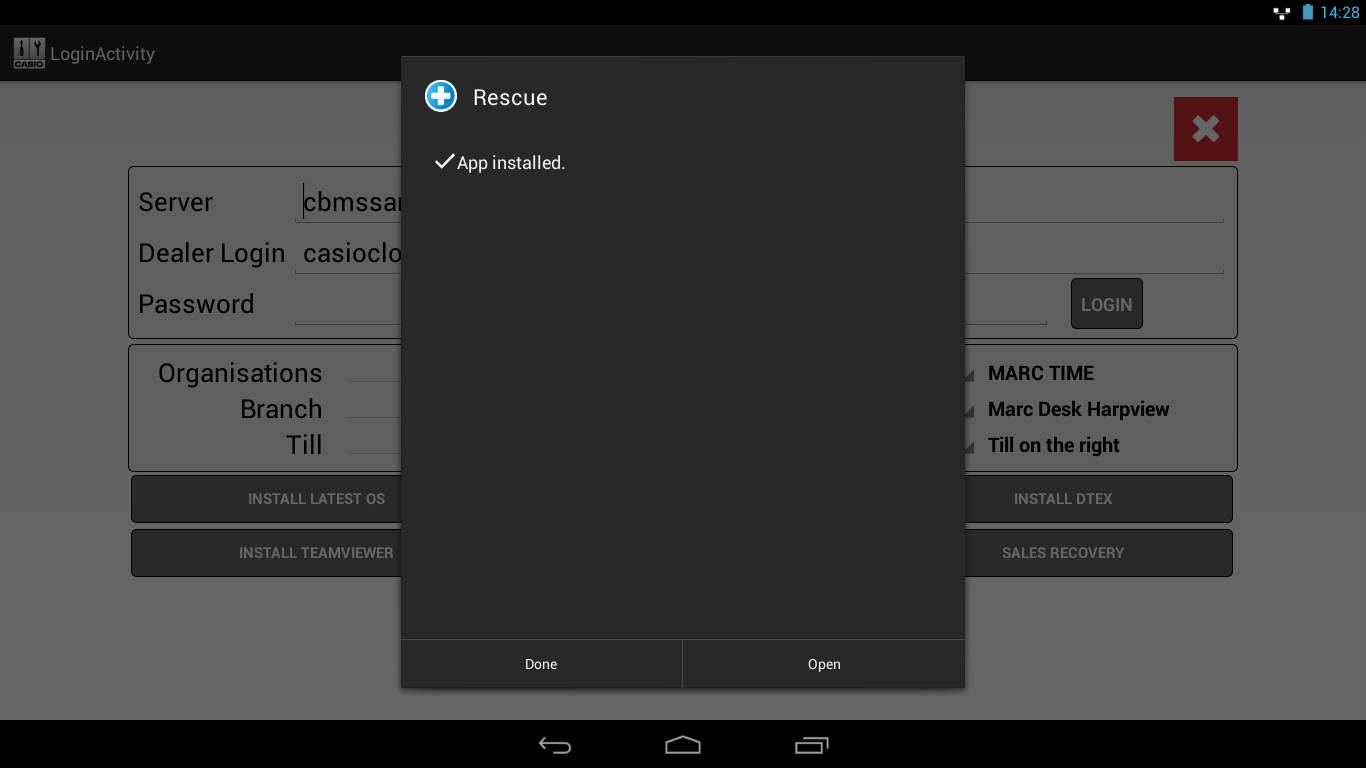
- Another installer will launch. Tap ‘Install’.
- When installation is complete, tap ‘Done’.
- You will be prompted to confirm whether you want to close or launch LogMeIn. Tap ‘Close’.
LogMeIn Rescue can be launched from within ‘Addons Settings’ by tapping ‘LOG-ME-IN RESCUE’. It can also be launched from the Android desktop by tapping ‘Rescue’.
8 - Sales Recovery for Cloud
The DTEX (Data Exchange) component which is responsible for sending the sales from the till to the Casio Cloud can sometimes fail to recover if the internet connection on the till has been down for too long (e.g. 2 weeks).
The ‘Sales Recovery’ tool, independently of the DTEX, will help recover the sales which have not been sent to the Casio Cloud. Casio Support may advise you to use this tool in special circumstances. This tool only works with pre-ERA versions of the cash register application.
- Launch ‘Addons Settings’ and tap ‘Registration and Installs’.
- Log in as a dealer to the appropriate server and make sure the ‘Organisation’, ‘Branch’ and ‘Till’ options are correct.
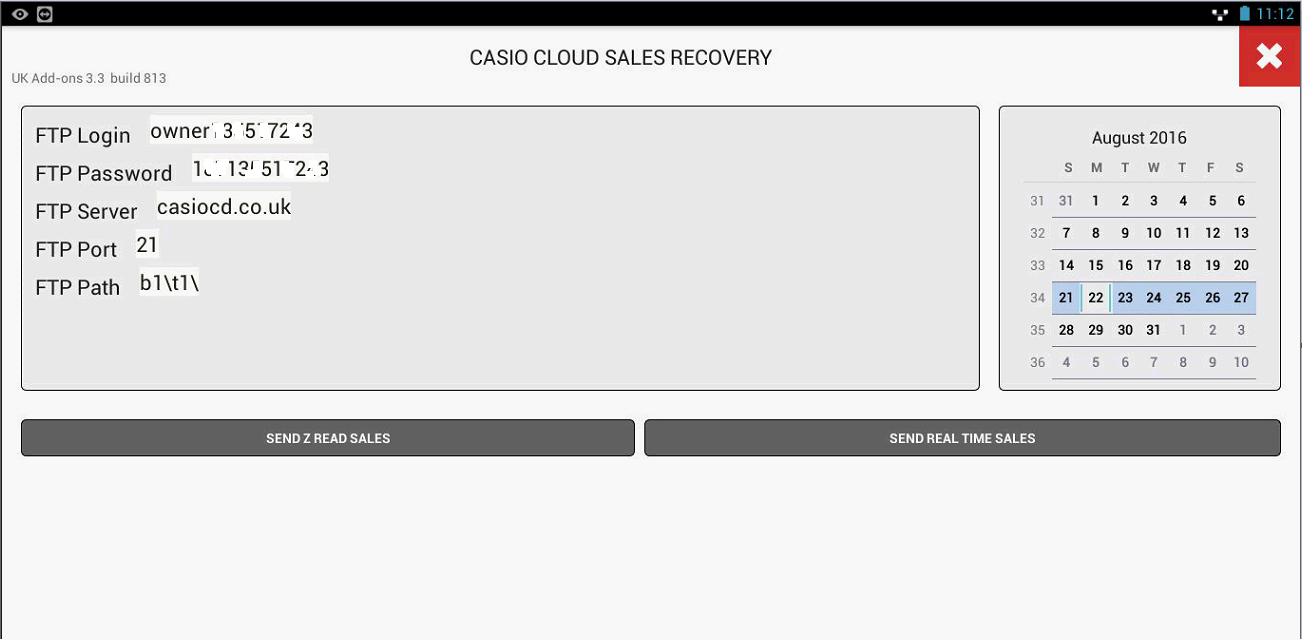
- Tap ‘SALES RECOVERY’.
- Select the date for which you want the sales to be recovered and tap ‘SEND Z READ SALES’ or ‘SEND REAL TIME SALES’.
9 - Time and Attendance
‘Time and Attendance’ is an application that allows clerks to clock-in/clock-out and break-in/break-out from within the Casio Cash Register application on V-R100 or V-R7000.
The information is stored on the Cloud and you can get live information and reports showing which members of staff are currently at work, how many hours they have worked and so on.
9.1 Installing and Configuring the ‘Time and Attendance’ panel
- Log in to the establishment on the Casio Cloud, click ‘Employees’ to create the employees list and make each of them active.
- Launch ‘Addons Settings’ and tap ‘Uk Add-ons Settings’.
- Tap the down arrow icon next to ‘Time and Attendance Panel’ to display the settings.
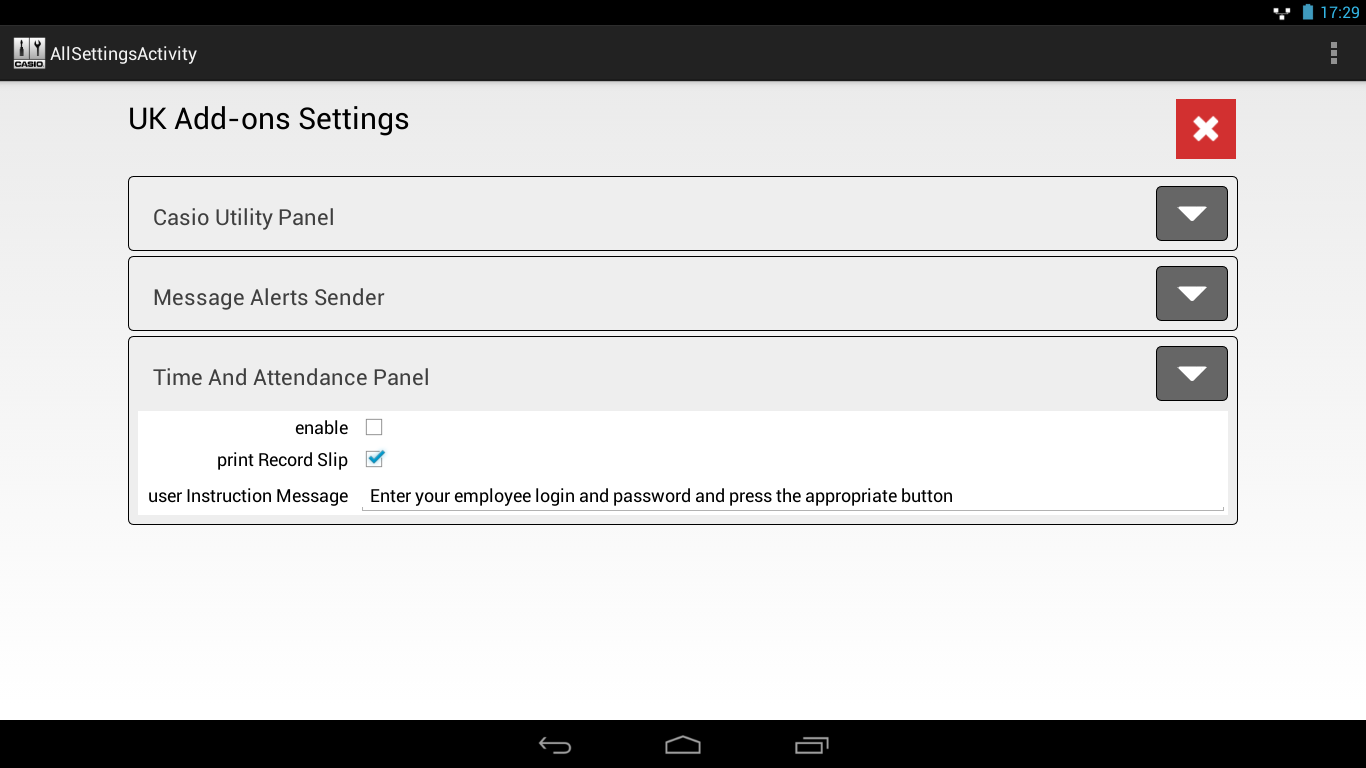
- The following settings are available:
. enable : Enables the ‘Time And Attendance’ utility. It will start when the Cash Register application is launched.
. print Record Slip : The utility will print small record slip on the receipt printer when the employee clocks-in or out.
. user Instruction Message : This is the message that will be displayed when the ‘Time And Attendance Panel’ is displayed.
The ‘Time And Attendance Panel’ will be available at all times, whether you are in or out of the Cash Register application. It appears at the top right corner of the screen as a small vertical bar with the text ‘Time & Attendance’ written vertically.
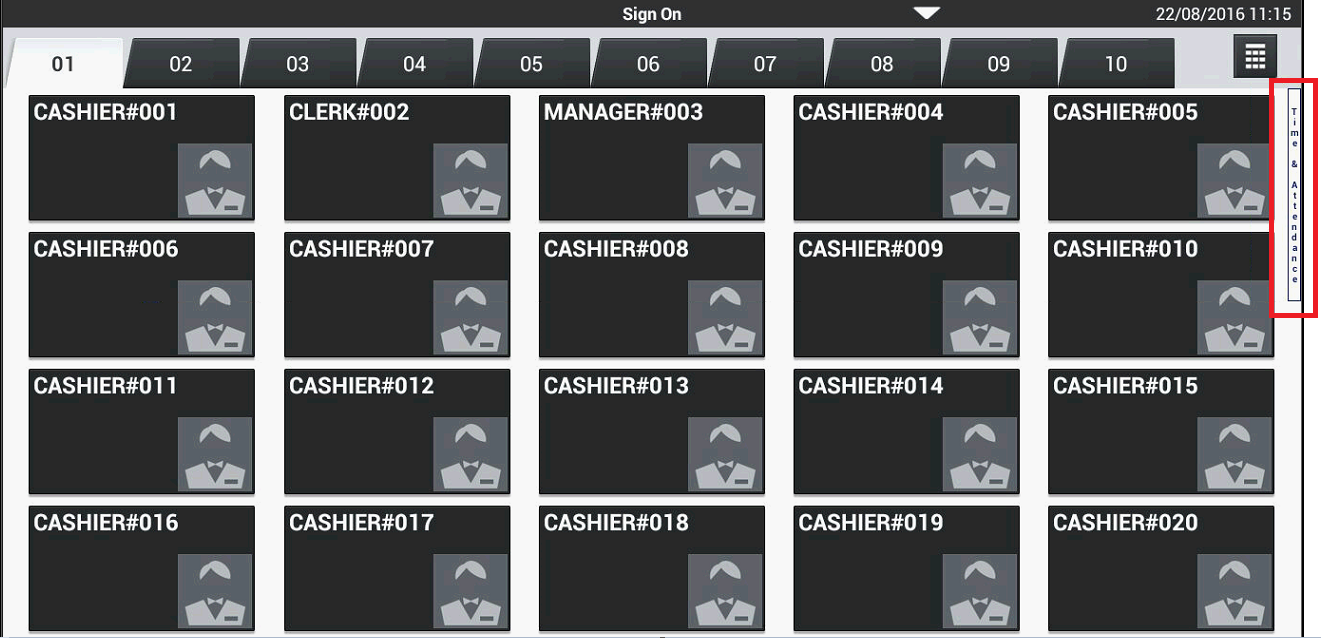
Swipe the bar to the right to display the full screen ‘Time and Attendance Panel’. Users can enter their employee login name and password then press the appropriate button on the right to perform the action. ‘CLOCK IN’ and ‘BREAK IN’ mean the user is working; ‘CLOCK OUT’ and ‘BREAK OUT’ mean the user is not working.
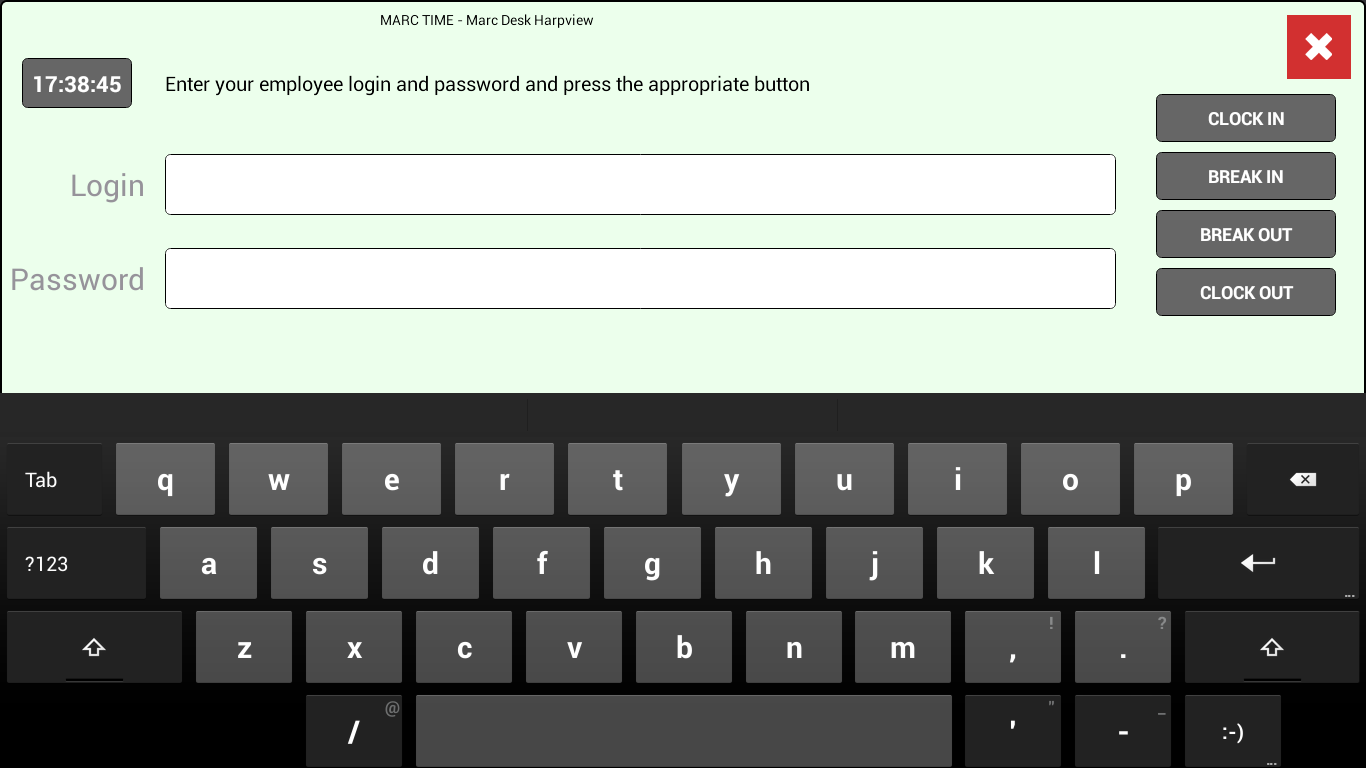
To close the panel, swipe it to the left or tap the ‘Exit’ icon. 
10 - Configuring the ‘Utility Panel’ on the till
The Utility Panel is a web browser which is easily available while operating the till by swiping it out from the right side of the screen. It can be easily closed by tapping the ‘Exit’ icon: . The Utility Panel is only compatible with version 4.46 and above of the Cash Register application or ERA 2.x.
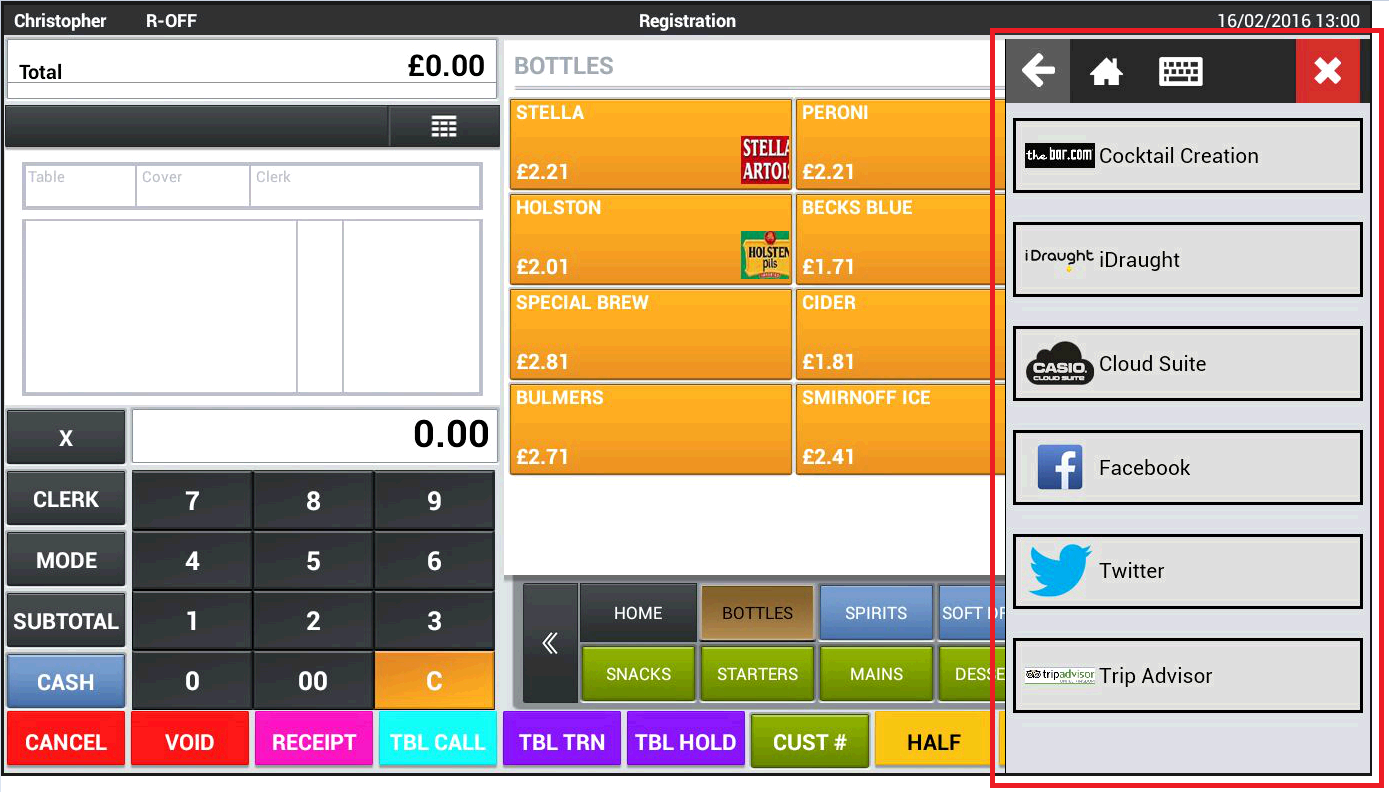
The Utility Panel can be configured to slide out onto a small part of the screen initially and then a second finger swipe to the left will open it out to full screen mode.
The Utility Panel can be configured to point to a single specific website or a page of website links that the user can then choose from. This page of links is configured on the Cloud. The list of website links is configurable for each branch. When you configure the Utility Panel on the till, only one website can be specified.
FIRST SWIPE :
SECOND SWIPE :
- Launch “Addons Settings’ and tap the ‘Uk Add-ons Settings’ option.
- Select the ‘Casio Utility Panel’ from the list of options (tap the ‘down arrow’ on the right hand side) and you will see the configurable settings for the Utility Panel.
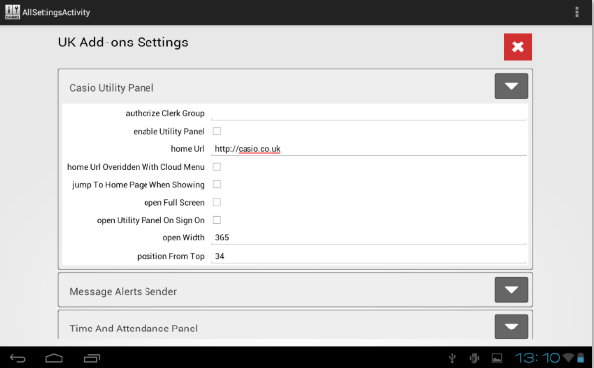
The Utility Panel options :
. authorize Clerk Group : This is the list of Clerk Groups that are authorised to swipe out the Utility Panel. Each group code must be comma separated. By default, the line is blank which means that ALL clerks will have permission to swipe out the Utility Panel. We recommend that, perhaps, Clerk Group 3 (‘MANAGER’) and 99 ‘SYSTEM’ are authorised.

This setting is overridden if you configure ‘Clerk Group Settings’ in the Cloud (see Section 11).
Clerk Groups are set up in the Cash Register application by going to Settings - REG SETTINGS - Clerk - Clerk Group. (or Programming - Clerks in the Cloud).You are then responsible for making sure that only those clerks who should be able to access the Utility Panel are in a Clerk Group that has the permission.
. enable Utility Panel : enables or disables the Utility Panel.
. home Url : This is the default URL that the browser will open when the ‘Home’ key is pressed or when the Utility Panel is swiped out (if configured to do so using ‘jump To Home Page When Showing’). It will have no effect if the next option is checked and a list of allowable websites has been configured on the Cloud.
. home Url Overridden With Cloud Menu : When this option is selected the browser will not point at the ‘home Url’ above but at the list of websites that you have configured on the Cloud. See the section later: ‘Configuring the Utility Panel Menu on the Cloud’.
. jump To Home Page When Showing : This option forces the browser to load the ‘home Url’ or the Cloud menu (depending on what has been selected above) every time the Utility Panel is swiped out. It is equivalent to pressing the ‘Home’ button.
. open Full Screen : When this option is selected the Utility Panel will always slide out in full screen mode on the first finger swipe ignoring the ‘open Width’ option below. (Recommended on the V-R100 )
. open Utility Panel On Sign On : When selected this will make the Utility Panel appear every time someone signs on. This could be used to force the showing of information to staff when they sign on (eg:cctv).
. open Width : The width at which the Utility Panel will be opened on the first finger swipe. The second finger swipe will open it in full screen.
. position From top : This option shouldn’t need to be changed as it is specifically adapted for each Casio till on which the tool runs. It could be set to 0 to gain a very slight amount of screen for the web page.
These are the typical settings for a normal installation of the Utility Panel:
. Register the till on the Cloud to the appropriate branch
. Check ‘enable Utility Panel’
. Check ‘home Url Overridden With Cloud Menu’
. Check ‘jump To Home Page When Showing’
Leave the other options on defaults.
11 - Configuring the ‘Utility Panel’ on the Cloud
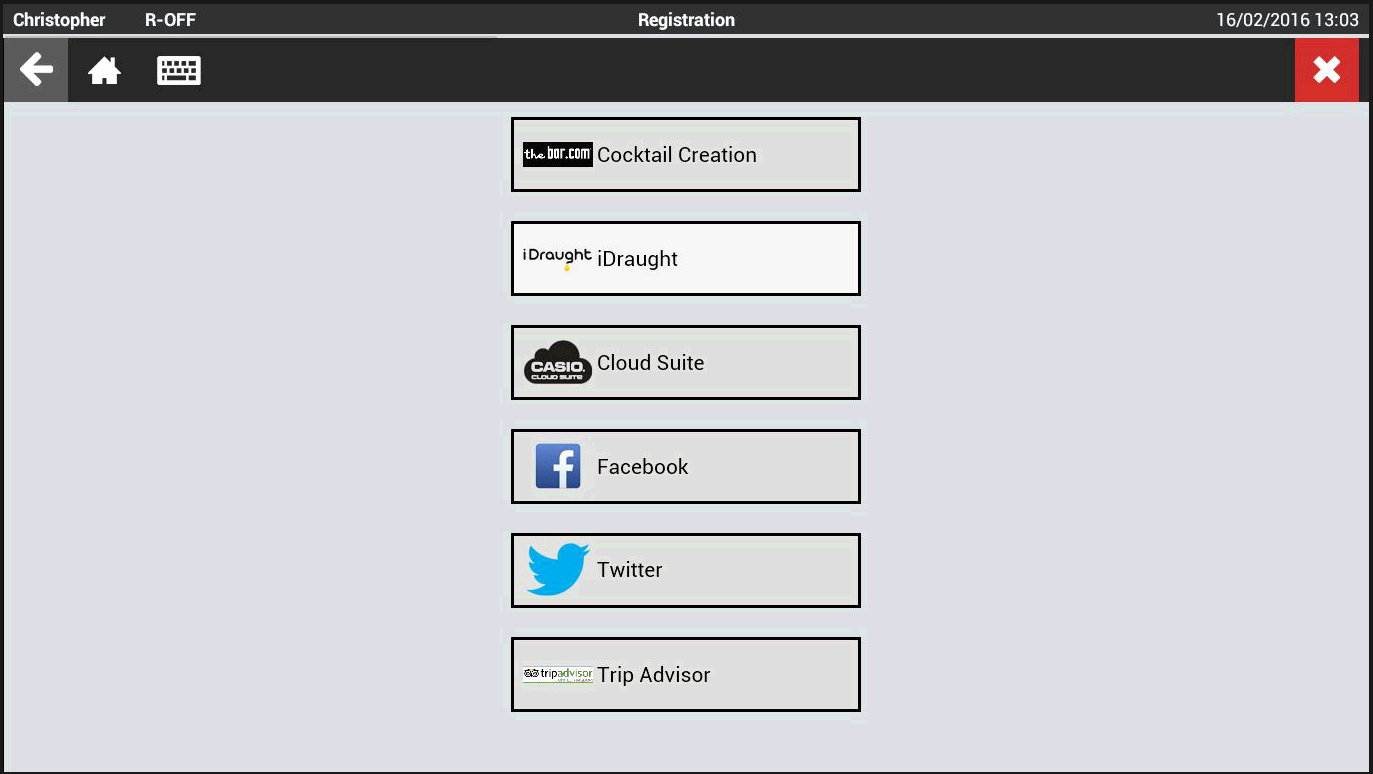
The maintenance screen for the Utility Panel Menu allows you to configure the list of links that will appear on the Utility Panel when it is swiped out by the user.
You can also limit each individual link by ‘Clerk Group’, so that some websites will only appear as options for clerks with the appropriate permission. Clerks can be assigned to groups on the till by going to Settings - REG SETTINGS - Clerk - Clerk Group. They can also be configured in the Cloud by going to Programming - Clerks.
The Utility Panel Cloud Menu can be accessed at the following link:
http://utility.casiocs.co.uk
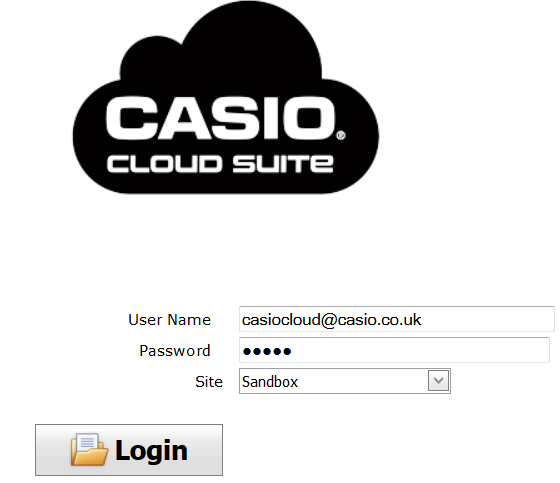
- Enter your dealer login credentials (the same ones you use to access the Cloud normally) and select which site is hosting your customer (‘Dealer Demonstration’ = ‘casiocd’, ‘Trial’ = ‘casioct’, ‘Live’ = ‘casiocs’, ‘Sandbox’ = ‘cbmssandbox’).
- Click ‘Menu Maintenance’.

- Establishments are listed by ‘Organisation’ and ‘Branch’. Select the organisation and branch you want to edit and click ‘Edit Menu’.
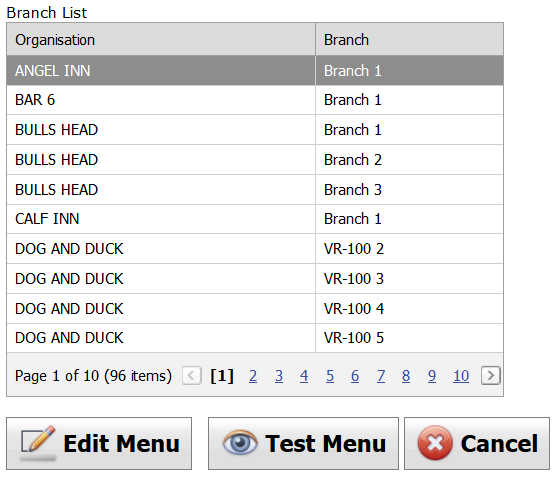
- If you have already configured some links for this branch, they will be shown in a list. If not, you will see ‘No data to display’. On this screen, you can add new links, edit or delete existing ones and edit the ‘Clerk Group’ permissions.
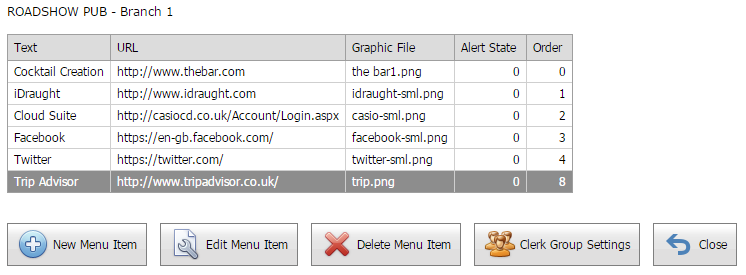
- To add a new link, click ‘New Menu Item’. You will see a screen that allows you to configure the new link.
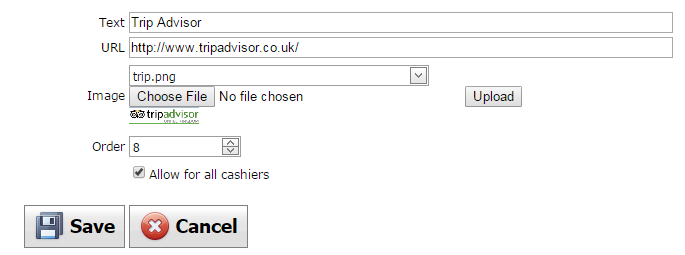
Complete the following fields and click ‘Save’.
- Text : This is the description of the link which will appear on the Utility Panel.
- URL : This is the URL link. You must include the part at the beginning - “http://”.
- Image : You can select from a list of preset icons or upload your own.
Images for upload must be in .png format and small in size.
- Order : Specify the position in the list for this link. No validation is done on this field so take care.
- Allow for all cashiers : If this is unchecked you will have to specify which Clerk Groups can access this link.
- To configure the ‘Clerk Group’ for a link, select the link then click ‘Clerk Group Settings’.
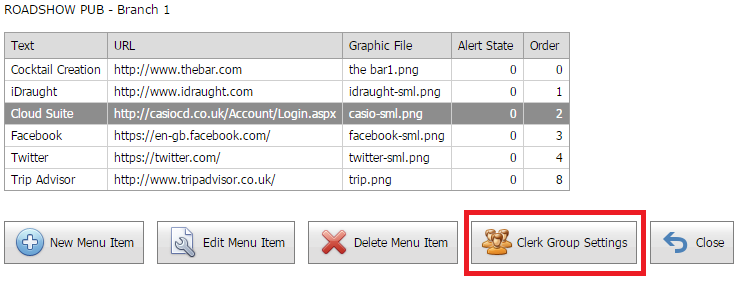
- You will see a list of ‘Clerk Groups’. Check the ‘Allowed’ box for each group who should have access to this link and then click ‘Save changes’.
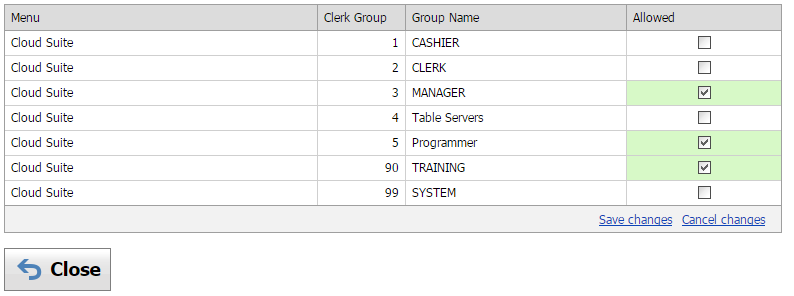
The changes are applied immediately and you can test it on the till as you go along.
- Click ‘Close’.
12 - Email Settings
‘Email Settings’ is a utility that allows you to configure the SMTP settings for the till which are used by the ‘Message Alerts Sender’ and ‘Stocktaker PLU Report’.
- Launch ‘Addons Settings’.
- Tap ‘Email Settings’.
- Complete the settings as described below:
- Smtp Login : This is usually your email address.
- Smtp Password : This is the password you use to access your email.
- Smtp Server : eg : ‘smtp.gmail.com’ for gmail. Get this from your email provider.
- Smtp Port : This is often ‘465’ or ‘587’ (for TLS). Get it from your email provider.
- Start TLS : Check with your email provider for this (often uses port 587).
- SMTP AUTH : Secure email. Tick if you use TLS.
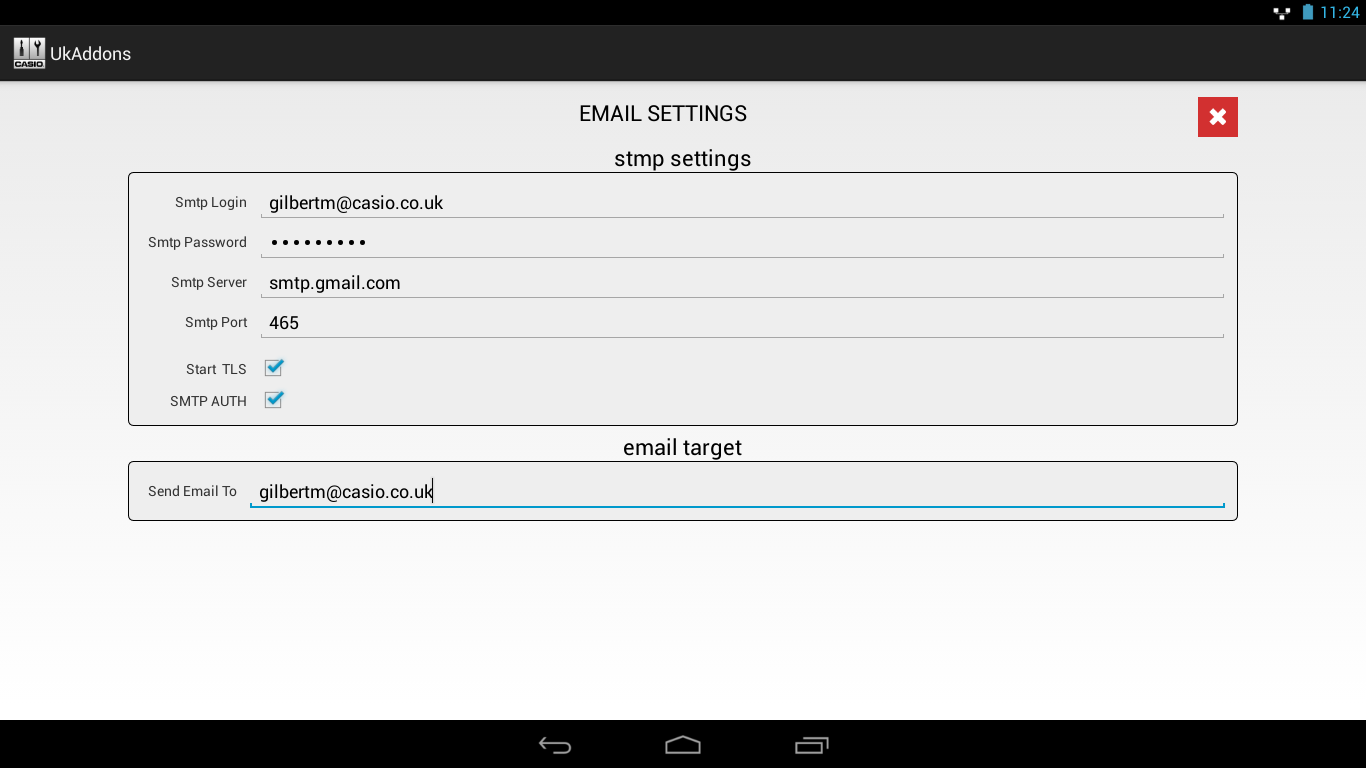
Enter the target email address in the ‘Send Email To:’ field. This address will receive the alerts generated by the ‘Message Alerts Sender’, if enabled.
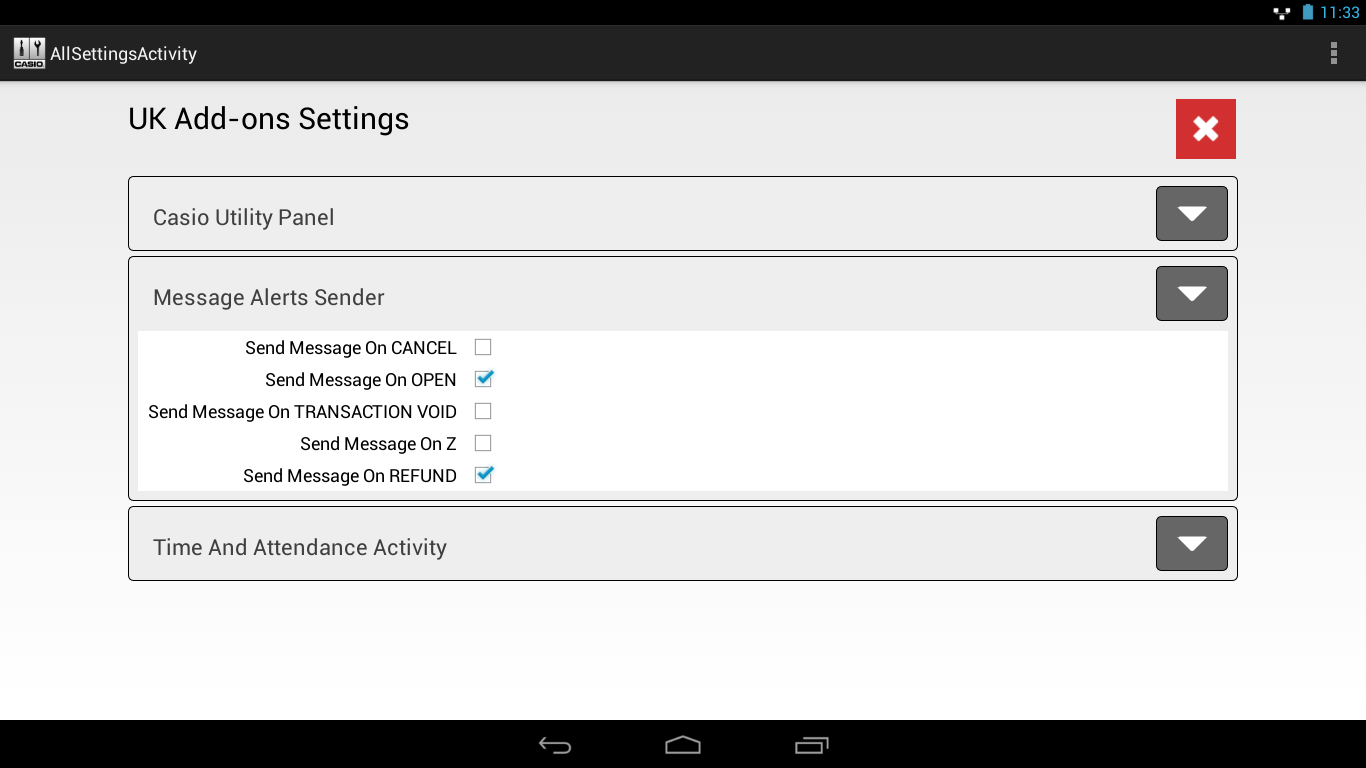
13 - Message Alerts Sender
‘Message Alerts Sender’ is a utility that can run in the background and will send alerts to a designated email address when certain events have occurred on the till. (e.g. Refunds).
- Configure the designated email address in the ‘Email Settings’ tool (see Section 12).
- Launch ‘Addons Settings’ and tap ‘Uk Add-ons Settings’.
- Tap the down arrow next to ‘Message Alerts Sender’ to open up the settings.
- The settings are easy to understand. Once you have ticked an option, the designated email address will receive an email alert when that event occurs on the till.
14 - Tickertape Alert Bar Service
The ‘Tickertape Alert Bar Service’ allows the till to receive a notification when it is necessary for an operator to perform an ‘OPEN’ operation on the till.
14.1 When are Alerts generated?
The alert message will be generated by the Cloud when a ‘Prepare Data for Sending’ operation is performed or if the ‘Auto Prepare Data’ feature is enabled and has invoked a ‘Prepare’. The former would occur if programming changes are made on the Cloud and the user manually prepares those changes for sending to the tills. The latter occurs if ‘Auto Prepare Data’ is enabled in the ‘Organisation’ screen on the Cloud for the customer site.

Manual ‘Prepare Data for Sending’ in ‘Programming’ section of the Cloud
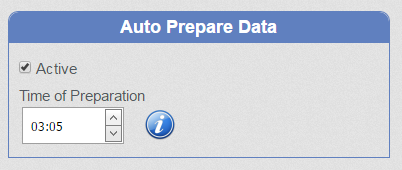
‘Auto Prepare Data’ is set in the ‘Organisation’ screen on the Cloud. This feature is often used to action price changes or Mix and Match offers for certain days. These Cloud changes will only be active if an ‘OPEN’ is performed on the till so the Alert system is a useful way to remind users that changes are pending and they need to do an ‘OPEN’..
14.2 Configuring Alerts in ‘Add-ons Settings’
- Launch ‘Add-ons Settings’ and tap ‘Uk Add-ons Settings’.
- Open the ‘Tickertape Alert Bar Service’ by tapping the down arrow next to it.

authorize Clerk Group: This is the list of Clerk Groups that are authorised to clear an Alert on the tilll. Each group code must be comma separated. By default, the line is blank which means that ALL clerks will have permission to clear an Alert. We recommend that, perhaps, Clerk Groups 3 (‘MANAGER’) and 99 ‘SYSTEM’ are authorised.
enable: Ticking this box enables the Alert system.
sound Notification Enabled: Tick this to enable an audible alert that an Alert message is pending.
sound Notification Interval Time in Seconds: Set the time period between alert sounds in seconds. - Enter your required settings and tap the white ‘Exit’ icon - .
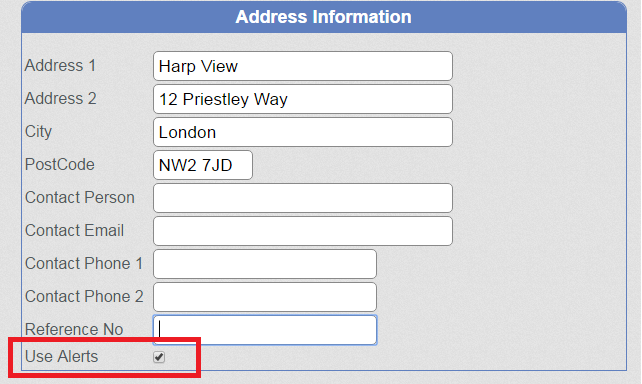
14.3 Configuring Alerts in the Cloud
- Log into the Cloud and click on the site for which you want to enable Alerts.
- Click ‘Branches’.
- Click the Branch for which you want to enable Alerts.
- Tick the ‘Use Alerts’ checkbox.
14.4 How Alerts work in operation on the till
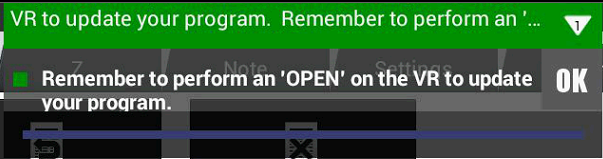
A small down arrow icon appears at the top of the screen to indicate that the Alerts systems is active.

When an Alert arrives, a scrolling message informs the user. “Remember to perform an ‘OPEN’ on the VR to update your program.”

Any user can “swipe down” the message to display it in full.
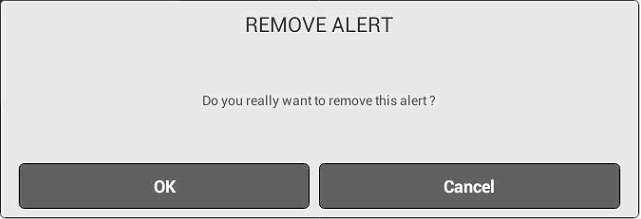
An authorized user can clear an Alert.
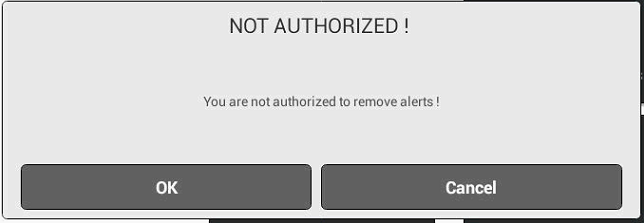
A non-authorized user cannot clear an Alert.
15 - Stocktaker PLU Report
‘UK Add-ons’ contains a utility that allows the user (e.g. a stocktaker) to print, email, save or just view the list of PLUs on the till.
The utility can print a report on the configured receipt printer or create a .txt , .csv or .pdf file which can be emailed, saved or opened. Note: If you want to open PDF reports on the till, you will need an Acrobat Reader program installed.
- Launch ‘Addons Settings’ and tap ‘PLU Stocktaker Report’’.

- Tap ‘PLUs Report by Department’.

- This will take you to the ‘PLUs REPORT BY DEPARTMENT’ screen.
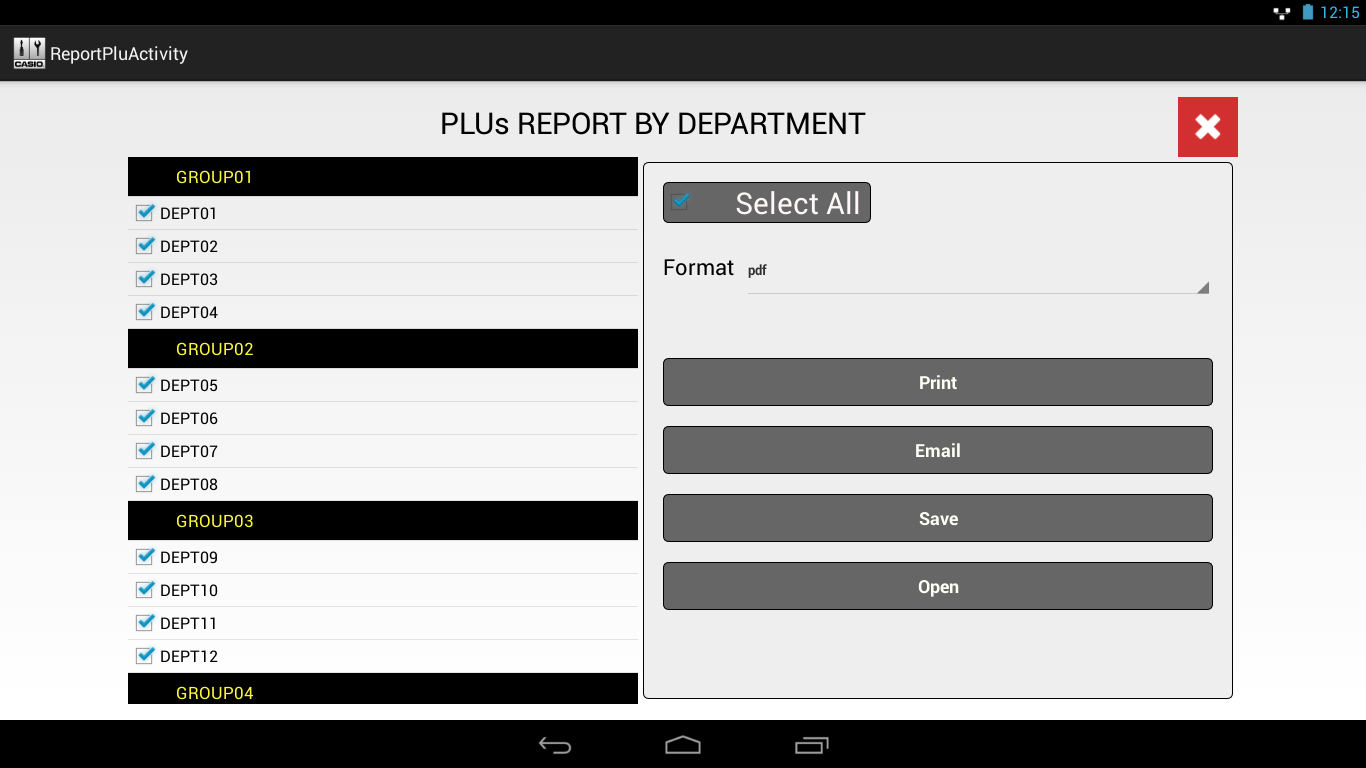
- Tick the Departments for which you want the reports. You can tap ‘Select All’ to select all the Departments. Tapping it again unticks all Departments. The departments are organised by ‘Group’.
- Specify the format in which you want the report to be generated by tapping on the ‘Format’ drop down list.
- esc : Select this format if you want to print the report on the receipt printer. Do not choose any of the other options below if you want to print the report on the receipt printer.
- txt : Select this format if you want a report as in text format that you will email, save or open for viewing.
- csv : Select this format if you want a report as a spreadsheet that you will email, save or open for viewing. CSV files can easily be opened in a spreadsheet application.
- pdf : Select this format if you want the report as a PDF document that you will email, save or open for viewing.
- Tap the relevant button to select the action you want to perform.
15.1 Add a shortcut icon for ‘PLUs REPORT’
You can add a shortcut icon for ‘PLUs REPORT’ on the ‘Z’ tab in the Cash Register application to make it easier to access. Follow these steps:
- Go to the ‘System’ tab.
- Tap ‘DB MANAGEMENT’.
- Tap ‘Script Execution’.
- Tap ‘Browse’.
- Tap ‘PutPLusReportButtonOnZTab.sql’.
- Tap ‘Decision’.
- Tap ‘Execute’.
- You will be asked to confirm. Tap ‘OK’.
- Tap ‘Close’ then ‘Back’.
- Tap ‘Close’.
- You will be asked to confirm a reboot. Tap ‘OK’.
Take care if you choose to open reports in, for example, ‘MemoText’ as you will not be able to exit the application to get back to the Cash Register application if you have launched the utility from the ‘Z’ tab.
16 - Casio/Ingenico EFT Integration
Please note that this system is no longer available for sale. These instructions are retained in case they are needed for existing customers only. For an integrated EFT solution, please refer to the Paymentsense solution.
‘UK Add-ons’ contains a module that integrates the Ingenico iPP350 PED (PIN Entry Device) with the Casio Cash Register application to facilitate card payments when the transaction is finalised. This feature works in conjunction with the acquirer, WorldPay.
Using this system the user can select a pre-configured ‘CARD’ key (it can be called anything you like) on the ‘Payment’ screen and the card transaction is then performed on the iPP350 PED. If the card payment is authorised successfully, the transaction is finalised automatically in the Cash Register application. At all stages during the payment process, information is presented to the clerk on the till and to their customer on the iPP350.
The receipts (merchant and customer copies) are printed by the Cash Register (on the ‘Receipt’ printer) as the iPP350 does not have a printer. The following payment operations are supported:
- Chip and PIN
- Chip and Sign
- Swipe and Sign
- Contactless
- Refunds and Cash Back
The purpose of this guide is to show you how to set up the equipment and configure the Cash Register application to handle card payments. Before following the instructions on the following pages, you should have:
- A Worldpay merchant account for your customer.
- The ‘Merchant Identification Number’ (MID) that will have been issued to you by Worldpay.
- A configured iPP350, sent to you from Ingenico.
- Raspberry Pi Model B+ OR Raspberry Pi 2 Model B, case and power supply.
- microSDHC card with SD Adaptor.
For more information about specific payment operations, and some FAQs, please refer to the document ‘Guidance Notes - Ingenico_Worldpay EFT.pdf’ which is available on the dealer website. Alternatively, you will find the same information in our Till Knowledge Base as individual FAQs.
16.1 Configuring the Raspberry Pi
The communication between the Cash Register and the Ingenico iPP350 PED uses IP protocol. The Raspberry PI acts as an IP bridge between them and, once configured, operates seamlessly between the Cash Register and iPP350.
When the Raspberry Pi is powered on, it boots from a microSD card. Casio have developed an OS image for the Raspberry Pi that is fully configured to work as an IP bridge in this system. You need to load this OS image onto the microSD card and then boot the Raspberry Pi using this card. You only need to follow steps 1-4 once (unless Casio notify you of an image update); you will need to follow steps 5-9 each time you configure a Raspberry Pi.
You need a Windows PC with a microSD card slot (or SD card slot if you are using an adaptor).
- In a browser, go to one of the following links depending on the model of Raspberry Pi you are using:
Pi Model B+: http://addons.casiocs.co.uk/downloads/raspberrypi/sd_raspberry_pi_model_Bplus.zip
Pi 2 Model B: http://addons.casiocs.co.uk/downloads/raspberrypi/sd_raspberry_pi2_model_B.zip
This will download a compressed file (a .zip file) to your PC. - Extract the file to a suitable location on the PC. The file you now have will be called either ‘sd_raspberry_pi_Bplus.img’ or ‘sd_raspberry_pi2_modelB.img’ (depends on Pi version).
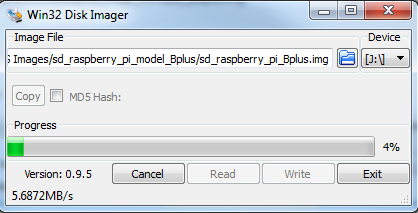
- In a browser, go to http://addons.casiocs.co.uk/downloads/raspberrypi/Win32DiskImager-0.9.5-install.exe. This will download ‘Win32DiskImager-0.9.5-install.exe’ to your PC.
- Run the exe file and follow the instructions to install the tool on your PC.
- Insert the microSD card into your card reader and run ‘Win32DiskImager’.
- Click the blue ‘Folder’ icon and navigate to the location in which you stored the .img file. Highlight the file and click ‘Open’.
- Make sure the ‘Device’ drive letter is the location of your microSD card.
- Click ‘Write’ to load the OS image to the card. This process should take 10 minutes or so.
- Once completed, insert the microSD card into the Raspberry Pi and move on to the next section.
16.2 Setting up the Hardware
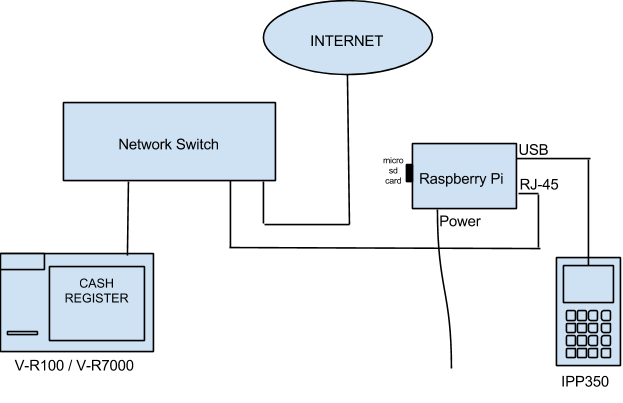
- Connect the Raspberry Pi to the local network (via a Switch) with an RJ-45 lead.
- Connect the iPP350 to a USB port on the Raspberry Pi.
- Connect the local network to the internet.
- Connect the power supply to the Raspberry Pi.
- Connect the Cash Register to the same network as the Raspberry Pi.*
* The Raspberry Pi must obtain its IP address via DHCP. The Cash Registers and other EPoS equipment (e.g. LAN printers) usually use static IP addresses because their addresses must not change. Therefore, you will need to ensure that a DHCP server is present on the network and is configured to assign IP addresses within the same network range as those assigned to the EPoS equipment.
The first time you power up the iPP350, it will ask you to input the ‘Merchant Identification Number’ and then go through an initialisation process followed by a re-boot. It requires internet access to do this so make sure you have followed all the steps above in the correct order.
When the PED is ready for use, it will display ‘READY’ and show the ‘Merchant number”.
16.3 Setting up the Software
- If you have not already done so, install the ‘UK Add-ons’ application on the Cash Register. (See Section 1). This guide assumes you have installed and configured the Cash Register application and DTEX program (if using Cloud) via ‘UK Add-ons’ already.
IMPORTANT: If an earlier version of ‘UK Add-ons’ has been installed, you must uninstall it and install version 3.0 or later. To uninstall, exit from the Cash Register application to the Android desktop and go to ‘Settings-Apps’. Scroll to the bottom of the list and tap ‘UkAddons’ then tap ‘Uninstall’ followed by ‘OK’ when prompted. Follow the steps in Section 1 to install the new version then pick up from step 2 below.
- Run the script ‘ConfigureCreditCardPaymentLink.sql’ from inside the Cash Register application by following these steps (if you do not have the script file, it can be downloaded from the dealer website. Make sure you have the latest version.):
- Go to the ‘System’ tab.
- Tap ‘DB MANAGEMENT’.
- Tap ‘Script Execution’.
- Tap ‘Browse’.
- Tap ‘ConfigureCreditCardPaymentLink.sql’.
- Tap ‘Decision’.
- Tap ‘Execute’.
- You will be asked to confirm. Tap ‘OK’.
- Tap ‘Close’ then ‘Back’.
- Tap ‘Close’.
- You will be asked to confirm a reboot. Tap ‘OK’.
- Go to the ‘System’ tab and tap ‘Add-ons Settings’ then tap ‘Card Terminal Settings’.
- At the top of the screen is a drop down menu that reads ‘0 - No EFT’ by default. Tap this and select ‘Ingenico iPP350 through IP’.
- In the ‘Options’ section, check ‘Print on ECR’. This ensures that credit card receipts will use the Receipt printer that is configured on the Casio till.
- In the ‘Network Settings’ section, enter the serial number of the iPP350 in the ‘PED Serial Number’ field. You should find this on the back of the iPP350, marked as ‘Serial N:’. You do not need to enter an IP address as it will be detected when initiating the first transaction.
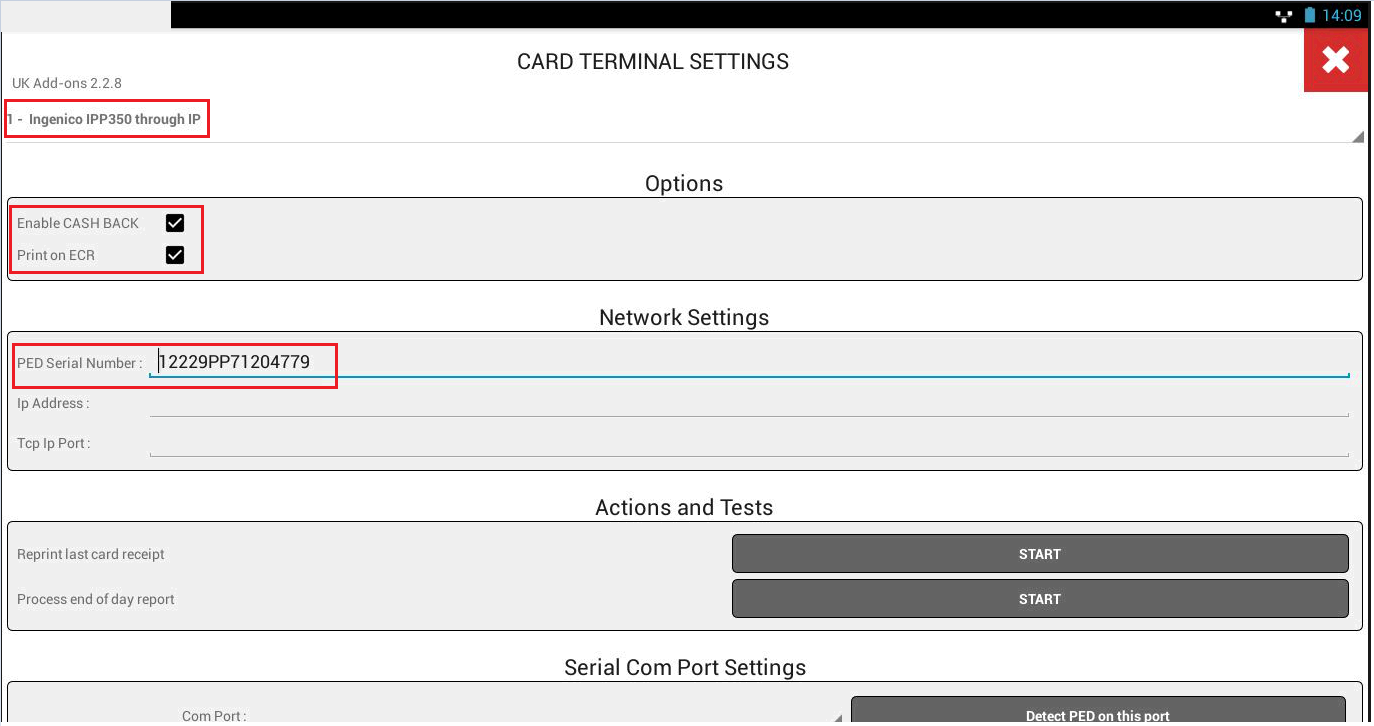
- If you require cash back, check ‘Enable CASH BACK’. This option must be configured on the iPP350 so be sure to request that this is enabled when you order the iPP350.
- You can ignore the other settings. Tap the ‘Exit’ key (
 ) and then again on the next screen.
16.4 Configure a key to be the ‘CREDIT’ key
You must configure a ‘CREDIT’’ key on the ‘Payment’ screen of the Cash Register application, so that it is linked to the ‘UK Add-ons’ application which controls the iPP350 during the payment process. The key can be called whatever you like but ‘CARD’’ would be a good choice. The underlying ‘function’ of the key uses the term ‘CREDIT’.
If you are using the Casio Cloud Suite you must configure the key on the Cloud, ‘Prepare Data for Sending’ and then do an ‘Open’ on the till to import the changes (see Section 16.4.1). If you are not using the Cloud you have to configure the key directly on the till using the “Function Key” option in ‘Control Panel’ (see Section 16.4.2)
16.4.1 Configuring the ‘CREDIT’ key from the Cloud
Note: Individual keyboards are assigned to tills by going to ‘Branches’, clicking the Branch, clicking the ‘Tills’ button then the name of the Till in the list. Finally, select the keyboard to assign from the ‘Keyboard’ drop down list.
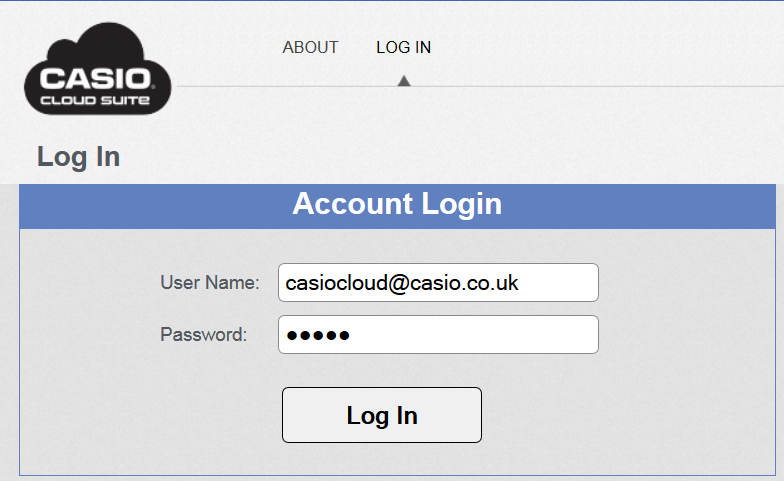
- Log in to your account on the Casio Cloud Suite and select the customer site from the list.
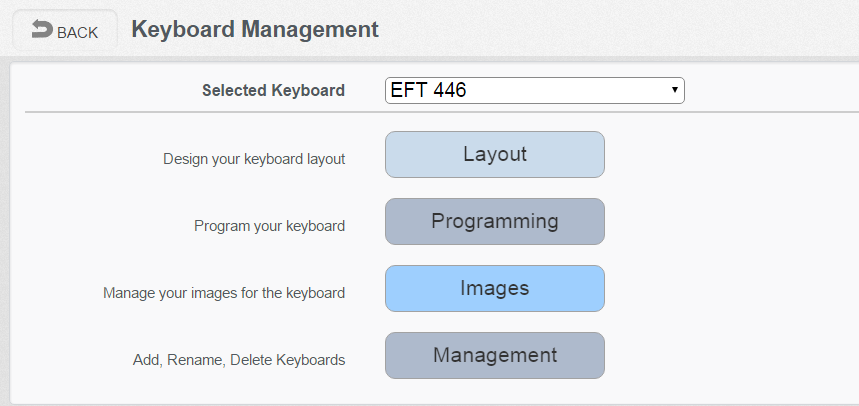
- Go to ‘PROGRAMMING - Keyboard’. Select the keyboard you want to edit from the ‘Selected Keyboard’ drop down list. You can edit one of the default keyboards or work on one you have created yourself. Click ‘Programming’.
- Select ‘Finalise’ from the ‘Department’ drop down list (top left, under the ‘Save/Cancel’ buttons).
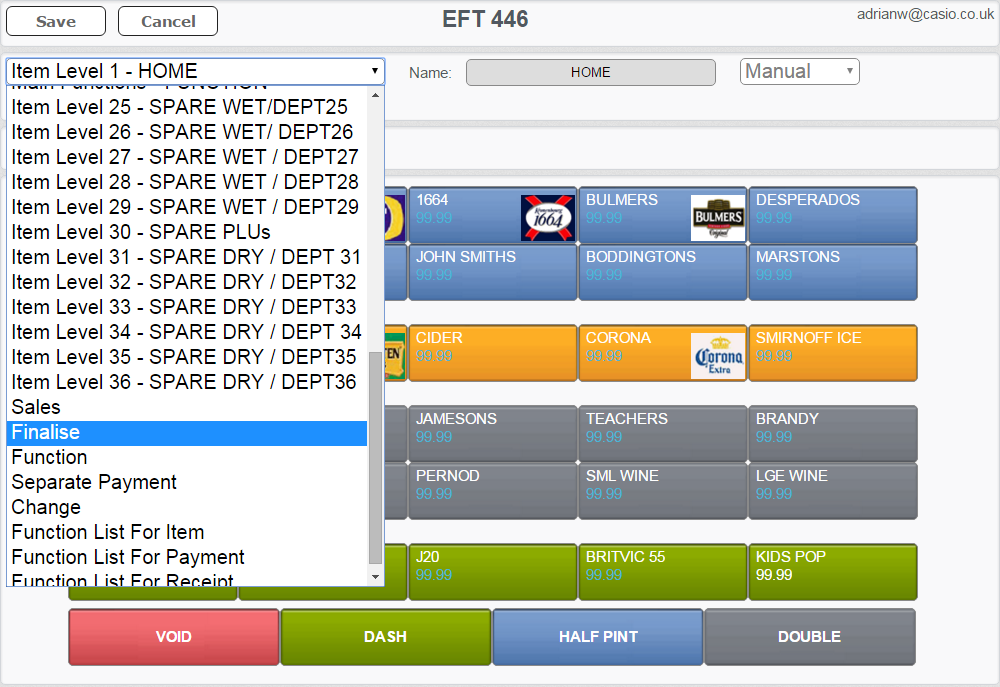
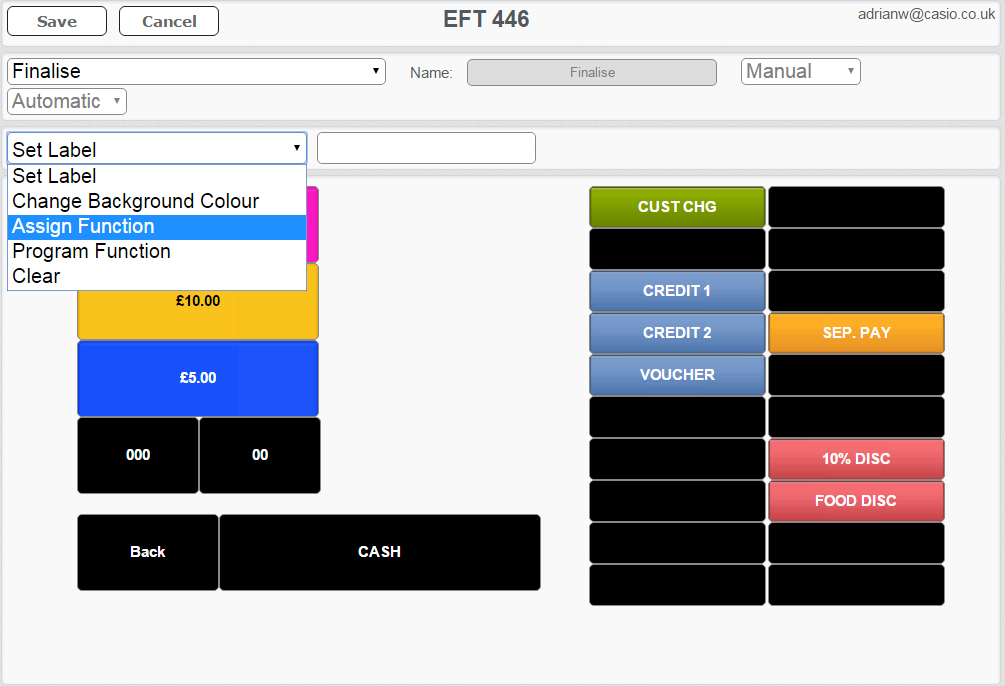
- The ‘Finalise’ screen will be displayed. Select ‘Assign Function’ from the ‘Action’ drop down list (the one immediately under the list you used in step 3).
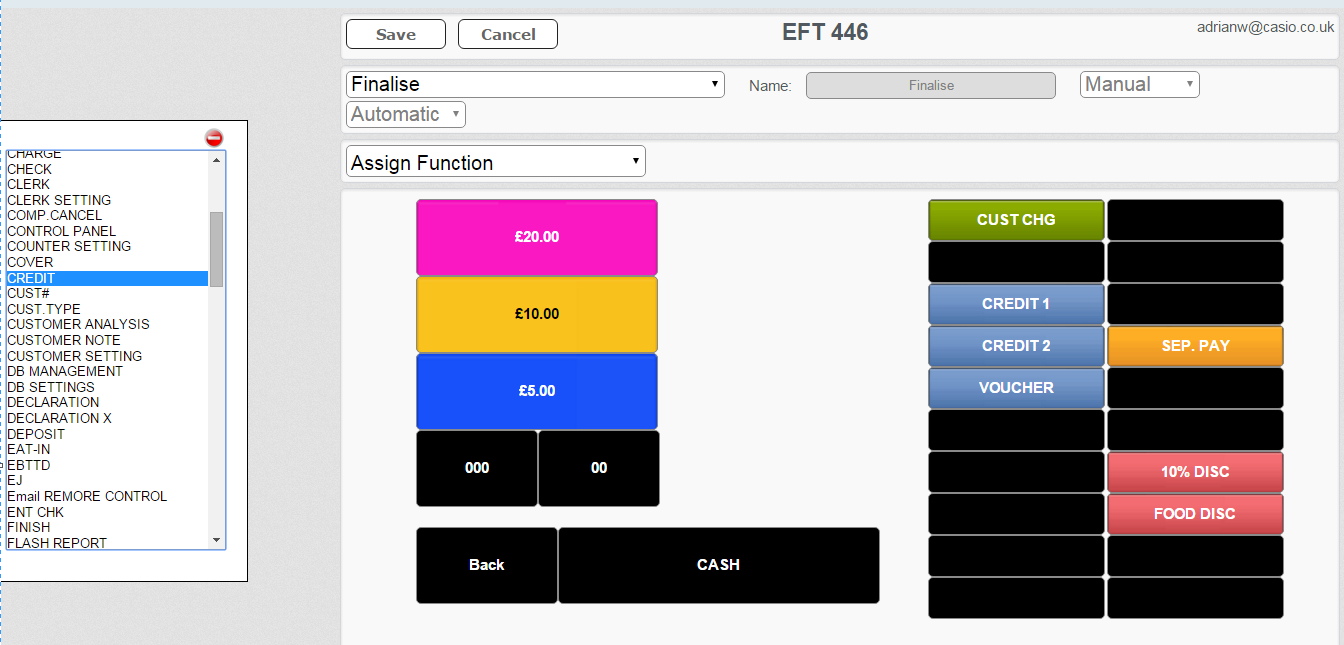
- A panel will appear on the left side of the screen - click this panel to display the list of action options and select ‘CREDIT’.
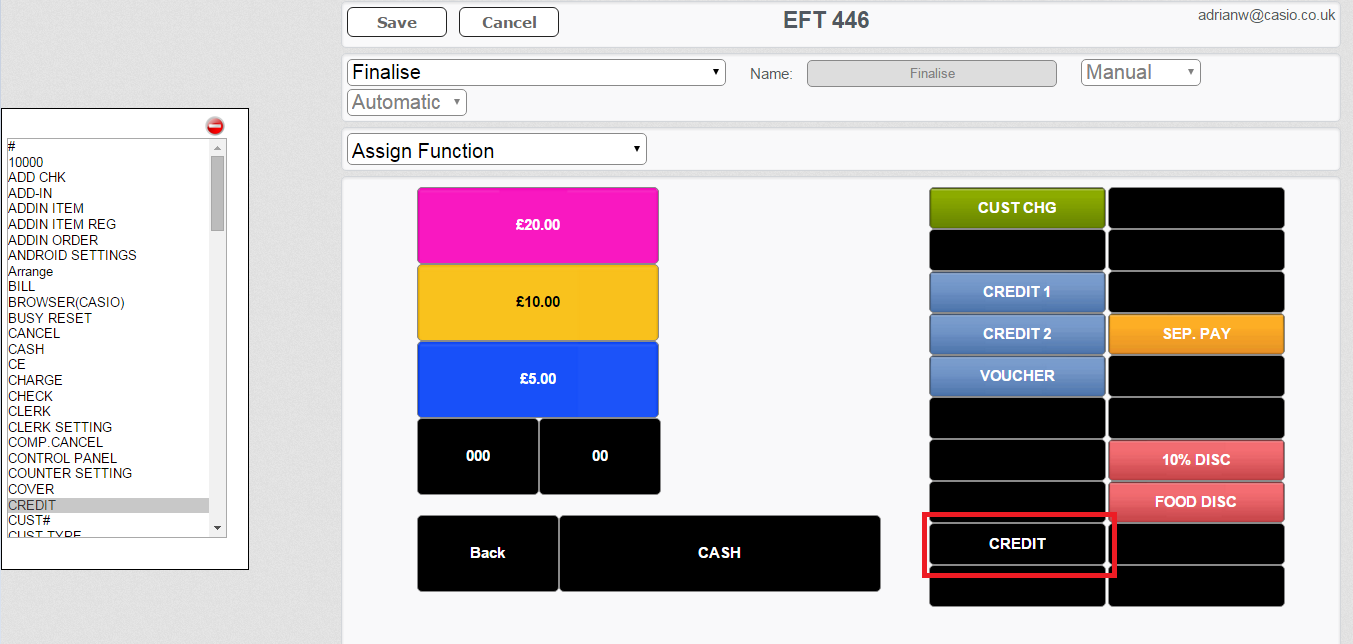
- On the right side, click the key that you want to assign as the ‘CREDIT’ key. The word ‘CREDIT’ will appear on this key.
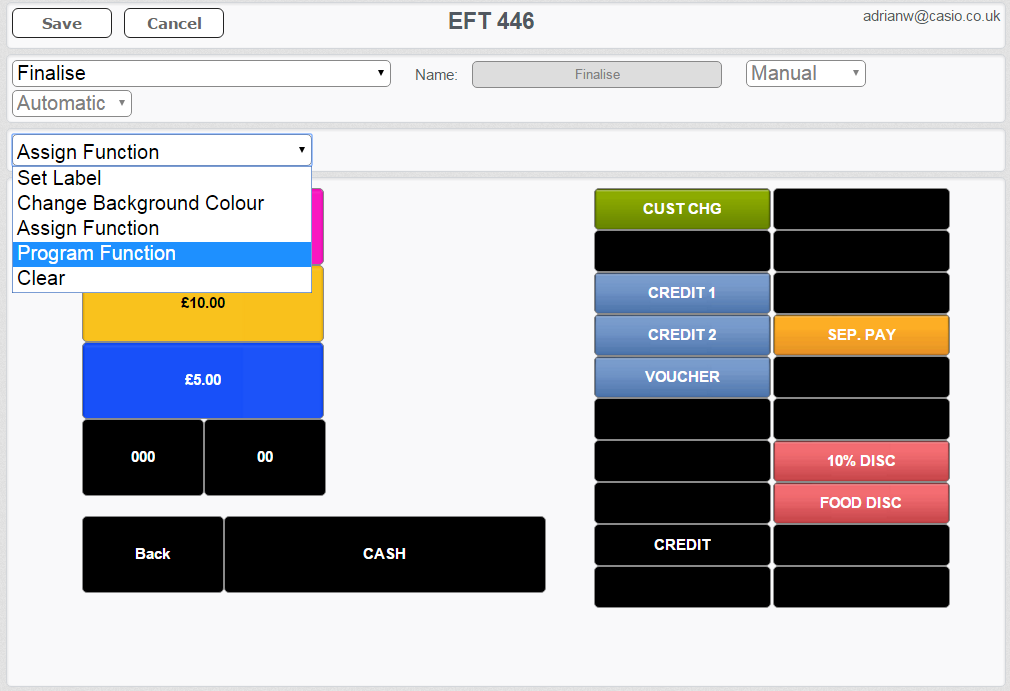
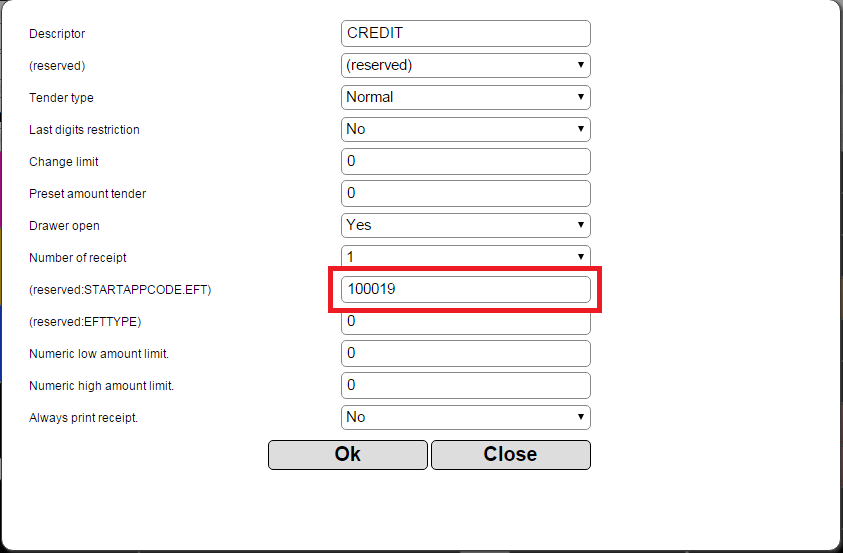
- From the ‘Action’ dropdown list, select ‘Program Function’ and click on the ‘CREDIT’ key again.
- Another settings screen will be displayed. Change the ‘(reserved:STARTAPPCODE.EFT)’ field to ‘100019’. Click ‘Ok’.
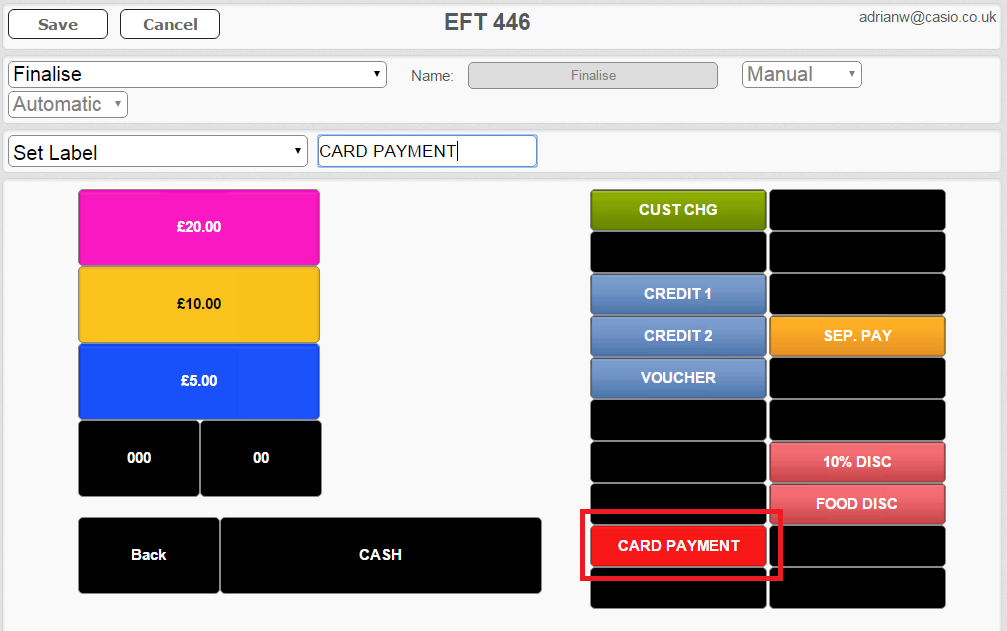
- From the ‘Action’ drop down list, select ‘Set Label’.
- Type a suitable name for the key in the box to the right and click the ‘CREDIT’ key. The button label will change accordingly.
- Following the same principles, you can change the background colour for the key too if desired.
- Click ‘Save’ (at the top left of the screen). Click ‘OK’ when prompted to confirm your changes.
- Click ‘Back’ and then click ‘Prepare Data for Sending’. This will prepare a new CRX containing your settings.
- Perform an ‘OPEN’ on the till (in the ‘Register’ tab) and reboot the till when this has completed. This will add the ‘CREDIT’ key on the till which will be now linked to the iPP350 PED.
16.4.2 Configuring the ‘CREDIT’ key on the Cash Register (No Cloud)
- Go to ‘Settings - REG SETTINGS - Function - Function Key’.
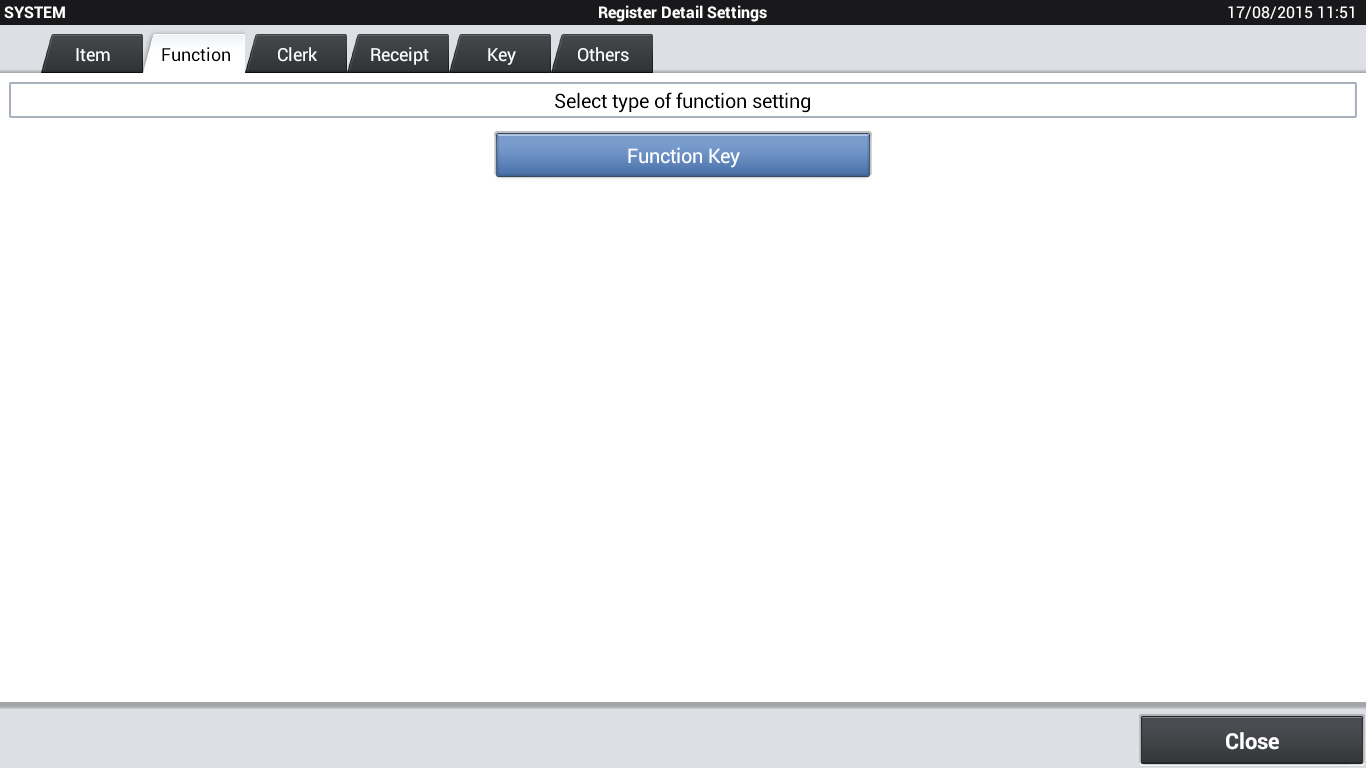
- Select ‘Function Key’ from the menu.
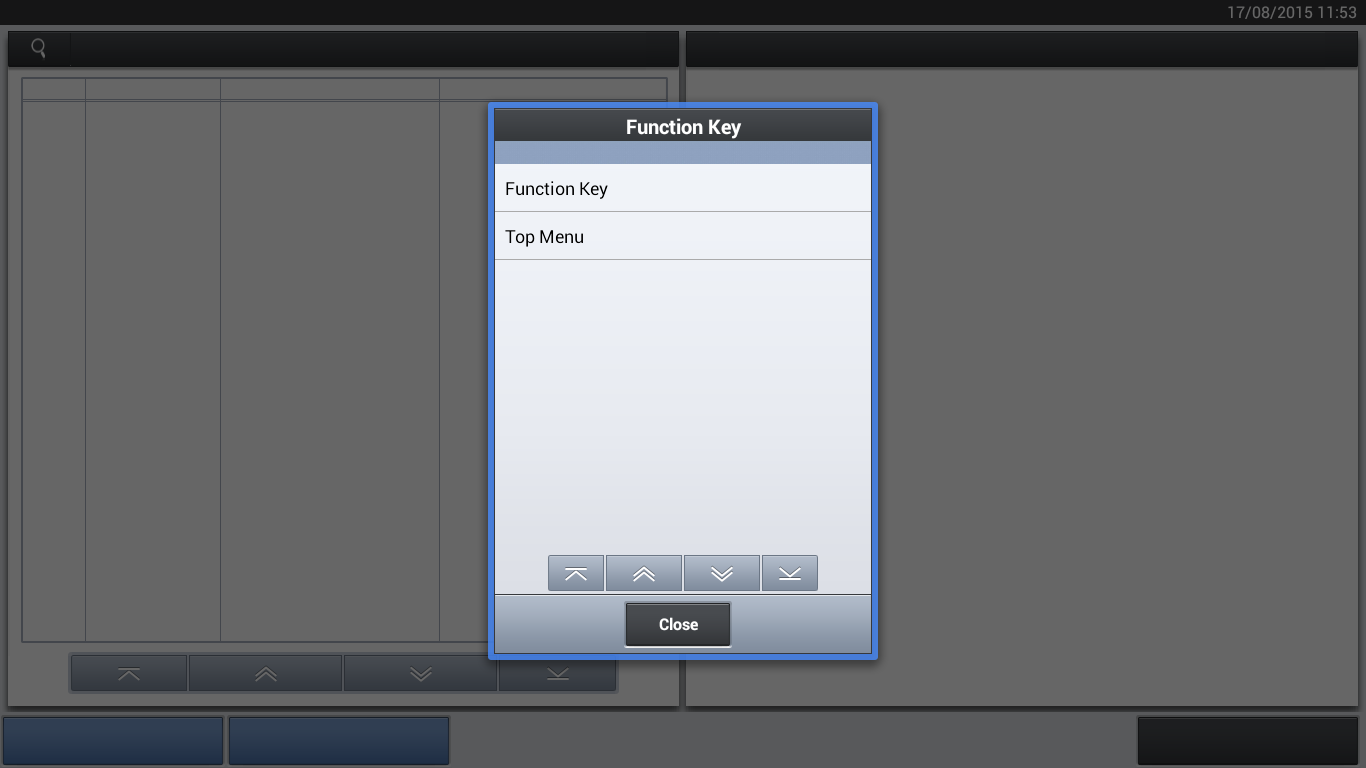
- Tap ‘Location’.
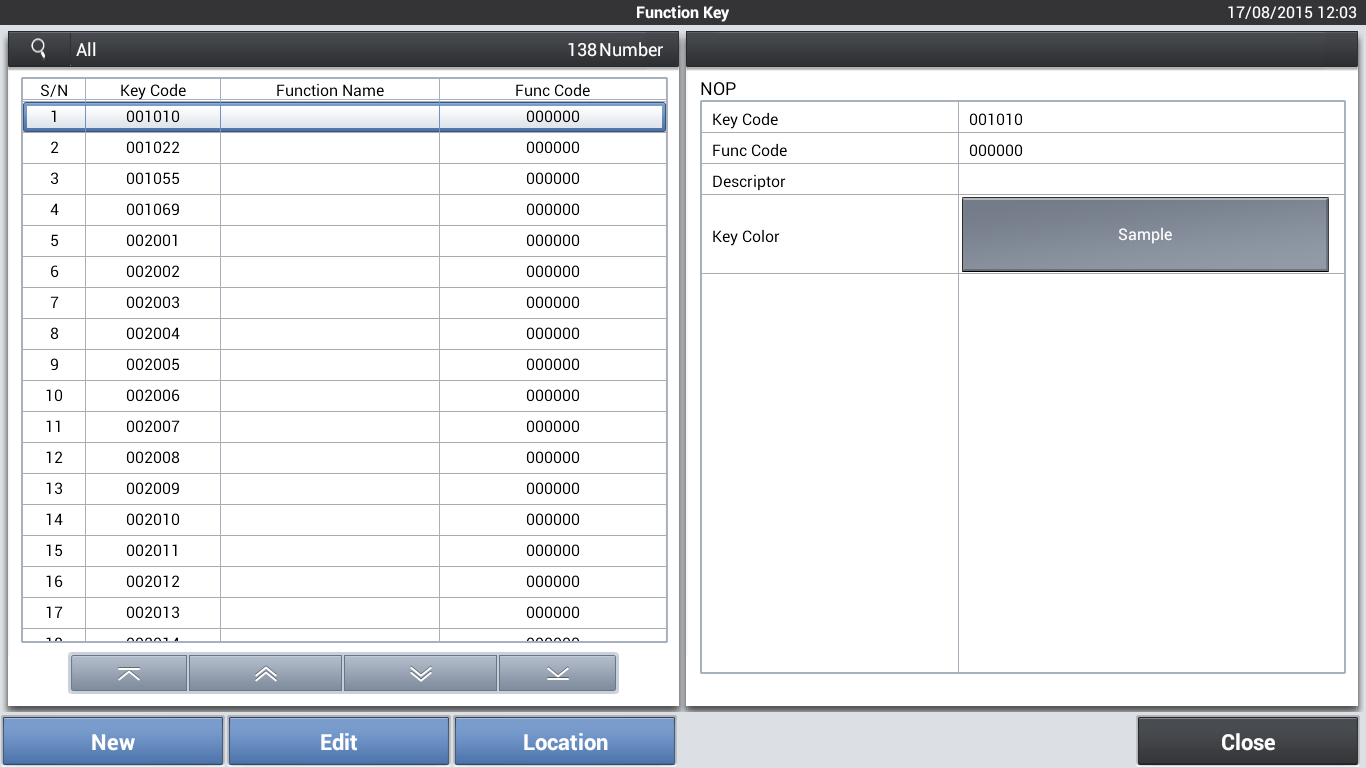
- The various screens in the Cash Register application will be displayed graphically, just as they appear in the application. Select the area where the ‘CREDIT’ key will appear (‘Finalize screen’)
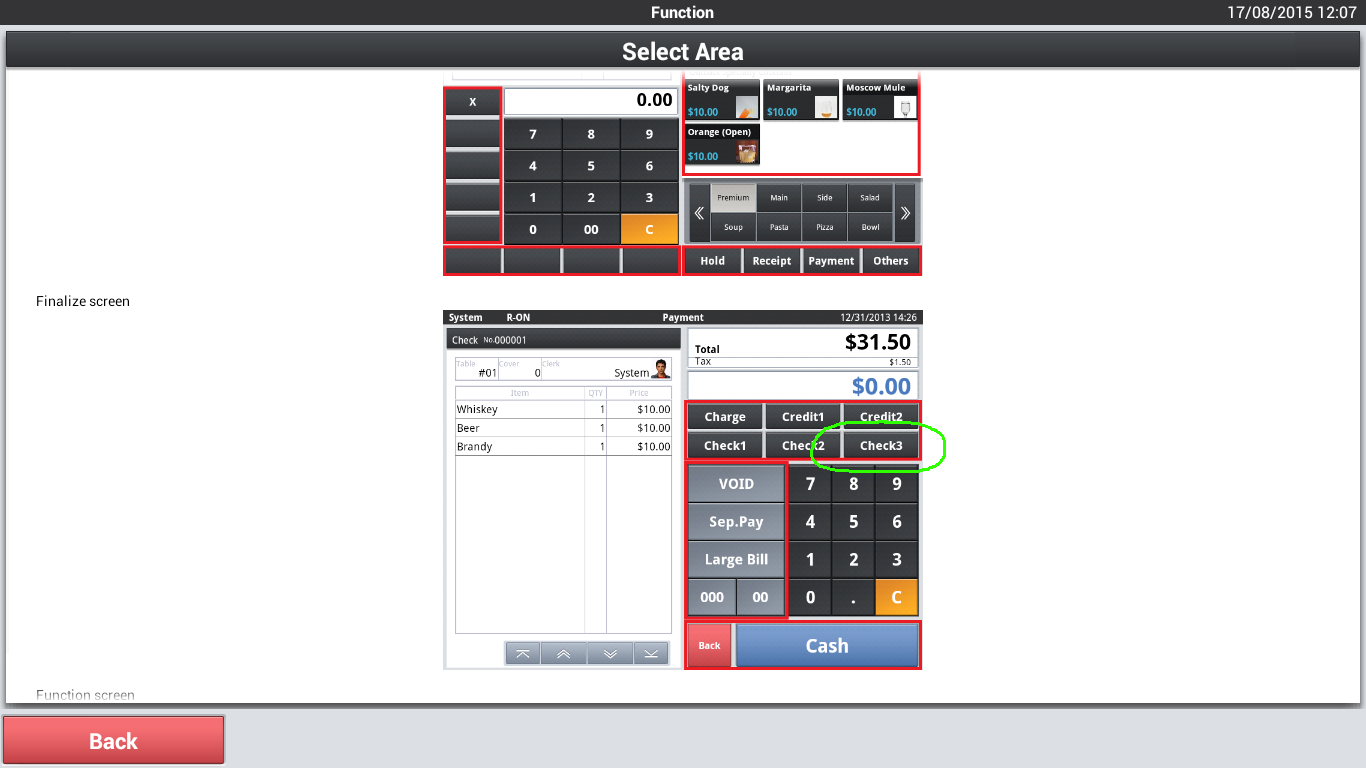
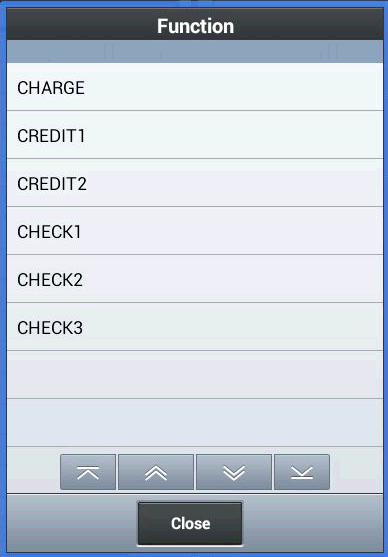
- A list of keys in that area will appear. Tap an available key.
- You now need to edit some of the settings for this key on the right hand side. Set the ‘Func Code’ to ‘000004’ and the ‘Descriptor’ to ‘CREDIT’ (you may use another name).
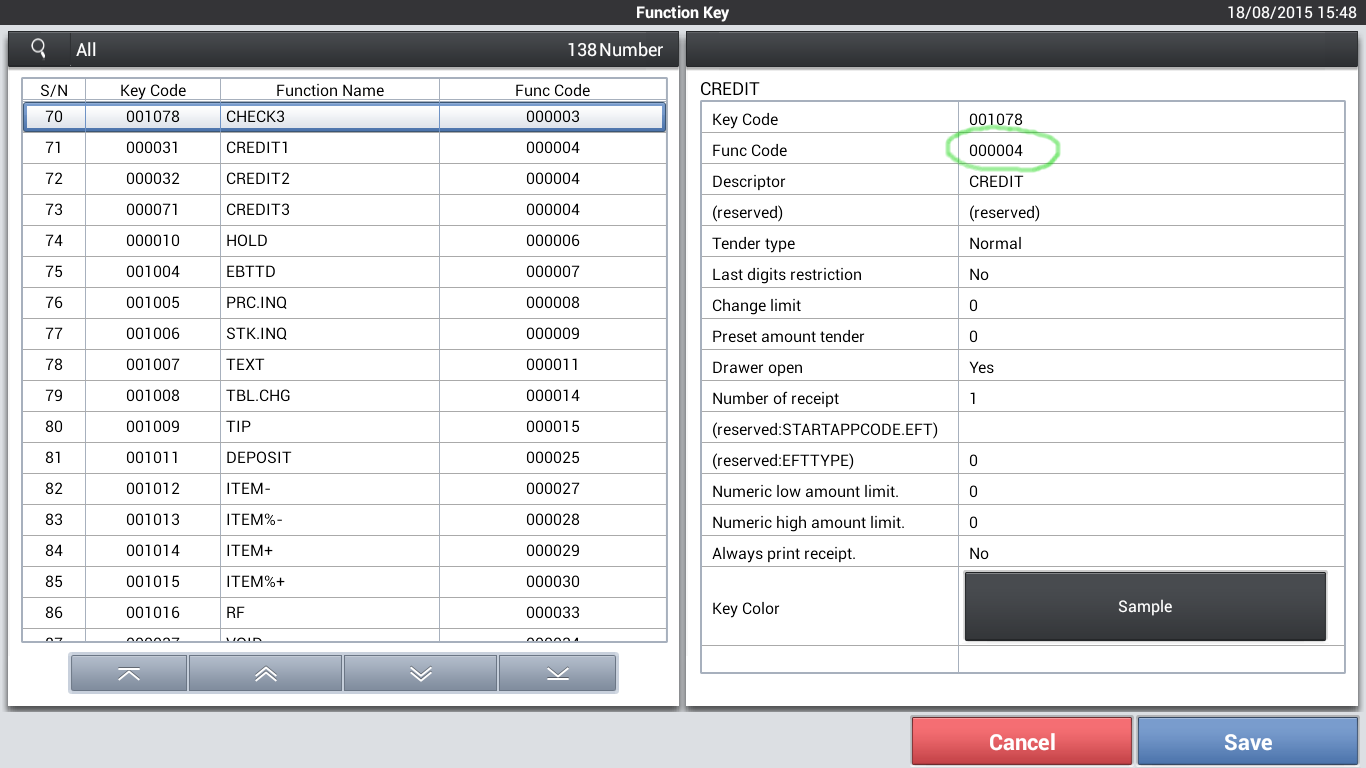
- Set the ‘(reserved:STARTAPPCODE.EFT)’ field to ‘100019’.
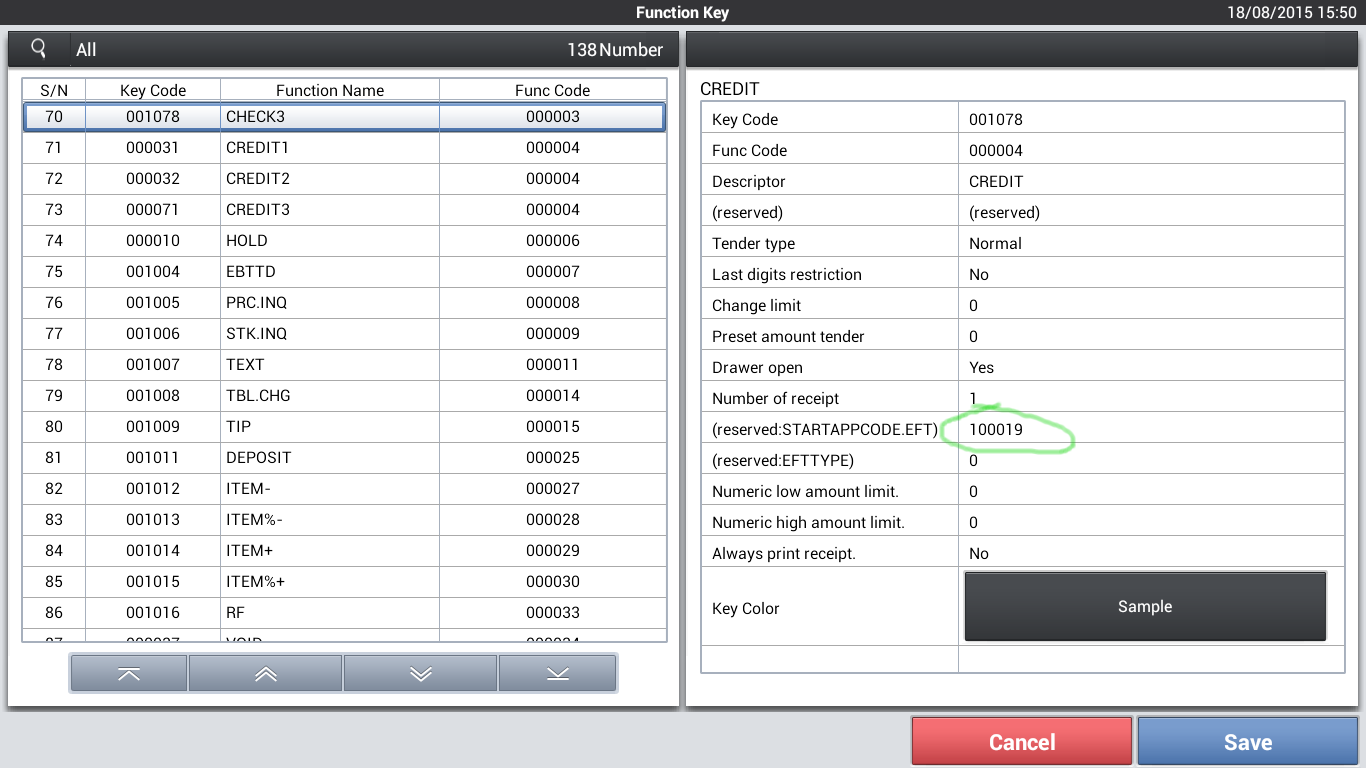
- Tap ‘Save’ then ‘Close’ and then ‘Close’ again.
16.5 Using the EFT payment option on the Cash Register
When you finalise a transaction, tap the ‘CARD’’ key (or whatever you have called it) to initiate a card payment. The first time you do this the application will display the message ‘Checking Card Terminal status’ for a while as it detects the Raspberry Pi on the network. This will only happen the first time and, after that, only if the IP address of the Raspberry Pi has changed (remember, the Raspberry Pi must obtain its IP address via DHCP so the address may change at some stage). It may take a minute or so for the application to finish this process.
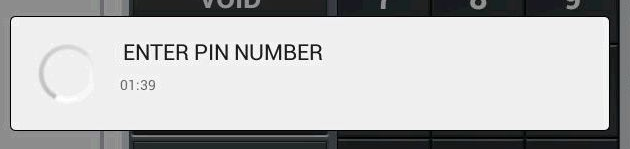
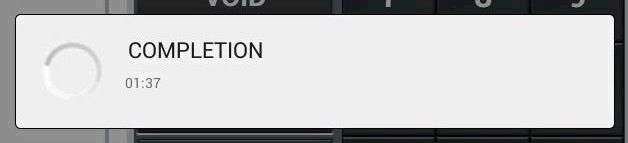
On subsequent occasions (unless Cash Back is enabled), the till and PED will immediately display ‘INSERT CARD’ and, as the customer progresses through the steps, relevant prompts are shown on till and PED as shown below. At each step there is a 2 minute timeout period for the customer to complete the action. If the timeout period expires, the transaction is cancelled.
16.6 Reprinting the last credit card receipt
Follow exactly the same steps as in Section 16.4 where you configured the ‘CREDIT’ key. However, set the ‘STARTAPPCODE.EFT’ field to ‘300048’ and name the key something like ‘CARD RECEIPT’.
When the clerk taps this key, the system will interrogate the iPP350 to obtain the last transaction details and will then print the last customer and merchant receipt again (but not the till receipt; use the Electronic Journal if you need to re-print this).
16.7 Enabling ‘CASH BACK’ (and a consideration when using Contactless payment)
In order to enable cash back you must ensure that the iPP350 has been configured for cash back. This must be done when the PED is ordered so be sure to request this option when ordering the PED. If you request this feature later, charges will be incurred for changing the configuration.
Set the ‘Enable CASH BACK’ check box in the ‘Card Terminal Settings’ in ‘Add-ons Settings’.

See Section 16.3, ‘Setting up the Software’ for details.
When you tap ‘CREDIT’, and cash back is enabled, the iPP350 will check to see if the card is eligible and the cash back limit (this data is on the card so the card must be inserted for this to happen). It will then prompt the merchant to enter the cash back amount or tap ‘No cash back’.
When a customer wishes to pay with contactless (which does not allow cash back), the merchant should press ‘CANCEL’ on the iPP350 after tapping the ‘CREDIT’ key so that it skips the cash back checks and proceeds directly to the prompts for contactless payment. If this is not done, the customer will have to wait for about 20 seconds for the cash back check to time out before they can proceed with the contactless payment (the iPP350 beeps when it has interacted with the contactless card).
16.8. ‘Operator mistake’ on the till when you tap the ‘CREDIT’ key (Cloud users)
If you see the ‘Operator mistake’ error message when you tap the ‘CREDIT’ key it means that you have somehow configured two keys to act as card payment keys on the ‘Finalise’ screen. You will have another key on that screen that should work. Once you have identified the incorrect key, you should use the settings in the Casio Cloud to remove the ‘100019’ setting from its ‘reserved:STARTAPPCODE.EFT’ field.
16.9. ‘ERROR (-1)’ is displayed when you tap ‘Save’ after setting up a ‘CREDIT’ key (non-Cloud users)
This means that you already have a ‘CREDIT’ key set up on the till. Only one ‘100019’ key is allowed. From the ‘Function Key’ list on the left, identify which key is already set up as a ‘CREDIT’ key, decide which one you want to keep and delete the ‘100019’ setting from the other one.
16.10. Precautions when using Dallas Keys (iButton)
If any of the EFT payment dialogs are currently displayed on the screen (those shown in Section 16.5), the user must not remove their Dallas Key. The detection of Dallas Key events is not possible whilst the payment process in ongoing. If the Dallas Key is removed during the process, and the same one is not re-attached, the till may display an ‘Operator Mistake’ error message until the original Dallas Key is re-attached.
Therefore, users should be trained to not remove their Dallas Key when processing an EFT payment.
16.11. ‘Paper out’ errors if a ‘Swipe and Sign’ transaction is in progress
If a customer’s card only supports signature (and not Chip and PIN), the till needs to print a slip for the customer to sign during the transaction process. If there is an error condition on the printer when the till attempts to print this slip, it will not be able to display an error message.
Therefore, users should be trained to rectify any printer error conditions (most likely, the paper has run out) if a signature is required and nothing is output from the printer. In general, till rolls that feature red marker lines to indicate that the roll is nearly used up should be used and users should be trained to change the roll when they appear.
16.12. Further Reading and Troubleshooting
Refer to ‘Guidance Notes - Ingenico_Worldpay EFT.pdf’ or the ‘Till Knowledge Base’ which are both available on the dealer website (http://sa.casiopartners.co.uk/ ) for further operation instructions and troubleshooting information.
17 - Import from older models (Import Tool)
This tool allows you to import Groups, Departments and PLUs from data files obtained from older Casio models. It can save you a considerable amount of time when migrating an existing customer from an old till to either V-R100 or V-R7000. It also allows you to import CSV format files which means that data exported from non-Casio tills can also be imported.
This tool works for pre-ERA versions of the cash register application.The tool can import data directly from the following models:
TE-3000 QT-6000 QT-6100 QT-6600 TE-4000 TE-4500
QT-2100 TE-8000 TE-8500
The following file formats are also supported:
- CSV (Comma Separated Value)
- Casio.txt files (These are files created using the ‘C_comw’ tool)
Preparation of the V-R range till in advance: - For the best and quickest results your base program should have all the keyboards set to automatic layout and linked to appropriate departments .
For example, from the Installation program on the V-R, select ‘Initialize Database -> New Install Application and Database’ and then ‘Standard for automatic layout’.
17.1. Backing up the older Casio till
17.1.1 QT-6600/QT6100/QT6000
- Log on with a Clerk who has permissions to go to all modes.
- Press the ‘Mode’ button.
- Press the ‘CF Card’ button.
- Select ‘Data Backup’.
- Select ‘Individual File’.
- Select ‘PLU’.
- Accept the default description of ‘FILE004P.004’.
- Confirm that you wish to backup.
- When finished, press ESC key.
- Repeat from step 6 but select ‘Department’.
- Repeat from step 6 but select ‘Group’.
17.1.2 QT-2100/TE8000/TE8500
- Log on with a Clerk who has permissions to go to all modes.
- Press ‘Mode X 5’ button.
- Press ‘CF Card’ button.
- Select ‘Data Backup’.
- Select ‘Individual File’.
- Select ‘PLU’.
- Accept the default description of ‘FILE004P.004’.
- Confirm that you wish to backup.
- When finished press ‘ESC’ key.
- Repeat from step 6 but select ‘Department’.
- Repeat from step 6 but select ‘Group’.
17.1.3 TE4500/TE4000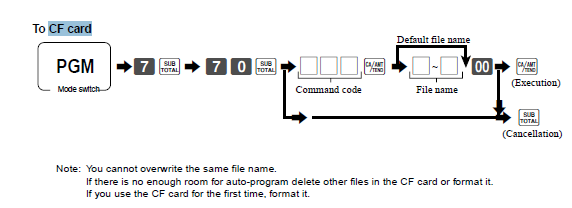
Follow the above procedure and use the following Command FILE numbers:
4 = PLU. 5 = Department. 6 = Group
Important: Use the default file names by pressing the ‘Double zero’ and ‘Cash’.
17.2 Format of CSV files
The Import utility can import a ‘comma separated value’ file. Most tills will be able to either export to such a file or have some kind of intermediate software that will take till data and convert it to CSV format. The tools needs separate CSV files for the Groups, Departments and PLUs. See Section 16.8 for details.
17.3 Creating Casio.txt files
Casio .txt files are generated when the ‘C_comw’ program is used to collect the files. For full details see the manual for this program. However, the basic steps are as follows:
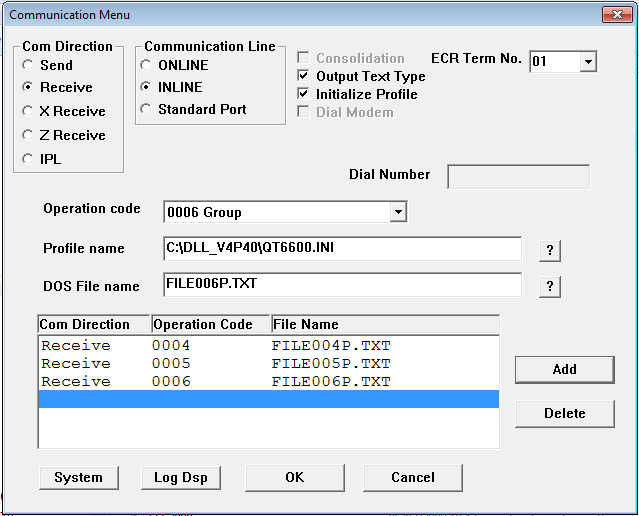
- Run ‘Program C_comw.exe’
- Set ‘Com Direction’ to ‘Receive’.
- Set ‘Communication Line’ to ‘INLINE’ for ‘TCP/IP’ or ‘ONLINE’ for ‘RS232’
- Tick the ‘Output Text Type’ box.
- If ‘INLINE’ is set, select the ‘ECR Term No.’
- Select the ‘Profile name’ for the relevant machine type, e.g. QT6600 by tapping the
 icon and choosing the relevant .ini file.
 - From the ‘Operation code’ drop down list, select ‘PLU’, ‘Department’ and ‘Group’, tapping ‘Add’ after each type. The list should then look like that in the screenshot below.
- Click ‘OK’ to execute.
Example of a PLU file (‘FILE004P.TXT’)
"C","c:P0004:"
"h","36","01","0000","150323","1508","0000","00","02","4695"
"f","FILE004","P","P","0006"
000001,"PROD 1 ","00000000000010000002","000100","000150","000000","000000","000000","0000","000000","00","00","01000000","000000000000","00","00","00","00"
000002,"PROD 2 ","00000000000010000002","000100","000350","000000","000000","000000","0000","000000","00","00","01000000","000000000000","00","00","00","00"
000003,"PROD 3 ","00000000000010000002","000100","000750","000000","000000","000000","0000","000000","00","00","01000000","000000000000","00","00","00","00"
000004,"PROD 4 ","00000000000010000002","000100","000850","000000","000000","000000","0000","000000","00","00","01000000","000000000000","00","00","00","00"
000005,"PROD 5 ","00000000000010000002","000100","000125","000000","000000","000000","0000","000000","00","00","01000000","000000000000","00","00","00","00"
17.4 Supported media
Files are normally accessed by the tool via media plugged into the USB port on the till. You can copy the files, in their relevant folder, to a USB stick or use a USB Card Reader and insert a Compact Flash Card into that. Just insert the relevant media into the USB port on the till either before or after starting up the tool.
If you use Compact Flash Cards, ensure that they are formatted using FAT16 as this format is required when backing up some of the older till types.
17.5 Running the tool in ‘UK Add-ons’
- Launch ‘UK Add-ons’.
- Tap ‘Registration and Installs’.
- Tap ‘IMPORT FROM OLDER MODELS’.
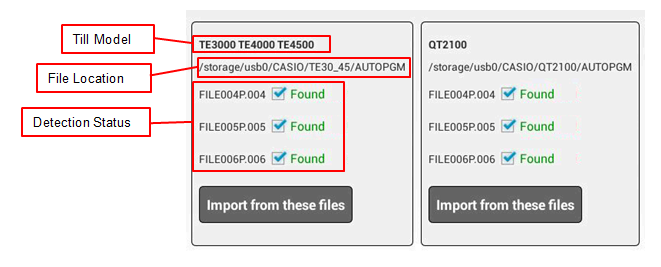
- You will see a display showing the supported models. The screen can scroll to the right to show more model options.
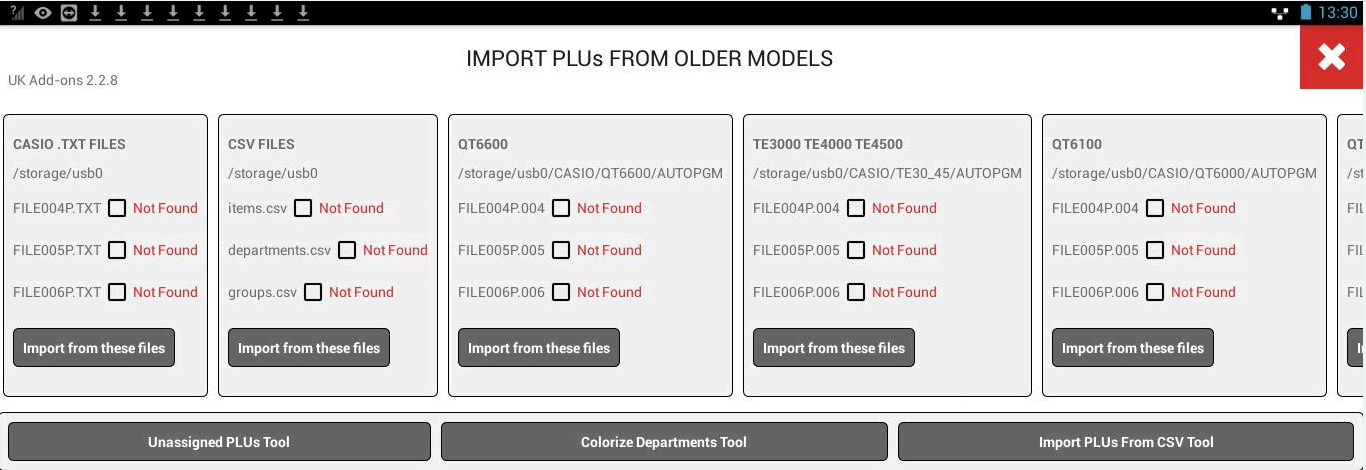
- Insert the USB stick or Card Reader containing your backed up data files.
- The program will automatically detect files and the checkboxes for the models it can find will be ticked.
17.6 The import process
- Tap the ‘Import from these files’ button to begin the import of the selected files.
- A confirmation dialog will be displayed. Tap ‘IMPORT’. Note that all current PLUs, Departments and Groups on the till will be deleted by the import process.

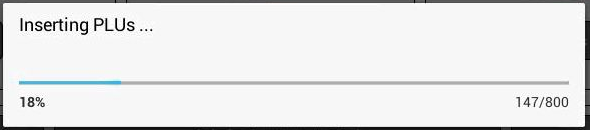
- Progress bars for each element of the data will be displayed as the import process takes place.
17.7 Allocating unassigned PLUs to Departments
- A list of all unassigned PLUs will be displayed on the ‘UNASSIGNED PLUs’ screen.
- Tick the checkbox of the PLUs to assign. To assign them all to one Department, tap ‘select all’.
- Select the Department to which these PLUs should be moved from the ‘Move to’ list on the right hand side. In the example below, we would tap ‘DRINK’ as the PLUs we have checked are clearly drinks.
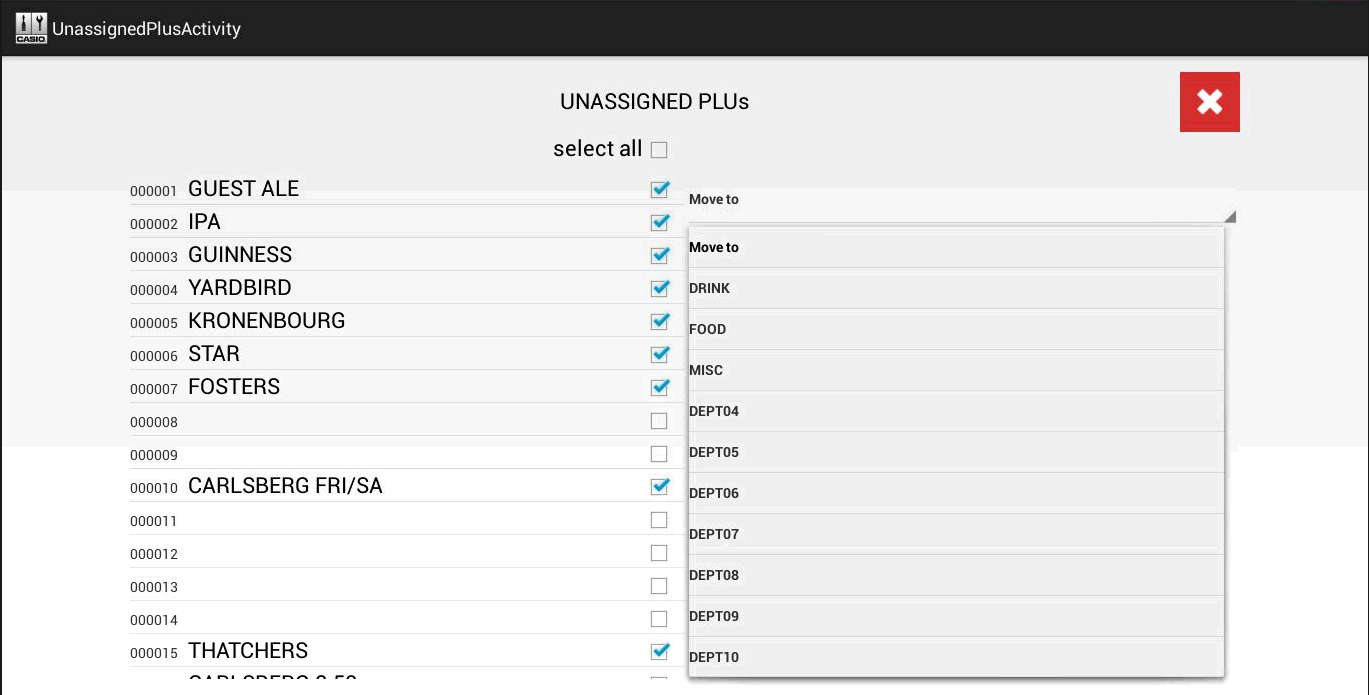
- Tap the ‘Exit’
 button
17.8 Colorizing Departments
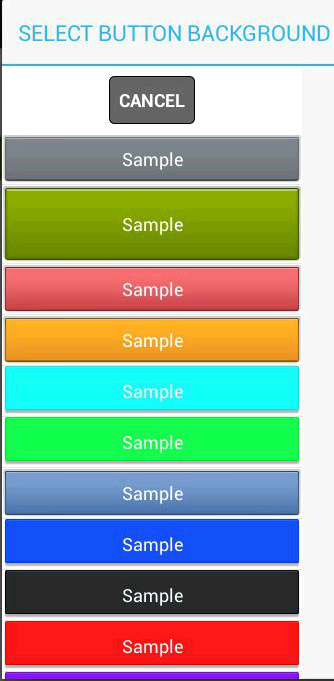
- The ‘COLORIZE DEPARTMENTS’ screen will be displayed.
- Tap each department in turn and select a colour from the pop-up list.
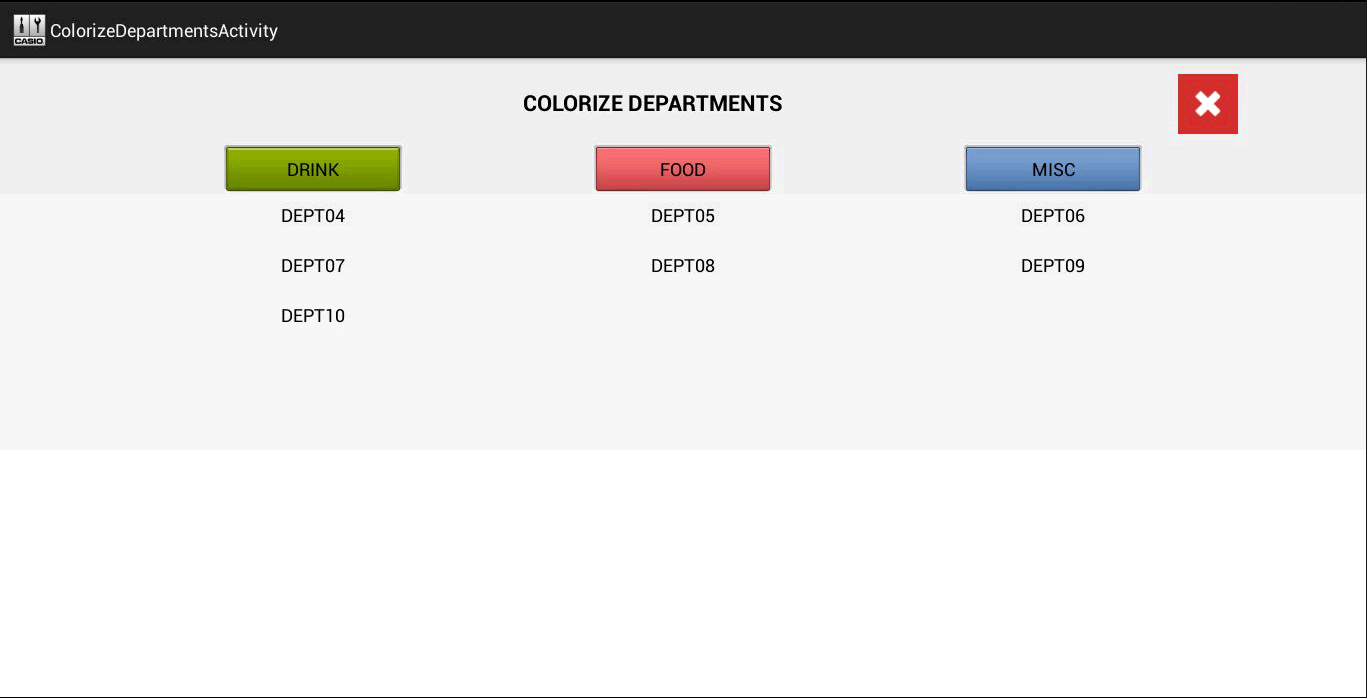
This completes the import of the data from an older Casio till. Refer to Section 16.9, ‘Final setup steps’ for a list of tasks that must be performed manually to finish the configuration.
17.9 Importing CSV files
Importing CSV files is slightly more complicated as you have to assign the relevant fields in the CSV file to a field on the V-R. This section assumes you have copied your CSV files to the root of a USB stick and inserted it into the till.
Note: V-R7000 only - If Total Commander is not yet installed on the till, it can be installed during the import process. Ensure that the ‘Unknown sources’ option in ‘Settings-Security’ in the Android home screen is checked. You do not need Total Commander on the V-R100.
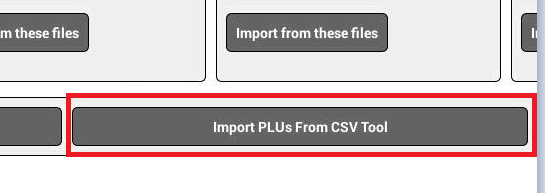
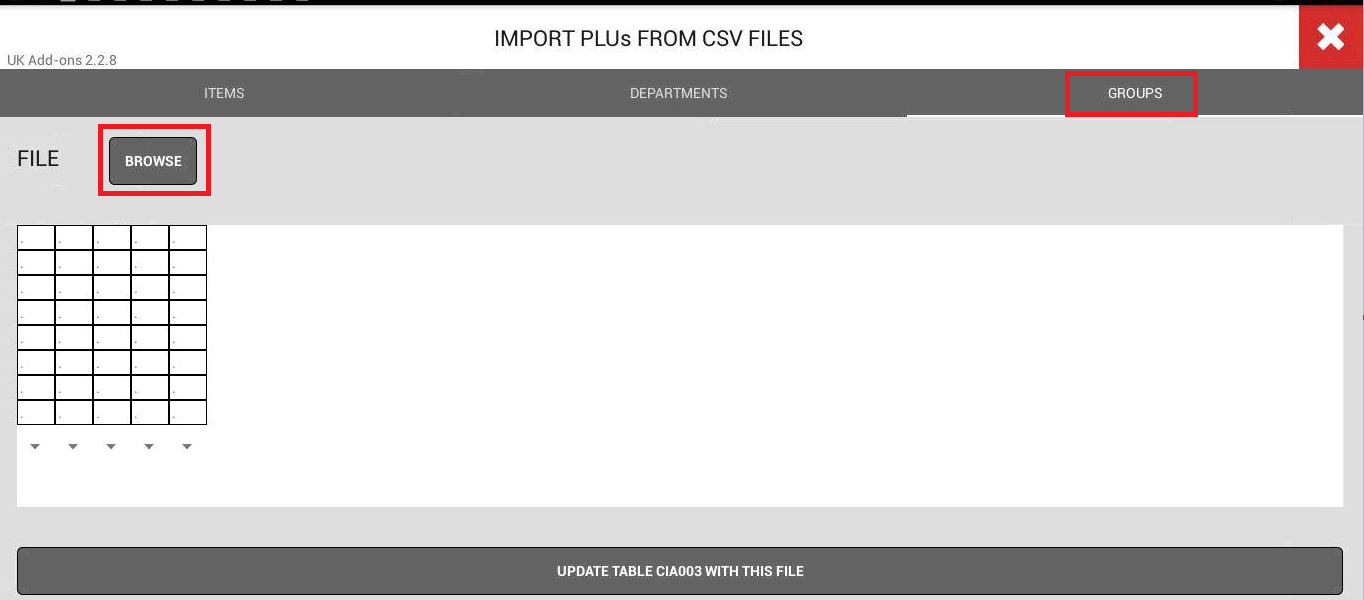
- On the initial screen, tap ‘Import PLUs From CSV Tool’.
- A screen with 3 sections will be displayed: ‘ITEMS’ (i.e. PLUs), ‘DEPARTMENTS’ and ‘GROUPS’. The normal procedure is to import the ‘GROUPS’ first.
- Tap ‘BROWSE’
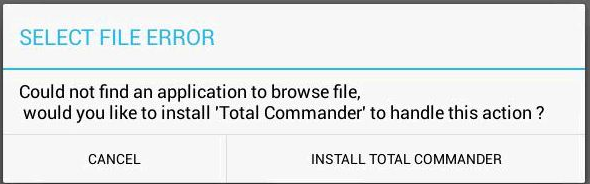
- In order to browse and select files from within this tool, it is necessary to have ‘Total Commander’ installed on the till. You can either install this tool manually or, if it is not already installed, you will be prompted to do so at this point. The till must be connected to the internet. A ‘SELECT FILE ERROR’ dialog will be displayed if ‘Total Commander’ is not installed. Tap ‘INSTALL TOTAL COMMANDER’ and follow the prompts to install the tool now. At the end, tap ‘Done’ (not ‘Open’).
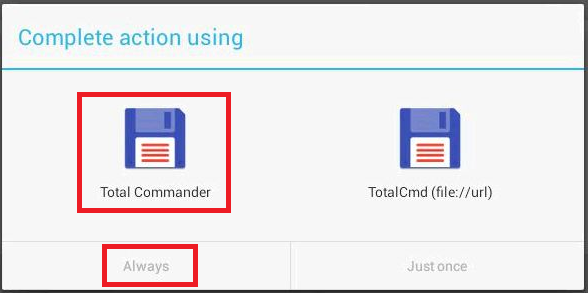
- A ‘Complete action using’ dialog is displayed. Tap ‘Total Commander’ then tap ‘Always’.
- Navigate to the location in which the CSV files are stored. In this example, it is the root of a USB stick.
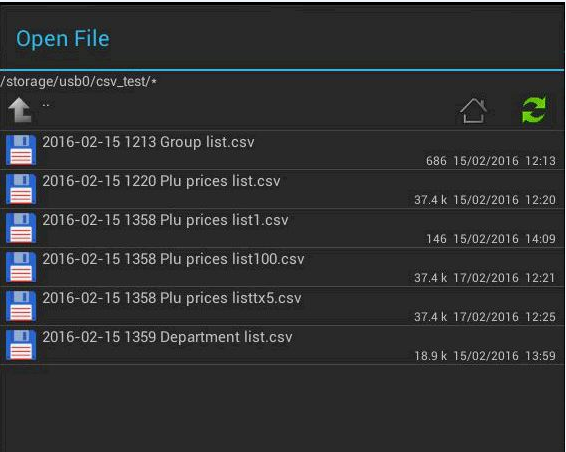
- Select the CSV file that contains the ‘Groups’.
- A table will be displayed showing the first 8 rows of data from the file.
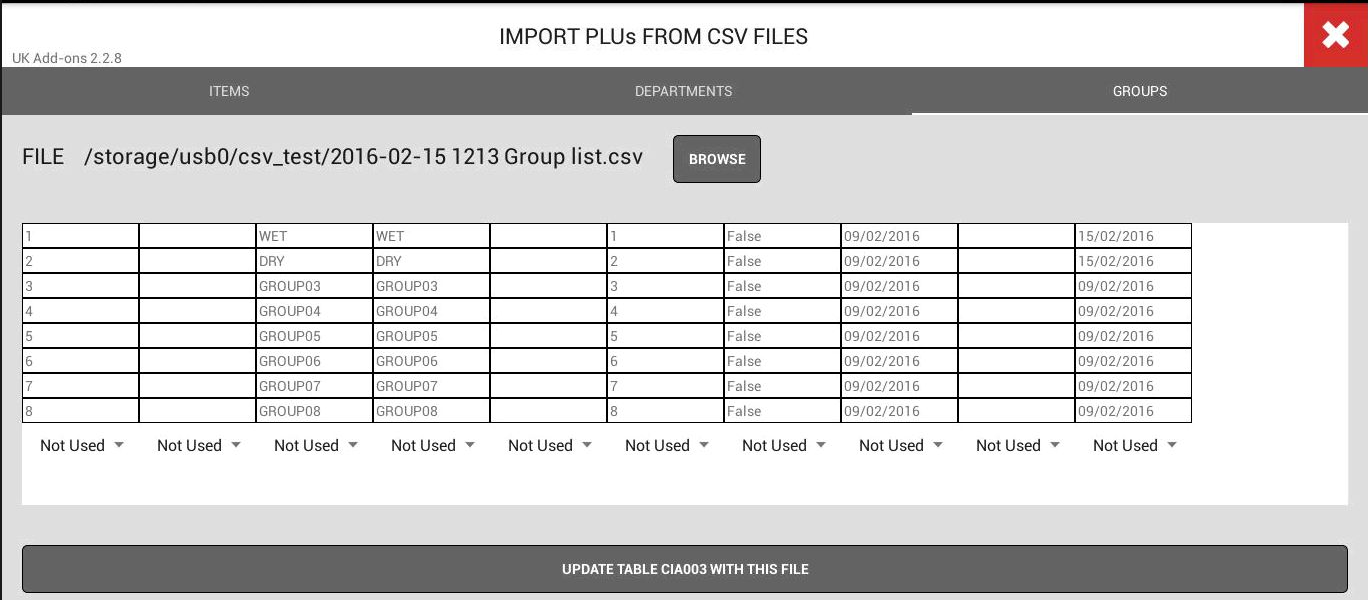
- At the bottom of each column, a drop down list is provided to allow you to assign the data in that column to a relevant Group field on the V-R. In this example (see below), column 1 is the ‘Group Code’ and column 3 is the ‘Group Name’ (in the example, ‘WET’ and ‘DRY’ are the only Groups).
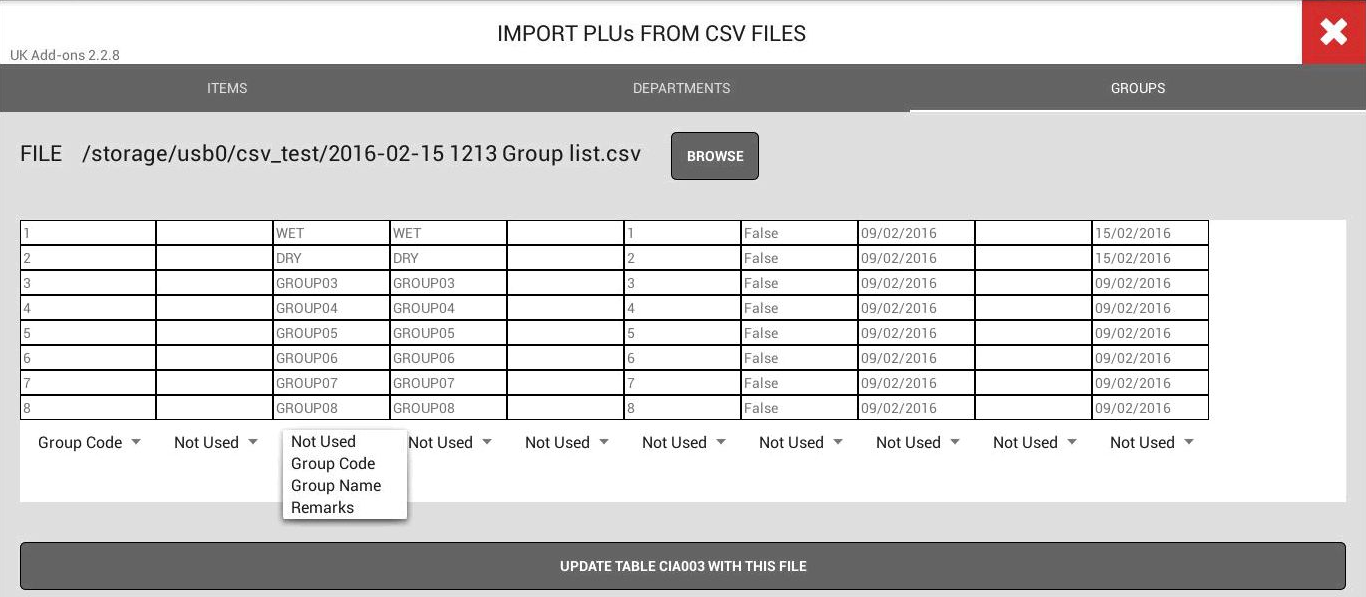
- Finally, tap ‘UPDATE TABLE CIA003 WITH THIS FILE’ to import the CSV Group file.
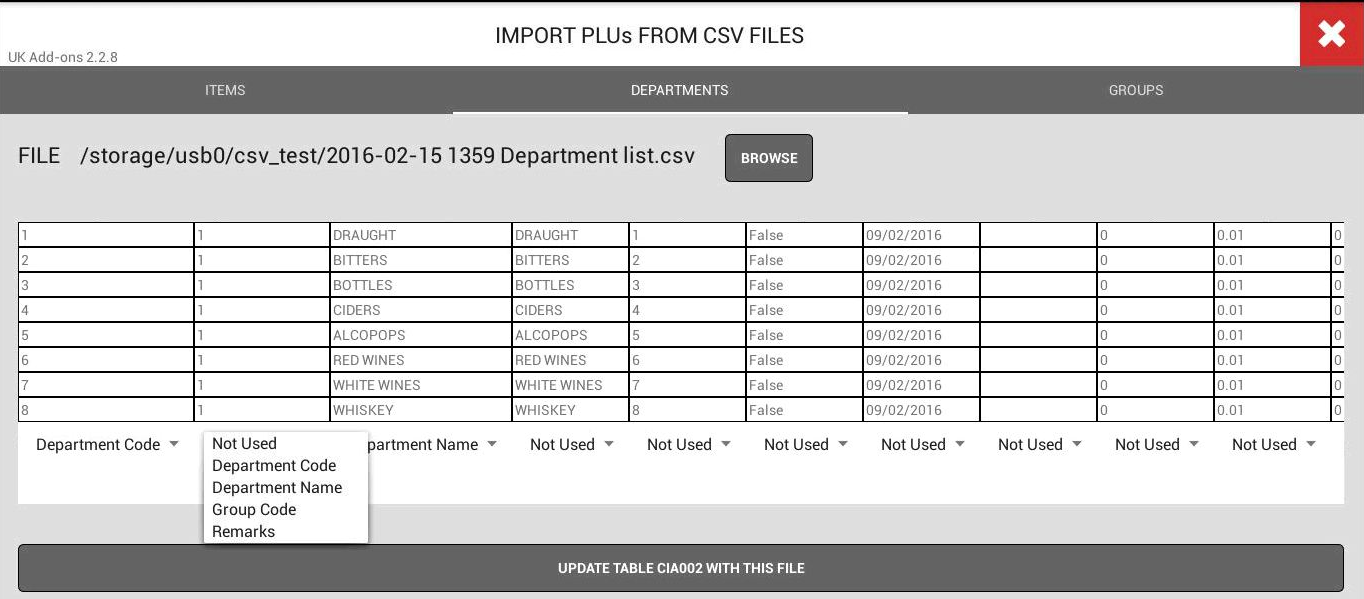
- Now tap ‘DEPARTMENTS’ and repeat steps 3 then 6-10 but this time import the CSV file containing the Department data. The completed table might look like the one below. The first 3 columns have been assigned to ‘Department Code’, ‘Group Code’ (Group 1, ‘WET’ in our example, the option showing the drop down list in the screenshot) and ‘Department Name’. Note that the button at the bottom now reads ‘UPDATE TABLE CIA002 WITH THIS FILE’ to reflect the fact that this data is being imported into a different database table than the Groups.
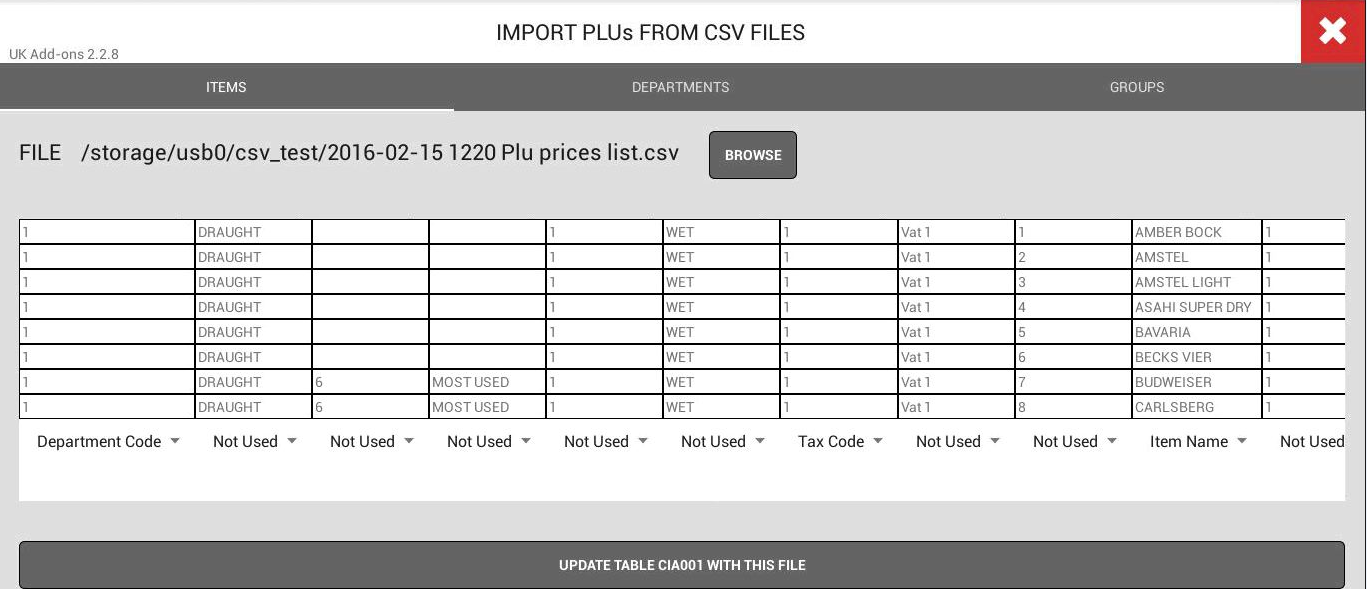
- Now tap ‘ITEMS’ and repeat steps 3 and 6-10 but this time import the CSV file containing the PLU data. The completed table for this might look like the below. Four columns have been assigned - ‘Department Code’, ‘Tax Code’, ‘Item Name’ and ‘Unit Price’ (off the screen to the right). You do not need to explicitly import the PLU numbers (column 9) as the tool will generate the PLU numbers automatically, with the first row in the data file becoming PLU1 and so on. Only the ‘Department Code’ is required and not the ‘Group’ - the tool will work out the ‘Group’ based on the earlier import process.
The screen below shows the ‘Unit Price’ field which was off to the right in the screen above.
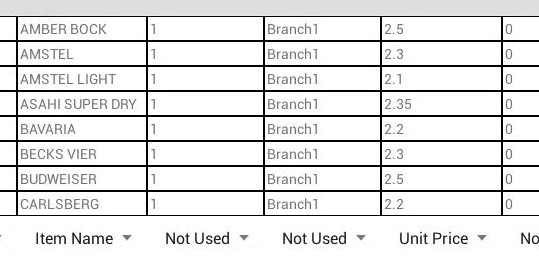
If you had barcodes in your CSV file, you would assign those to the ‘Scancode 1’ field.
The screenshots below illustrate more clearly how the PLU file is assigned by showing the raw CSV data underneath:
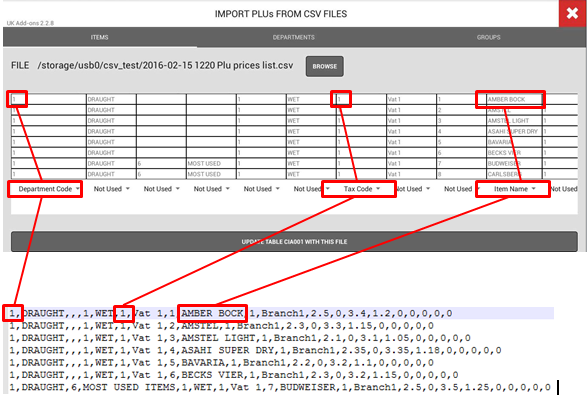
Once the data has been aligned with the correct fields tap the ‘UPDATE TABLE CIA001 WITH THIS FILE’ button.
17.9.1 Errors in the PLU CSV file
Certain errors in the PLU data will be picked up by the tool and generate an error message:
- If an invalid ‘Department Code’ is in the file (for example, over 99; up to 99 Departments are allowed).
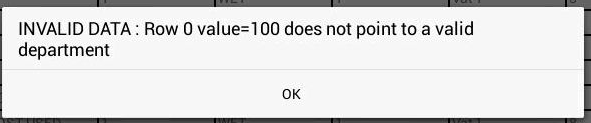
- If an invalid ‘Tax Code’ is in the file (for example, 5; only tax codes up to 4 are allowed).

17.10 Final setup tasks
Once the import has been completed you will need to set up certain parameters that cannot not be handled by the import routine. Any items that had the following flags or settings will need to have them configured again.
- Half pints, doubles or other quantity adjustments. Set these in ‘Reg Settings - Item - Item Parameters’. The ‘Unit Qty’ field allows you to set fractions or multiples of a whole sale unit and a different price for these.
- Printer allocations. Where items are printed to a kitchen printer or bar printer, they are assigned a printer using the ‘Order1’ to ‘Order5’ printers in ‘Reg Settings’ - Item - Item Settings’.
- Cooking/Preparation instructions and items that are part of a ‘Set Menu’. See ‘Reg Settings’.
- Items that require an ‘Order Character’. This sorts items with regard to the way they are printed on kitchen printers so that Starters, for example, are always grouped together. Once ‘Order Character’ options have been defined, they are linked to PLUs in the ‘Reg Settings’ - Item - Item Parameters’ option.
- PLUs that are part of a ‘Selective Item’ discount. These are set in ‘Reg Settings - Item - Item Parameters - Selective Item 1’ (to ‘Selective Item 5’).
- Items that have a ‘Service Charge’. This is set in ‘Reg Settings - Item - Item Parameters - Service Charge’. It is for items that have a compulsory Service Charge.
- Items that allow an ‘Open PLU’. This means items where a price can be entered at the point when they are entered on the POS. This is set in ‘Reg Settings - Item - Item Parameters - Open PLU’.
CASIO Electronics Co., Ltd. makes no representations or warranties with respect to the contents or use of this manual and specifically disclaims any express or implied warranties of merchantability or fitness for any particular purpose. Casio will accept no responsibility for loss of data or financial loss. All trademarks acknowledged.